background image

SPEED  LIGHT


Sports  Timing  System


29


START-GUN  Sensor /Siren (optional)


The  Start-Gun  Sensor  is  a  very  versatile  device.  In  this  small  unit  we  have 

managed to combine three important functions related to starting timing. 

1.


Starting-Pistol sensing

Connect  the  supplied  microphone    and  attach  the    other  end  to  the  starting 

pistol. Connect a cable from the Auxillary Start input on the timing module to 

the Start-Gun Sensor. By doing this power is now connected to the sensor and 

you will see a RED Led flashing. This indicates that the device is in ‘Sample” 

mode  and  is  reading  the  microphone  input  in  order  to  store  the  maximum  it 

“hears”.  So….load  the  starting  pistol  and  “BANG”.  Press  the  RED  switch  to 

store this value.The Start-gun Sensor will now use 70% of this noise level as a 

thresh-hold . This system entirely eliminates flase triggering. From this point on 

,  operation  of  your  starting  pistol  will  send  a  “START”  signal  to  the  timing 

module. 

2.


Electronic Siren Starting 

Included  with  the  Start-Gun  Sensor  is  an  electronic  siren.  Connect  a  cable 

between  the  Auxilliary  Start  input  on  the  timing  module  and  the  Start-Gun 

Sensor.  After  connecting  this  device  it  is  important  to  press  the  RED  button 

once to stop the red LED flashing and to  reset the device for Electronic Siren 

operation. 

This siren connects to the same input as was used with the  microphone, and is 

used  to  generate  an  audible  starting  signal  for  the  athlete.  Pressing  the  RED 

button will result in a loud squeal and a simultaneous start signal being sent to 

the Timing module.  

3.

Thumb Switch operation


By  plugging  the  supplied  double-adaptor  into  the  Start-gun  Sensor  and  then 

connecting this into your ‘daisy chain’ of Timing Gates, the RED button can be 

Summary of Contents for SPEED LIGHT

Page 1: ...ng System 1 OWNER S MANUAL SPEED LIGHT SPORTS TIMING SYSTEM Copyright 2005 Swift Performance Equipment PO Box 726 Lismore NSW Australia 2480 Ph 61 2 66221666 Fax 61 2 66221633 E MAIL info spe com au I...

Page 2: ...onnecting the Gates 6 2 5 Quick Start 7 3 Basic Features 8 3 1 Keyboard Layout 8 3 2 Keyboard descriptions 9 3 3 System Components 10 3 4 Switching On 11 3 5 Switching Off 11 3 6 Setting the Time 11 3...

Page 3: ...SPEED LIGHT Sports Timing System 3 4 Appendix 25 4 1 Trouble Shooting 25 4 2 Care and Maintenance 26 4 3 Specifications 27 4 4 Start gun Sensor 28 5 Glossary 30...

Page 4: ...T Sports Timing System signals a new era in athletic training and performance evaluation With a wide range of sporting applications from competition event timing to precise performance measurement thi...

Page 5: ...scharge the batteries at a faster rate it is necessary to connect the timing gates and begin timing Discharge will occur in approximately 6 hrs in this configuration Do not recharge until the LOW BATT...

Page 6: ...Number of splits set to 1 c Number of jumps set to 1 d Event Number set to 1 2 3 Operational Description 2 3 1 Timing gates Each timing gate consists of 2 tripods one timing light and one reflector T...

Page 7: ...h of these are functionally identical and are used for parallel connection or daisy chaining of timing gates when in Lap Mode E G Simply connect a cable from the Single Lane input on the Timing Module...

Page 8: ...with nothing attached is LAP MODE 2 5 Quick Start Instructions 1 Remove Timer Module from the case 2 Remove Tripods from the case and set each up with all but the very last leg segments extended so th...

Page 9: ...SPEED LIGHT Sports Timing System 9 3 1 Keyboard Layout Fig 1...

Page 10: ...de to cycle through lanes Increments selected variables Increments lap split number Increments jump mode results Decrements selected variables Decrements lap split number Decrements jump mode results...

Page 11: ...lowing components Timing Module 4 x Timing Lights 4 x Reflectors 8 x Tripods Computer Cable STSI Software Timing Gate Cables Cable Joiners Battery Charger Carry Case Options The following options are...

Page 12: ...f gates check OK 3 6 2 Use the or buttons to scroll through the menu till SET TIME is displayed press ENTER 3 6 3 Use or buttons to move cursor to hh mm ss position Use the or to increment or decremen...

Page 13: ...module d Timing gates are checked for alignment If all are OK confirm by pressing Reset e You are now in the main menu from here you have several options which will be covered in later chapters Press...

Page 14: ...ule will respond with Start is covered If you press Enter now the system will be armed and waiting for the athlete to start the timer by leaving this Timing gate Alternatively you may have pressed Ent...

Page 15: ...r event using the same number of splits as previously set up ie go to point g m Press Reset again to exit to main menu n Pressing the OFF button will turn the timing module off when in the main menu 3...

Page 16: ...r decrement the number of lanes required maximum of 8 lanes If you select less than 8 lanes say 5 lanes the timer looks at the first lanes from which valid triggers are received rather than looking at...

Page 17: ...osition When the preselected number of lanes laps has been reached the timing module will display FINISHED Place numbers will then be displayed for the selected lane at the bottom line far right posit...

Page 18: ...ect JUMP MODE f Use the or to increment or decrement the number of jumps required per event Press ENTER g The Timing module will now display the status of the Jump Mat start ie START IS OFF MAT is dis...

Page 19: ...em 19 or keys Pressing or keys will increment or decrement the jump number k Pressing RESET will reset the timing module ready for another test using the same number of jumps l Pressing RESET again wi...

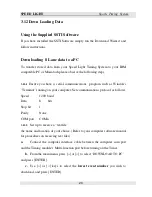
Page 20: ...am such as Windows Terminal running on your computer Set communications protocol as follows Speed 1200 baud Data 8 bits Stop bit 1 Parity None COM port COMn 3 12 2 Set up to receive a text file the na...

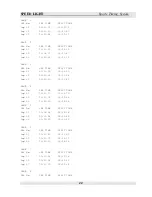
Page 21: ...in the following format a Lap Mode TIME DATE EVENT MODE 16 05 03 01 95 004 LAP MODE LAP No LAP_TIME SPLIT_TIME Lap 01 00 00 03 16 00 00 03 16 Lap 02 00 00 03 98 00 00 07 14 Lap 03 00 00 03 54 00 00 10...

Page 22: ...02 00 20 18 00 31 68 Lap 03 00 20 21 00 51 89 LANE 4 LAP No LAP TIME SPLIT TIME Lap 01 00 12 70 00 12 70 Lap 02 00 19 74 00 32 44 Lap 03 00 20 20 00 52 64 LANE 5 LAP No LAP TIME SPLIT TIME Lap 01 00...

Page 23: ...0 36 14 Lap 03 00 19 89 00 56 03 c Jump Mode TIME DATE EVENT MODE 16 05 03 01 95 008 JUMP MODE START OFF MAT JUMP No CONTACT_TIME FLIGHT_TIME HEIGHT Jump 01 0 480 0 394 0 190 Jump 02 0 706 0 366 0 160...

Page 24: ...ta 8 bits Stop bit 1 Parity None b The printer cable must be connected to the printer and to the Multi function Port of the timing module before the timer is turned on c From the main menu use or keys...

Page 25: ...which the desired data was recorded in b Press RECALL c Use or keys to select the event number to be reviewed the event number is displayed as well as the MODE in which the event was recorded Note Onl...

Page 26: ...et the micro processor manually A reset switch which is accessible through a small hole on the underside of the timing module can be pressed by using a straightened paper clip or similar c Gates canno...

Page 27: ...nic equipment on the dash or seat of a motor vehicle Temperatures can rise to as high as 80 degrees C which may be detrimental to LCD Displays ii This system is not water proof If it should get wet al...

Page 28: ...Gates On 30mA Gates Off 40mA Battery Capacity 1700mAH Battery Charge 120mA over 14 hrs Display LCD Timing Lights Dual beam modulated Visible RED Light Polarising Filters Current Drain per Gate 50mA Ca...

Page 29: ...noise level as a thresh hold This system entirely eliminates flase triggering From this point on operation of your starting pistol will send a START signal to the timing module 2 Electronic Siren Star...

Page 30: ...SPEED LIGHT Sports Timing System 30 held held down to emulate a gate in the START is COVERED mode Releasing the RED button will send a start signal to the Timing module...

Page 31: ...e recorded between successive gate activations LAP MODE The name given to a single lane testing protocol where gates are connected are daisy chained MULTI FUNCTION PORT The socket used to connect the...

Reviews: