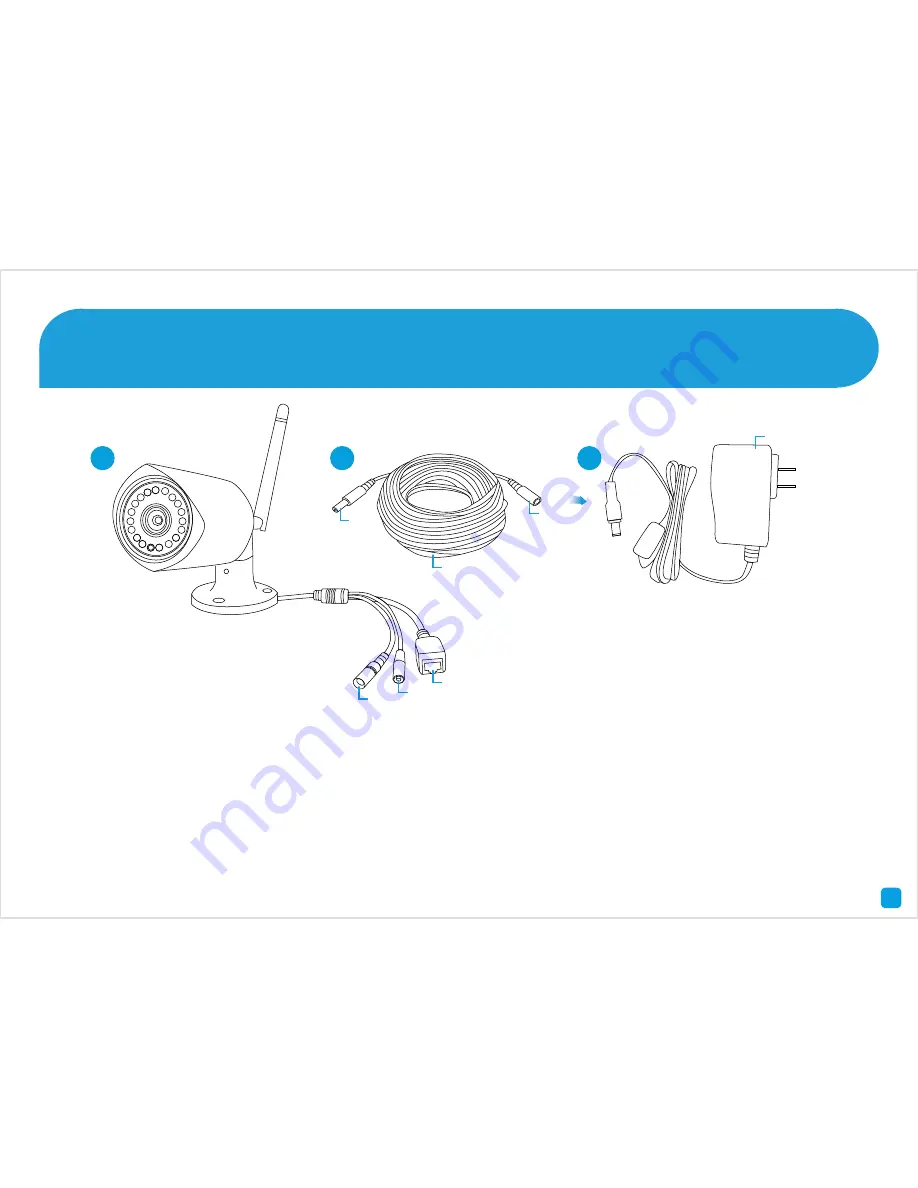
Swann SWNVW-GUAEYE Quick Start Manual Download Page 5

5

1.

 Connect the Power Input on the camera to the Power 

Output on the Power Extension Cable. Repeat this step for 

each camera provided.

2.

 Connect the Power Input on the Power Extension Cable 

to the Power Adapter. Repeat this step for each Power 

Adapter provided.

3.

 Connect each Power Adapter to a wall socket. Press the 

wall socket’s switch to the on position to supply power.

Reset

 - To reset your camera, press and hold the reset 

button, connect power and continue holding for 10 seconds.

LAN

 - This can be used to configure your camera to your 

Wi-Fi network.

Step Two - Connect your Cameras

2

1

LAN

Reset

Power

Input

Power

Output

Power

Input

Power Extension 

Cable

Power Adapter

3

Summary of Contents for SWNVW-GUAEYE

Page 1: ...hat does this mean Installing the Wi Fi Antennas Connect your Cameras Connect your NVR to your Home Network Connect your Mouse Connect your NVR to your HDTV Connect your Power Adapter QHGUAEYE111215E...

Page 2: ...ure nothing was damaged during shipping On the other side is a detailed connection map which illustrates the various connections on the NVR Getting to know your NVR 1 Wi Fi Input 2 LAN 3 Audio Out 4 V...

Page 3: ...erference in a residential installation This equipment generates uses and can radiate radio frequency energy and if not installed and used in accordance with the instructions may cause harmful interfe...

Page 4: ...the rear of each camera 2 As there are several Wi Fi antennas provided use the two longer versions for your NVR and the shorter versions for each camera 3 Use a clockwise motion to connect Make sure...

Page 5: ...for each Power Adapter provided 3 ConnecteachPowerAdaptertoawallsocket Pressthe wall socket s switch to the on position to supply power Reset To reset your camera press and hold the reset button conn...

Page 6: ...point Don t proceed to the next step until this is done Please note AP mode allows wireless communication with your cameras however your NVR must be connected to your router to send email alerts synch...

Page 7: ...uch as a flash drive not included to the other port to back up your video recordings and to perform a firmware upgrade Step Four Connect your Mouse Please note Bluetooth and wireless mice and trackpad...

Page 8: ...e NVR then connect the other end to a spare HDMI input 1 on your HDTV Make sure the video input on the HDTV matches the physical connection used to connect the NVR Step Five Connect your NVR to your H...

Page 9: ...ng then connect the power adapter to a spare wall socket illustration may differ from what is supplied All the connections have now been completed You re now ready to run through The Wizard quick star...

Reviews: