background image

Digital Video Recorder User Manual 

23


STEP6 

Press "

ESC

" button to come back the Preset menu.   

STEP7 

Press "

SAVE

" button to save the position of camera which you adjust before as Presetting Point; press 

"

CANCEL

" button to discard the setting to get back to upper menu.   

  Notice: Do you know how to use the Presetting Point?   

You can use the number key to switch the Presetting Point in PTZ mode. Firstly, press "PTZ" button to enter the PTZ mode. Then you 

should press the number key such as "1", the Speed Dome will move to Presetting Point 1 which you set it in front steps.   

6. COPY 

TO 

You could copy the setting of this channel to any other selected channel. 

3.2.6 User Configuration 

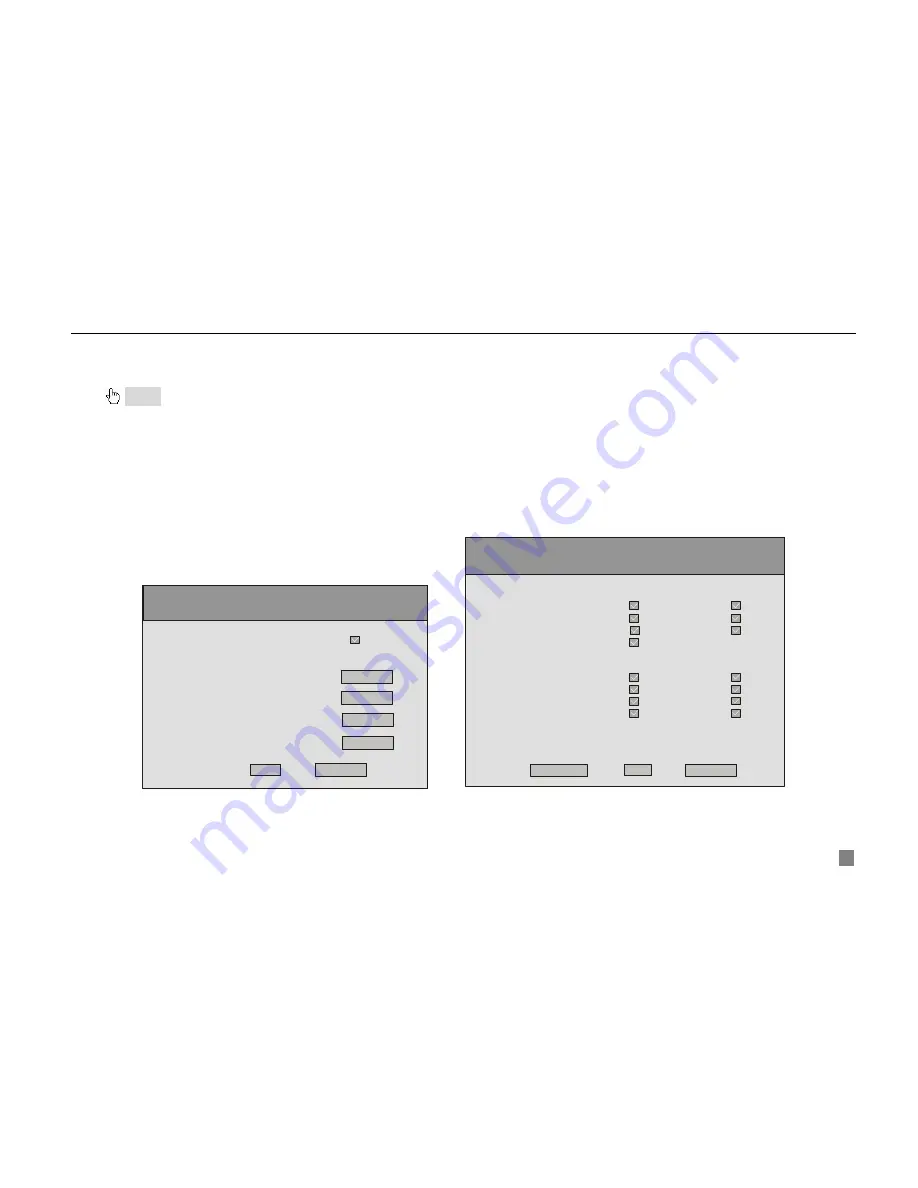
User Configuration is shown as Fig3.16 User Configuration. The default username is Admin. Admin can add users, set 
users’ authorizations and delete users.   

USER   CONFIG

AUTHORIZATION    CHECK      :

OK

CANCEL

PASSWORD                         :        RESET

 AUTHORIZATION                :        SETUP  
                                       

NEW    USER                        :           ADD

USER                                    :    <14>    

DELETE    USER                  :           DEL         


AUTHORITY   SETUP

LOCAL   AUTHORITY:
PLAY  OR BACKUP                RECORD
DEL   OR   LOCK                     SETUP
EVENTLOG                              PTZ   CTRL
MANAGER    TOOLS

DEFAULT 

OK

CANCEL

REMOTE  AUTHORITY:
PLAY  OR   BACKUP               RECORD
DEL    OR   LOCK                     SETUP
EVENTLOG                              PTZ   CTRL
MANAGER   TOOLS                PREVIEW

MAC:
00-00-00-00-00-00


1. AUTHORIZATION 

CHECK 

If select "

AUTHORIZATION CHECK

" check box, all users need input the password before entering the Main Menu.   

Fig3.16 User Configuration 

Fig3.17 Authority Setup 

Summary of Contents for P-6T4

Page 1: ...4 Channel H 264 DVR P 6T4 SW242 6T4 Swann Security www swannsecurity com EN110608...

Page 2: ...fore using any camera for any purpose it is the buyer s responsibility to be aware of all applicable laws and regulations that prohibit or limit the use of cameras and to comply with the applicable la...

Page 3: ...Use Remote Controller 5 2 4 2 Facie of Remote Controller 6 CHAPTER 3 Basic Operation Guide 10 3 1 How to Start DVR 10 3 2 Main Menu Setting 10 3 2 1 Basic Configuration 12 3 2 2 Live Configuration 13...

Page 4: ...ation 50 4 4 1 Basic Configuration 52 4 4 2 Live Configuration 53 4 4 3 Record Configuration 54 4 4 4 Alarm Configuration 56 4 4 5 Network Configuration 56 4 4 6 User Configuration 56 4 4 7 Manage Too...

Page 5: ...ernet function of remote controlling DVR completely good internet speed and high quality picture recording with very low bit rate saving HDD space with long hour recordings 1 2 Main Features and Speci...

Page 6: ...internet Two record search mode time search and event search ALARM 4 alarm inputs and 1 alarm output PTZ CONTROL Support various PTZ protocols Support various PTZ preset Support remote PTZ control CO...

Page 7: ...se a Remote Controller a power cable a CD ROM with Network Client software and some screws for installing HDD You could use screwdriver and some screws to fix the HDD into DVR The DVR can connect one...

Page 8: ...rd button 6 Stop button 7 Information button 8 Left Up Right Down buttons 9 Quad Enter button 10 Search button Fig2 1 Front Panel 2 3 Back Panel Interface Terminals The interfaces on the Back Panel pl...

Page 9: ...emote Controller 1 Open the battery cover of the Remote Controller 2 Put into two AAA batteries whose model is 7 and make sure that they are not inserted upside down 3 Put back the battery cover STEP2...

Page 10: ...t mode Button Name Description POWER Power Button Press the button to shutdown the DVR REC Record Button If the DVR does not record press the button to start recording If the DVR is recording press th...

Page 11: ...n Press the button to upward move the cursor Leftward Left button Press the button to leftward move the cursor Rightward Right button Press the button to rightward move the cursor Downward Down button...

Page 12: ...ls in turn A A Button Press the button to switch the mode of font form PTZ PTZ button Press the button to enter the PTZ mode Zoom Zoom button Control the Fast Speed Dome to zoom in and zoom out FOCUS...

Page 13: ...Digital Video Recorder User Manual 9 Number Button Corresponding Letter Number Button Corresponding Letter 1 2 ABC abc 3 DEF def 4 GHI ghi 5 JKL jkl 6 MNO mno 7 PQRS pqrs 8 TUV tuv 9 WXYZ wxyz...

Page 14: ...is powered on STARTING appears on the screen which indicates DVR is initializing When WELCOME is displayed you have been in live display mode You could press Menu button to enter the Main Menu The sy...

Page 15: ...NETWORK MANAGER TOOLS STEP2 Press Up Down Right and Left buttons to move cursor selection highlighted by yellow STEP3 Press Enter key to enter the sub menu And press Menu key to get back to Main Menu...

Page 16: ...move the cursor manually STEP2 Press Enter key to change the video format 2 TIME POSITION You could set position of displaying time There are three options to choose TOP Time is displayed on top of th...

Page 17: ...can Date format MM DD YY 6 TIME ADJUST Time Adjust menu is shown as Fig3 5 Time Adjust You must stop recording first to adjust time STEP1 Press Up Down Left and Right buttons to move the cursor STEP2...

Page 18: ...mbers from 0 to 9 STEP1 Press A button to switch the inputting mode STEP2 Input channel name STEP3 Press Enter key to confirm the operation 3 SHOW NAME If select SHOW NAME check box the camera name wi...

Page 19: ...n 3 2 3 Record Configuration Record Configuration menu is shown as Fig3 7 Record Configuration You could enter the menu to set the parameters of record RECORD CONFIG VIDEO RESOLUTION CIF RECYCLE PRERE...

Page 20: ...e rate of using HDD is larger 7 AUDIO If you select AUDIO check box DVR will record audio when it records video Otherwise it will not record audio Notice When you playback the record you can press AUD...

Page 21: ...frame rates to choose 1 3 6 12 and 25 The maximum of the frame rate is 25 10 COPY TO You could copy the setting of this channel to any other selected channel 3 2 4 Alarm Configuration Alarm Setup menu...

Page 22: ...DVR will record when there is motion event If not DVR will not record 6 ALARM OUT There are two alarms out options to choose ALARMOUT1 and BUZZER 7 SCHEDULE It is the schedule of the motion detection...

Page 23: ...part 5 Press Esc button to confirm the option and exit CUSTOM option STEP3 Press BACK option to go back the Motion Alarm Configuration menu Notice In Continuous recording mode Manual Record and Alarm...

Page 24: ...once in 1 minute 2 SENSOR STEP1 Press Up Down Left and Right buttons to move the cursor to SENSOR option STEP2 Press Enter key to switch the Sensor 3 DETECTION It is a switch of sensor alarm If select...

Page 25: ...n channel 1 and channel 2 when the SENSOR1 is triggered 6 ALARM OUT There are two options to choose ALARMOUT1 and BUZZER When ALARMOUT1 is selected and the sensor is triggered DVR will give normal ala...

Page 26: ...e PTZ address Press Enter key and use the number key and button to set it 5 PRESET STEP1 Press SET button to enter the Preset submenu which is shown as Fig3 15 Preset There are 16 Presetting Points wh...

Page 27: ...copy the setting of this channel to any other selected channel 3 2 6 User Configuration User Configuration is shown as Fig3 16 User Configuration The default username is Admin Admin can add users set...

Page 28: ...EFAULT button STEP5 Press Enter key The default authorization will be set The default authorization of user content Live view Playback or backup and Record in local system Live view Playback or backup...

Page 29: ...If you select the check box and set the port number of the server you would make the NET SERVER enable 2 NET VIDEO QUALITY It sets picture quality of remote surveillance There will be three options to...

Page 30: ...password when DVR need to connect internet If you forget username and password Please contact with ISP If you press INFO button the System Information menu can be displayed on the screen when DVR con...

Page 31: ...th your Domain Name Service Provider to be guided how to get the domain 1 Apply the Domain Name 1 Register in the Web STEP1 Fill in the blank of IE address with www dns2p com STEP2 Click to enter the...

Page 32: ...tem will pop up a dialog box to show that the domain is added successfully referred Fig3 26 Dialog Box Fig3 26 Dialog Box Notice Time of probationary period is one month If user wants to use it contin...

Page 33: ...er Tools Manager Tools menu is shown as Fig3 27 Manager Tools You could enter the submenu to set the parameters of network SHUTDOWN SYSTEM You could shut down system through this function STEP1 Press...

Page 34: ...tem will remind user to format the HDD when the DVR started up And HDD could record after the HDD is formatted Before you format the HHD you must stop recoding and playing back Time for formatting the...

Page 35: ...07 092151 means 2007 7 11 9 21 51 and N L means the LOGIN of the NET If there are too much log list user can use PREV button to page up and use NEXT button to page down SYSTEM INFORMATION System infor...

Page 36: ...art updating Process of backup is shown as Fig3 32 Updating Fig3 32 Updating STEP5 After the program checked is done the system will restart If DVR reboot normally DVR is updated LOAD DEFAULT Fig3 33...

Page 37: ...mode In the live view of PTZ mode the default channel is channel 1 you can use Remote Controller to change the channel number to enter the corresponding channel PTZ mode SPEED STEP1 In PTZ mode press...

Page 38: ...screen PLAYBACK BACKUP DELETE and LOCK Data menu is shown as Fig3 36 Data PLAYBACK 1 Select the Date STEP1 In Data menu press Up and Down buttons to move the cursor STEP2 Press Enter key to enter the...

Page 39: ...ht buttons to switch the channels When you play back the record you may press INFO button on the front panel to play or stop channel audio Fig3 38 Playback 3 Search by Event You could search the motio...

Page 40: ...list is over a page use PREV and NEXT buttons to view next page BACKUP VIEW BACKUP 1 BACKUP Select the Backup submenu in the Data menu to enter the Backup submenu which is shown as Fig3 39 Backup Fig3...

Page 41: ...KUP MEDIA BACKUP FILE CHANNEL START TIME END TIME and EVENTS DVR is ready to backup STEP1 Enter the menu after word USB is displayed on the live mode STEP2 Press BACKUP button the backup information o...

Page 42: ...d DVR format it is suggested to utilize DVR player to play both format recordings DELETE Delete submenu is shown as Fig3 42 Delete You can delete the selected record in the Delete submenu Fig3 42 Dele...

Page 43: ...to lock or unlock the record Fig3 43 LOCK UNLOCK Use Enter key to change the state If the record event is locked the record can not be deleted and overwritten 3 3 3 Information Press the INFO button...

Page 44: ...he third channel in full screen If you press the Right button it will display the fourth channel in full screen If you press the Enter button it will display the four divided channel If you press the...

Page 45: ...parameters firstly DVR could support five users logging in and operating the Network Client synchronously 4 1 1 Accessing DVR in LAN When your computer is connected in LAN you can access DVR accordin...

Page 46: ...Accessing DVR in WAN When you access DVR in WAN you need to set safety certificate firstly STEP1 Double click the IE browser icon to open the IE browser STEP2 Select tools Internet Options in menu ba...

Page 47: ...indow referred Figure4 3 Security Settings STEP4 In Security Settings window enable the options which relate with ActiveX controls STEP5 Click OK finish setting the parameters STEP6 Input IP of the DV...

Page 48: ...select Internet Options Advanced Security 2 Enable Allow software to run or install even if the signature is invalid and Allow active content to run in files on my computer 3 Click OK to finish the se...

Page 49: ...ag down list to record STEP3 Select Stop Record in drag down list to stop recording 4 2 5 Camera Audio You could set to open or close the camera audio STEP1 When you are in live display mode or playba...

Page 50: ...Playback Search By Date Search By Channel Backup Lock Snap Picture Event Search Record Playback and Control Fig4 3 Remote Playback Meaning of the function button in the Remote Playback window is shown...

Page 51: ...e Record Events Yellow Motion Detection Record Events Red Sensor Alarm Record Events The ruler on top of the bar shows the hours in whole day Right click the ruler it will be magnified 10 multiples Th...

Page 52: ...Press Browse button to select the folder of saving the Backup file STEP4 Select cameras which you want to backup STEP5 Select the type of backup file STEP6 Click Backup Now button backup progress pop...

Page 53: ...s Fig4 7 Select Event Fig4 7 Select Event 1 Choose event list and press button to move to backup list showed in the box under Click to choose all events 2 Choose event list and press button to clear s...

Page 54: ...up the LOCK EVENT window which is shown as Fig4 9 Lock Event STEP5 Select the check box can change the lock status Lock Status shows to indicate that the event is locked otherwise it means unlock STE...

Page 55: ...ig4 10 are as below System Configuration Live configuration Record Configuration Alarm Configuration PTZ Configuration User Configuration Manage Tools Return The Remote DVR Configuration can set the c...

Page 56: ...click OK button the setting will be saved and inured on the DVR Fig4 11 Basic Configuration 1 Video Format Select the option in the drag down list to change the video format of DVR There are two vide...

Page 57: ...tion Click button in the Remote DVR Configuration the drag down menu will appear There are the Live Configuration window and Color Settings window which are shown as below Fig4 12 Live Configuration a...

Page 58: ...ge the name of the channel COLOR SETTINGS 1 Channel Select the option in the drag down list to change the channel of DVR 2 Brightness Contrast Saturation Hue You can set suitable brightness contrast s...

Page 59: ...f Schedule Record is not active STEP1 Click the check box of the Schedule Record it will be active The default schedule time is every day STEP2 Click the Set Schedule button the Schedule Configuration...

Page 60: ...tion The setting of User Configuration window is the same as 3 2 6 User Configuration of the DVR The added users in the server can login the Server and Client 4 4 7 Manage Tools Click button in the Re...

Page 61: ...default setup SYSTEM INFORMATION It displays the information of the DVR such as version DVR name and MAC address and so on SYSTEM LOG It displays the information about operating information on the DVR...

Page 62: ...lick the corresponding channel Then users can begin to control the PTZ through enabled channel 2 Baud Rate It sets the Baud Rate of PTZ device The default value is 9600 3 Protocol It sets the communic...

Page 63: ...enter the PTZ Control interface which is shown as Fig4 18 PTZ Control You can control PTZ devices by the function buttons on the right side of the interface The function of the buttons is described a...

Page 64: ...to swing down FOCUS It sets the camera s long focus FOCUS It sets the camera s short focus ZOOM It sets the camera s zoom in ZOOM It sets the camera s zoom out IRIS It sets the PTZ device s much ligh...

Page 65: ...t In live display mode right click on the picture to enter the menu list There are three menus to choose Search Configuration and PTZ Control 5 2 1 Search Click Search menu to enter the Data menu refe...

Page 66: ...You could control the zoom in and zoom out focus and input lightness of the Speed Dome Fig5 1 Shortcut Menu of PTZ FOCUS Click FOCUS button to control long focus of the Speed Dome Click FOCUS button t...

Page 67: ...backward or forward the record Multiple of reversing and forwarding is controlled through using the mouse The shortcut menus of fast backward and fast forward are shown as Fig5 2 Fast Reverse and Fast...

Page 68: ...TVTTH Answer When installing the software the system regedit and system file need to be modified And if you login the system as ordinary user the modification operation could not be performed So you n...

Page 69: ...4x576 NTSC 120FPS Display Speed PAL 100FPS AUDIO Compression PCM Audio In Out 2CH 1CH Input Level TBD 0 5 1 4Vp p 20Kohm RECORDING Compression H 264 Compression bit rate 256kbps 512kbps NTSC 352 H x24...

Page 70: ...put BNC 2 Parallel S Video 1 VGA 1 optional Audio Input Mono RCA 2 Audio Output Mono RCA 1 Sensor Input Terminal Block Alarm Output Terminal Block PTZ RS 485 2Pins Terminal Block Ethernet RJ 45 10 100...

Page 71: ...t used for user s reference Different definition and stabilization object s movement of the images will lead different results Appendix C Abbreviation Words Meaning Words Meaning L Lock HDD Hard Disk...

Page 72: ...M Th 6am 10pm US PT F 6am 2pm US PT USA Exchange Repairs 562 777 2551 M F 9am 5pm US PT AUSTRALIA toll free 1300 138 324 M 9am 5pm AUS ET Tu F 1am 5pm AUS ET Sa 1am 9am AUS ET New Zealand toll free 08...

Page 73: ...he end user is responsible for all freight charges incurred to send the product to Swann s repair centers The end user is responsible for all shipping costs incurred when shipping from and to any coun...

Page 74: ...Digital Video Recorder User Manual 70 Swann Communications 2008...

Reviews: