


RedAlert/BlueAlert Digital Video Recorder
RedAlert/BlueAlert Digital Video Recorder
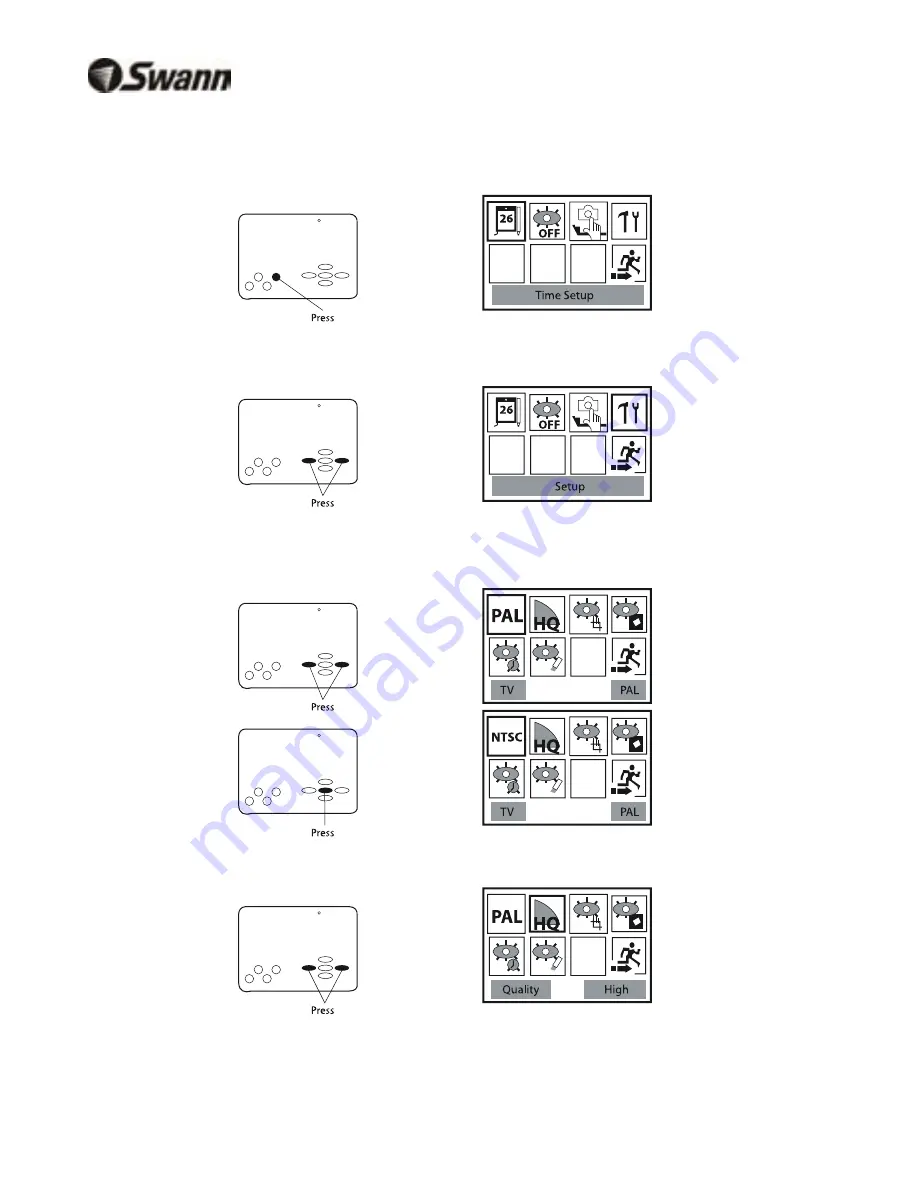
TV Mode and Picture Quality Settings
1. Press
the
Menu
button to enter menu interface.
2. Press
Left/Right
to highlight
Setup
and then press
OK
.
8. Press
Left/Right
in the
Setup
menu and highlight
Motion Detect Sensitivity
and press
OK
.
9. This screen shows the bounding box where motion will be detected.
Current Value
is the level of motion that is currently being detected on a scale of 0~99
where 0 is no motion and 99 is the highest level of motion.
Target Value
is the level of motion required to set off motion detection. For motion to be
detected the
Current Value must be higher than the Target Value
.
10. Press
Left/Right
to set the Target Value (or sensitivity) between 0~99. Adjust the
sensitivity to the level needed for your conditions. Press
OK
to return to the
Setup
menu.
Note
: In our example above, Target Value is set to 10. Motion will only be recorded when the level of motion (Current
Value) in the bounding box reaches 10 or more.
3. Press
OK
to toggle TV mode from
PAL/NTSC
.
NOTE: The default setting is NTSC in North America and PAL for Europe/Australasia
4. Press
Left/Right
to highlight the picture
Quality
option.
7
10


