


1
2
3
4
5
6
7
8
9
SwannEye HD
EN
INSTRUCTION MANUAL
Important Information
FCC Verification
This equipment has been tested and found to comply with the limits for
Class B digital device, pursuant to part 15 of the FCC Rules. These limits
are designed to provide reasonable protection against harmful interfer-
ence in a residential installation. This equipment generates, uses and
can radiate radio frequency energy and, if not installed and used in ac-
cordance with the instructions, may cause harmful interference to radio
or television reception, which can be determined by turning the equip-
ment off and on, the user is encouraged to try to correct the interference
by one or more of the following measures:
• Reorient or relocate the receiving antenna
• Increase the separation between the equipment and the receiver
• Connect the equipment into an outlet on a circuit different from that
to which the receiver is connected
• Consult the dealer or an experienced radio/TV technician for help
These devices comply with part 15 of the FCC Rules. Operation is sub-
ject to the following two conditions:
• These devices may not cause harmful interference
• These devices must accept any interference received, including in-
terference that may cause undesired operation
Important Note:
All jurisdictions have specific laws and regulations relating to the use
of cameras. Before using any camera for any purpose, it is the buyer’s
responsibility to be aware of all applicable laws and regulations that
prohibit or limit the use of cameras and to comply with the applicable
laws and regulations.
FCC Regulation (for USA): Prohibition against eavesdropping
Except for the operations of law enforcement officers conducted under
lawful authority, no person shall use, either directly or indirectly, a de-
vice operated pursuant to the provisions of this Part for the purpose
of overhearing or recording the private conversations of others unless
such use is authorized by all of the parties engaging in the conversation.
Warning
Modifications not approved by the party responsible for compliance
could void user’s authority to operate the equipment.
Important Safety Instructions
• Make sure product is fixed correctly and stable if fastened in place
• Do not operate if wires and terminals are exposed
• Do not cover vents on the back of the device and allow adequate
space for ventilation
Default Password Information
To ensure your privacy, this device supports password protection.
The default, all-access username is
admin
, the default password is
123456
. This is the camera’s password - not your account password!
To ensure your ongoing privacy, we strongly recommend setting a pass-
word as soon as possible. Choose something that you’ll remember, but
that others would be unlikely to guess.
Contents
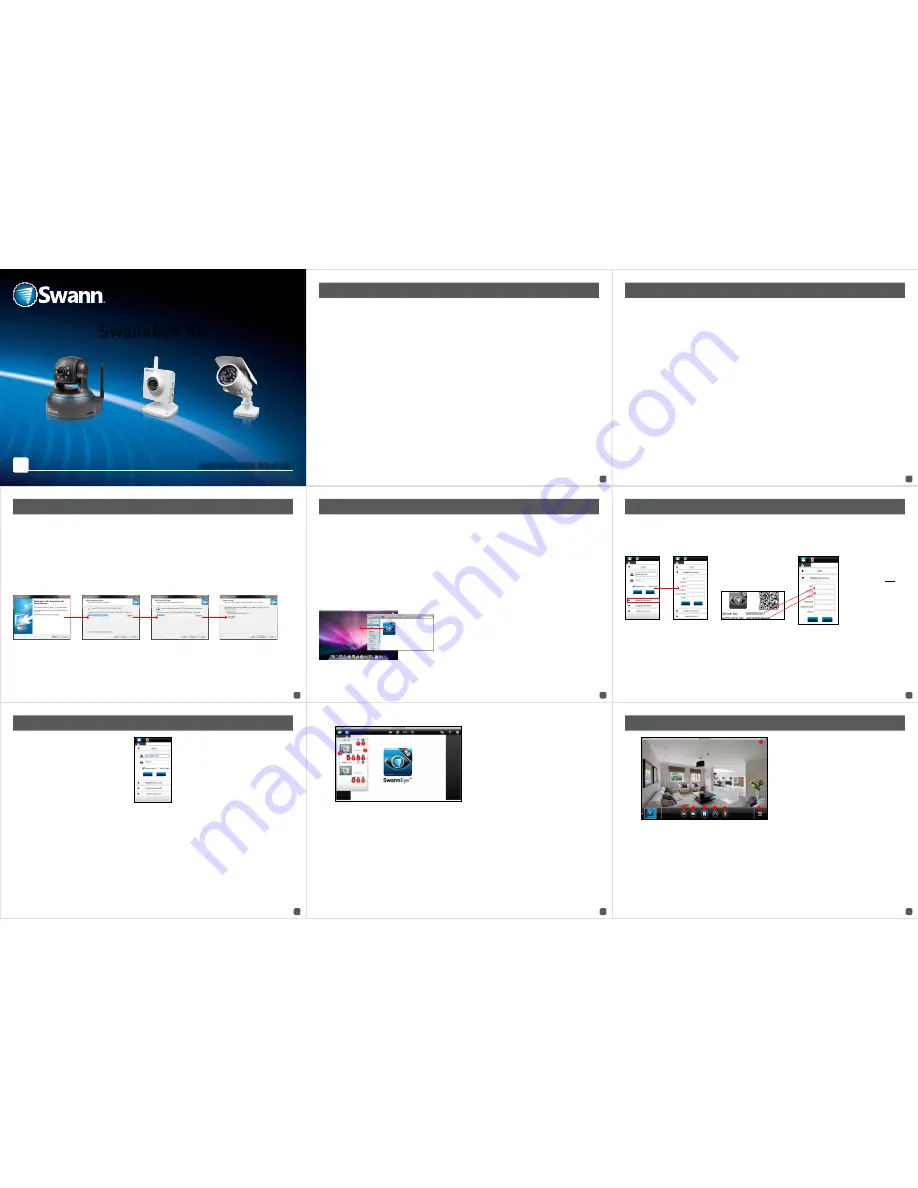
Installing the SwannEye HD Pro Software (PC)
Included with the camera is the SwannEye HD Pro software for the PC. Have a look at the following instructions for installation
onto your computer.
Note:
If you have already downloaded and installed the SwannEye HD Pro software from our website, you don’t need to install
it from the CD.
(1)
Insert the included CD into your PC’s optical drive.
(2)
When prompted by Windows as to what action to take, select “AUTORUN”.
(3)
From the menu, select “Install the SwannEye HD Pro Software”. If the auto-run menu isn’t enabled on your system, you can
access the optical drive from “My Computer”, then select the PC folder on the CD and run the installer directly.
(4)
You will see a series of dialogue windows similar or identical to those shown below.
Installing the SwannEye HD Pro Software (Mac)
Registering an Account
Using the SwannEye HD Pro Software
The Live View Interface
Important
Information
2
Contents
3
Installing
the
SwannEye
HD
Pro
Software
(PC)
4
Installing
the
SwannEye
HD
Pro
Software
(Mac) 5
Registering
an
Account
6
Using
the
SwannEye
HD
Pro
Software
7
The
Live
View
Interface
9
The
Control
Panel
&
Sharing
your
Snapshots
11
Recording
to
a
Memory
Card
12
Advanced
Settings:
Name
13
Advanced
Settings:
Date
&
Time
13
Advanced
Settings:
Video
14
Advanced
Settings:
Audio
15
Advanced
Settings:
Ethernet
16
Advanced
Settings:
Wi-Fi
17
Advanced
Settings:
Device
18
Resetting
your
Camera
18
Using
the
SwannEye
HD
Mobile
App 19
SwannEye
HD
Mobile
App:
Settings 21
Accessing
the
Camera
with
your
Internet
Browser
22
Mounting
the
ADS-460
24
Troubleshooting
25
Warranty
Information
26
Helpdesk/Technical
Support
27
(5)
You may be asked by “User Account Control (UAC)” whether you will allow the SwannEye installer to make changes - choose
“Allow” or “OK”. Follow the on-screen prompts to complete the installation. A “SwannEye HD Pro” icon will be placed on your
desktop when the software has completed installation. You are now ready to register for an account - see “Registering an Ac-
count” on page 6 for details.
Included with the camera is the SwannEye HD Pro software for the Mac. Have a look at the following instructions for installa-
tion onto your computer.
The easiest way to install SwannEye HD Pro is to go to the App Store and search for SwannEye HD. Once you find the app, click
the “Free” button to install it on your Mac. Once this is done, see Step 1 of Registering an Account” on page 6 for details.
Note:
If you have already downloaded and installed the SwannEye HD Pro software from the App Store, you don’t need to install
it from the CD.
If you don’t have access to the App Store, follow these steps to install SwannEye HD Pro.
(1)
Insert the included CD into your Mac’s optical drive.
(2)
Open the CD’s contents by clicking on the CD drive icon.
(3)
Open the folder named “Mac”. Here you will find the “SwannEye HD Pro” software. Click and drag it onto your desktop or in
a location that you would like to keep it.
(4)
No installation is required. Just double-click the software to run it. You are now ready to register for an account - see “Reg-
istering an Account” on page 6 for details.
(1)
Double-click the “SwannEye HD Pro” icon located on your desktop. The login screen is the first thing you will see when you
start the SwannEye HD software.
(2)
The login screen will appear as soon as the software has loaded (see below).
(3)
Click the “Register account” button to commence registration.
(4)
The “Device No.” and
“Verification No.” are print-
ed on a sticker that is locat-
ed on the camera. It will look
something like this:
(5)
Input the “Device
No.” and “Verification
No.” located on the
sticker. Note; both are
case sensitive. Only one
camera is required to
register an account, but
additional cameras can
be added later.
(6)
Choose a username. Your username can be any combination of letters and numbers up to (11) eleven characters in length.
Usernames are case sensitive.
(7)
Choose a password and confirm in the field below. Like the username, passwords are case sensitive.
(8)
Enter a valid email address. If you forget your password, this is how we can contact you.
(9)
When you’re done, click the “Submit” button to close the registration window and to register your account.
If you’ve made a mistake copying down the codes, you will see an error message after clicking the “Submit” button. If this
happens, your account will not be registered. To retry, just restart the registration process.
The following instructions apply to both the PC
and Mac versions of the SwannEye HD Pro soft-
ware. When you run the software, you will be tak-
en directly to the login screen.
User Name/Password:
This is the username
and password you’ll either have registered or
will register to connect to your camera. Until a
camera is paired to a registered account, it can’t
be accessed remotely.
Remember:
When ticked, the software will
remember the username and password last used
to login to it, and will have these fields filled when
the software is re-opened.
Auto Login:
Rather than having to login each time you open the software, ticking this box will retain your username/password
combination and automatically login to your account upon opening the software.
Register Account:
Takes you to the registration window. Click here if you need to register an account (if this is the first SwannEye
camera you’re connecting up, then you’ll need to register an account).
Forgot Password:
We all forget things sometimes. The good news is it’s pretty easy to get your password back - just click here
and we’ll email your password back to the email address you used when you registered the account.
Reset Account:
This option allows you to reset your entire account and will take all the settings for your camera back to their
factory defaults.
When you login to the SwannEye HD Pro software, you will be taken to the camera list.
(1) Refresh Device:
Re-scans the connection to all cameras on
your list.
(2) Add Device:
Allows you add additional cameras to your list.
(3) Camera Name:
The electronic ID (EID) of the camera.
(4) Open Folder:
Quick access to the local recordings folder.
The location of the local recordings folder can be set in the
“Program Settings” menu.
(5) Set Attribute:
Allows you to provide a local name for the
camera, as well as changing the settings for both video and
audio. You can also change the time zone and the IP address
settings for your wired or wireless network.
(6) Set Administrator:
Allows you to change the administrator
username and password.
(7) Set Video Password:
Allows you to set a password to view
an encrypted live stream from the camera.
(8) Open Folder:
Quick access to the local recordings folder.
The location of the local recordings folder can be set in the
“Program Settings” menu.
(9) Set Attribute:
Allows you to provide a local name for the
camera, as well as changing the settings for video and audio.
(10) Delete Device:
This option will delete your current ac-
count, as well as the camera(s) that you have registered. If you
choose this option, you will need to register a new account.
(11) Play:
Press this button to view a live image from your cam-
era. If you have more than one camera, in quad mode click a
screen then click play on the camera to start it in that section
of the screen.
The camera(s) connected to your wired or wire-
less network will be displayed under “LAN”, and
the camera(s) that you have registered to your ac-
count, will be displayed under “WAN”. If you have
renamed the camera(s) and/or added additional
cameras, the software will reflect this.
1
2
3
4
5
6
7
The Live View Interface is the primary window
for accessing the camera. From here, you will be
able to preview live images in near-real time.
(1) Photo:
Takes a snapshot of what’s on the screen and saves
it to your local computer.
(2) Start Record:
Initiates local recording. Click again to stop
recording.
(3) Stop Watching/Start Watching:
Turns off the live viewing
from the camera. Click again to turn on live viewing.
(4) Close Listen/Start Listen:
Toggles the audio monitoring ca-
pabilities of the camera off and on.
(5) Close Speak/Start Speak:
Toggles the intercom function off
and on (not supported on ADS-460).
(6) Single/Quad Screen:
If you have multiple cameras con-
nected to your wired or wireless network, or if you have more
than one camera registered to your account, click this button
to view them in quad screen mode. You will need to click on
each section of the quad screen to select it then click “Start
Watching” to see that camera live. Click again to return to a
single live view.
(7) Signal Strength:
Indicates the robustness of the connection
to the camera, much the same way as a cell phone indicates
its connection to the network. Higher quality images are avail-
able when the signal strength is strong.


