Sveon SPM5000 User Manual Download Page 21

SPM5000 User Guide

Index

1. Welcome
2. Features
3. System Requirements
4. Content
5. Hardware
6. Remote Control

7.

Connections

7.1 PC Connection
7.2 AV Connection
7.3 SVideo Connection
7.4 Composite Connection
7.5 HDMI Connection
7.6 Ethernet Connection
7.7 Audio Connection
7.8 USB  Host Connection

8. First time usage

8.1 Turn the unit on
8.2 Formatting process
8.3 Remote control
8.4 Security Information

9. Introduction
10. Setup Menu

10.1 A/V
10.2 ETC
10.3 Network

11. Hard Disk

11.1 Video files
11.2 Music
11.3 Pictures
11.4 Virtual DVD

12. Ethernet connection

12.1 Manual IP setup
12.2 How to get the IP information under 

Windows XP

12.3 How to get the IP information under 

Windows Vista

13. Share Files

13.1 Windows XP
13.2 Windows Vista

14. WiFi Setup
15. Firmware updating
16. Technical Specifications

21

English

- B.MARK:

A B.MARK will allow you to select a point in a video playback and to save it; then you will be able to start to

play this video file from this selected point. To select a point in a video file press "B.MARK" button during the playback and
the unit will create a file for this bookmark. If you want to start to play a video file using a bookmark, go to Hard Disk menu,
press "B.MARK" button and then select the bookmark file of the video you want to play.

- VOLUME: 

Press to increase or decrease the volume.

- MUTE:

Press to enable or disable audio signal.

- ZOOM:

Press to enlarge the size of the picture (x1, x2 up to x3).

- SYNC:

If you are playing a video file with subtitles and the subtitles don´t appear at the same time than the image you

can press +/- to synchronize both. Each time you press + or - button the subtitles will be moved 1 second forward or back-
ward.

- REPEAT:

Press this button to repeat the current file (File), all the files saved in a folder (All) or all the files saved in all

the folders of the hard disk (Folder).

- GOTO:

Press this button to go to a point in the timeline of a title.

- OK:

Press this button to play the selected file.

- Arrow buttons (up/down):

During a video playback with subtitles press up and down to move the subtitles in the screen

(up or down).

- Arrow buttons (left/right):

During a video playback you can press right and left arrow buttons to select the speed of  for-

ward function. Press right arrow button to increase the speed and press left arrow button to decrease the speed. You can
choose between different speeds: from 0.3x to 4x).

- PLAY:

Press this button to play or pause the playback of the file.

- STOP:

Press to stop the playback.

- SKIP:

Press left skip button to play the previous file or press right skip button to play the next file.

- SEARCH:

Press these buttons during a video playback to enable fast backward and fast forward options.
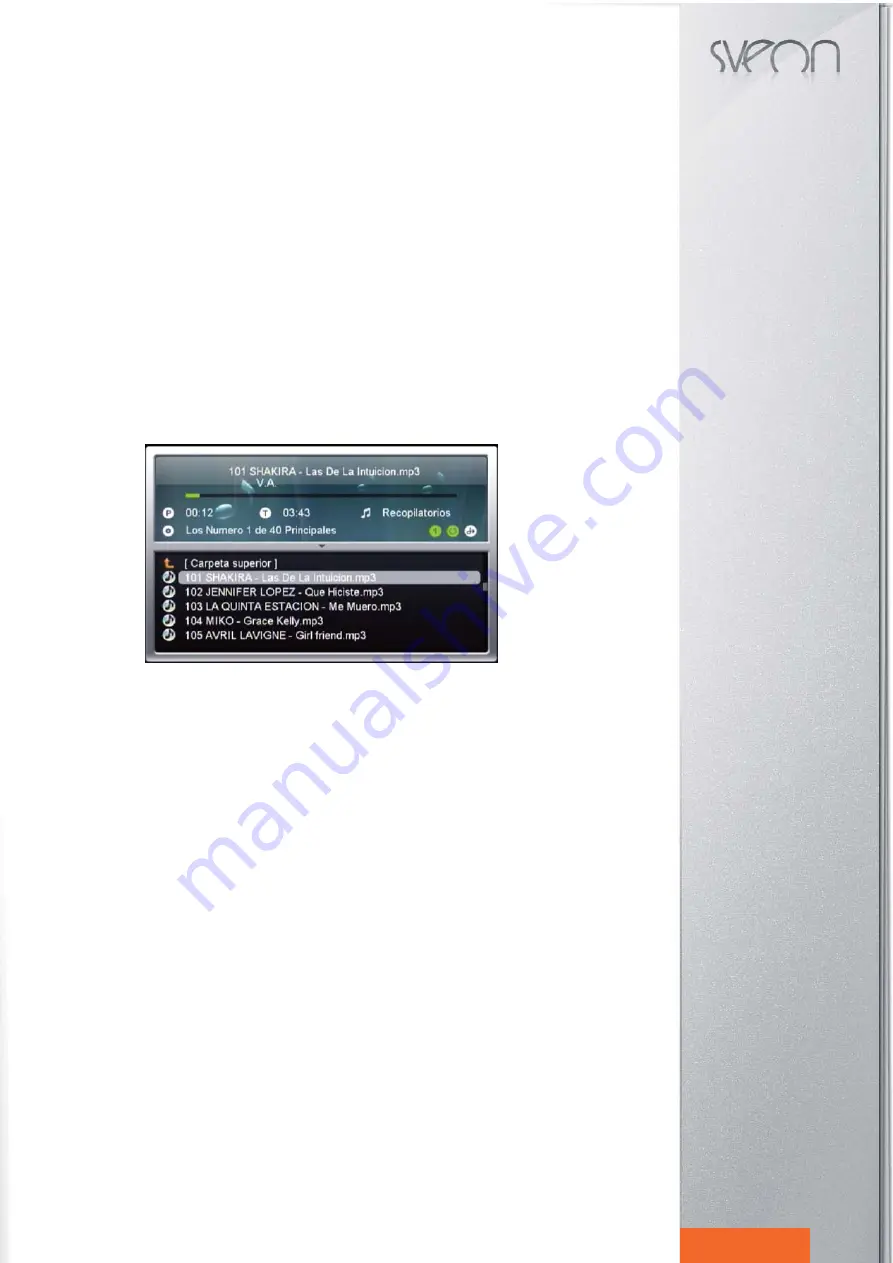
11.2 Music playback

SPM5000 has a special display for music playback. This special screen displays information about the file which is being
played, the elapsed time, the time remainig and also the name of the album.

- BOOKMARK: Press this button during a music playback to add this title to the playlist.
- VOLUME: Press this button to increase or decrease the volume.
- MUTE: Press this button to enable or disable the audio signal.
- OK: Press to play a selected file.
- PLAY: Press to play a file or to pause a file playback.
- STOP: Press to stop the a playback.
- SKIP: Press left skip button to play the previous file or press right skip button to play the next file.
- REPEAT: Press this button to repeat the file (File), all the files saved in the current folder (All), or all the files saved in the
all the folders of the hard disk (Folder).

11.3 Pictures playback

- PLAY: If you press “Play” button inside a folder with pictures, all the pictures will be displayed in Slide Show mode with
the interval time selected in “Setup/ETC/Interval time” option.
- OK: Select the file you want to play and press “OK” to play the file. The difference between Play and OK button is that
ifyou press “Play” all the files of the folder will be played.
- STOP: Press to stop the playback.
- SKIP: Press left skip button to play the previous file and press right skip button to play the next file. 
- ZOOM: Press to enlarge the picture file: x1, x2 up to x3.
- SYNC: Press this button during Slide Show mode to change the transition time between pictures.

11.4 Virtual DVD

SPM5000 allows you to play your DVD files with the navigation menus of the original disk.

- INFO: Press “INFO” button to display the chapters, lenght of each chapter, audio output, video output, TV type, repeat
mode, audio format, subtitles and angle.
- VOLUME: Press to increase or decrease the volume.
- MUTE: Press to enable or disable the audio signal.
- GOTO: Pres to go to a point of the timeline of the file.
- PLAY:Press to play or pause the file playback.
- STOP: Press to stop the playback.
- SKIP: Press left skip button to play the previous file and press right skip button to play the next file.
- SEARCH: Press this buttons during a playback to enable fast forward and fast backward options.

Summary of Contents for SPM5000

Page 1: ...Manual de usuario 2 User Guide 15 Manual do utilizador 28...

Page 2: ...idad 8 2 Formateo de la unidad 8 3 Mando a distancia 8 4 Avisos de seguridad 9 Introducci n 10 Men Setup 10 1 A V 10 2 ETC 10 3 Network 11 Hard Disk 11 1V deos 11 2 M sica 11 3 Fotos 11 4 DVDVirtual 1...

Page 3: ...C OGG PCM M4A AC3 WAV FLAC Subt tulos soportados smi sub srt lrc txt Image Subtitle sub with idx Conexiones 2 USB HOST LAN 10 100 Mbps WLAN 802 11g Conexi n al PC mediante USB 2 0 compatible 1 1 Repro...

Page 4: ...retroceder al archivo o p gina anterior TITLE Pulse para acceder al t tulo principal cuando visualice un DVD MENU Pulse para acceder al men principal cuando visualice un DVD INFO Pulse para ver la in...

Page 5: ...el cable a la toma RJ45 del panel trasero de la unidad Conecte el otro conector del cable a un puerto RJ45 LAN de su router switch o hub Si la conexi n se ha realizado correctamente se encender n dos...

Page 6: ...cione el que desee y pulse el bot n OK de su mando a distancia o del frontal de su unidad Una vez seleccionado el idioma SPM5000 mostrar la siguiente pantalla con las diferentes opciones Para moverse...

Page 7: ...legir entre cableada red cable LAN o Wifi red inal mbrica Para seleccionar la opci n cableada por favor conecte previamente haga las conexiones de red necesarias tal como se indica en el apartado 6 7...

Page 8: ...bot n con las flechas hacia la derecha para reproducir el archivo posterior SEARCH Pulse los botones durante la reproducci n del v deo para avanzar o retroceder r pidamente 11 2 M sica SPM5000 cuenta...

Page 9: ...Ethernet Este cable ha de ser Sin Cruzar si va conectado al Router Switch o Hub Si por el contrario quiere conectar la SPM5000 al PC el cable ha de ser Cruzado Para realizar la configuraci n con cabl...

Page 10: ...SPM5000 Manual de usuario ndice 1 Bienvenido 2 Caracter sticas 3 Requisitos del sistema 4 Contenido del pack 5 Hardware 6 Mando a distancia 7 Conexiones 7 1 Conexi n al PC 7 2 Conexi n por AV 7 3 Cone...

Page 11: ...ndowsVista 13 C mo compartir archivos 13 1 Compartir archivos a trav s de una red Windows XP 13 2 Compartir archivos a trav s de una red WindowsVista 14 Con guraci nWiFi 15 Actualizaci n del rmware 16...

Page 12: ...ed WindowsVista 14 Con guraci nWiFi 15 Actualizaci n del rmware 16 Especi cacionesT cnicas 12 Espa ol Paso 2 Seleccione Compartir esta carpeta en red y haga clic en Aplicar 13 2 Compartir archivos a t...

Page 13: ...e tener su red wifi protegida con contrase a le aparecer una ventana solicitando la clave de encriptado Introduzca la clave con la ayuda de los botones num ricos del mando a distancia Para Cambiar n m...

Page 14: ...d bajo WindowsVista 13 C mo compartir archivos 13 1 Compartir archivos a trav s de una red Windows XP 13 2 Compartir archivos a trav s de una red WindowsVista 14 Con guraci nWiFi 15 Actualizaci n del...

Page 15: ...8 First time usage 8 1Turn the unit on 8 2 Formatting process 8 3 Remote control 8 4 Security Information 9 Introduction 10 Setup Menu 10 1 A V 10 2 ETC 10 3 Network 11 Hard Disk 11 1Video les 11 2 Mu...

Page 16: ...WMA AAC OGG PCM M4A AC3 WAV FLAC Subtitles smi sub srt lrc txt Image Subtitle sub with idx Connextion 2 USB Host port LAN 10 100Mbps WLAN 802 11g PC Connection through USB 2 0 1 1 compliant Streaming...

Page 17: ...s to create a bookmark PC Press to go Network menu REMOTE CONTROLLER CONDITION DISPLAY It is turned in red when you press a button LANG Press to change the OSD language USB Press to access to the devi...

Page 18: ...ect SVideo input in your TV 7 4YPbPr Connection Connect the unit to the TV through Component video output YPbPr cable is not in cluded as shown in the picture Select YPbPr input in your TV Press the b...

Page 19: ...or beds because this kind of surfaces don t allow a correct air flow and the unit could suffer overheating 3 Place the unit in a place with a correct air flow 4 The power adaptor gets hot during the u...

Page 20: ...and yellow connectors Digital audio output Select this option if you want to use the Optical or Coaxial audio outputs 1080p option is only available in screens which support this resolution 10 2 ETC...

Page 21: ...een different speeds from 0 3x to 4x PLAY Press this button to play or pause the playback of the file STOP Press to stop the playback SKIP Press left skip button to play the previous file or press rig...

Page 22: ...uide This cable should be Without crossing if it is connected to a Router Switch or Hub If you want to connect the unit to your PC the cable should be Crossed To setup a LAN connection between the SPM...

Page 23: ...der Windows XP 12 3 How to get the IP information under WindowsVista 13 Share Files 13 1Windows XP 13 2WindowsVista 14 WiFi Setup 15 Firmware updating 16 Technical Speci cations 23 English 12 2 How to...

Page 24: ...ion under Windows XP 12 3 How to get the IP information under WindowsVista 13 Share Files 13 1Windows XP 13 2WindowsVista 14 WiFi Setup 15 Firmware updating 16 Technical Speci cations 24 English Selec...

Page 25: ...the IP information under WindowsVista 13 Share Files 13 1Windows XP 13 2WindowsVista 14 WiFi Setup 15 Firmware updating 16 Technical Speci cations 25 English Step 2 Select Share this folder through th...

Page 26: ...has a password a window will appear to enter the pass word Use the numeric buttons to write the password Press Function button of the remote control to change between uppercase and lowercase Once the...

Page 27: ...the IP information under WindowsVista 13 Share Files 13 1Windows XP 13 2WindowsVista 14 WiFi Setup 15 Firmware updating 16 Technical Speci cations 27 English 16 Technical Speci cations Supported forma...

Page 28: ...uipamento de udio 7 7 Conex o Ethernet 7 8 Conex o USB Host 8 Primeiro uso da unidade 8 1 Acender a unidade 8 2 Formata o do dispositivo 8 3 Avisos de seguridad 9 Introdu o 10 Menu de con gura o 10 1...

Page 29: ...itle sub com idx Liga es 2 USB HOST LAN 10 100 Mbps WLAN 802 11g Liga o ao PC atrav s de USB 2 0 compat vel 1 1 Reprodu o em streaming atrav s de LAN e WLAN Ecr LCD para poder ver a configura o conte...

Page 30: ...tar a ver PC Carregue para entrar na sec o de rede REMOTE CONTROLLER CONDITION DISPLAY Ilumina se em vermelho quando se ca rrega num bot o LANG Carregue para mudar a l ngua do sistema USB Carregue par...

Page 31: ...Escolha SVideo entrada na sua TV 7 4 Conex o porYPbPr Ligue o aparelho para a TV atrav s da sa da de v deo componente YPbPr cabo n o est inclu do como mostrado na figura Escolha YPbPr entrada na sua T...

Page 32: ...dade inclusivamente quando n o for utilizada 2 N o utilize a unidade em superf cies como sof s cama ou semelhantes a refrigera o n o ser a correcta 3 Coloque a unidade num lugar bem ventilado 4 O adap...

Page 33: ...s sa das anal gicas de udio cabos vermelhos e brancos Digital seleccione esta sa da se quiser utilizar as sa das ptica ou coaxial A op o s est dispon vel em 1080p mostra que suportam essa resolu o 10...

Page 34: ...reprodu o do v deo para avan ar ou retroceder rapidamente 11 2 M sica SPM5000 conta com um ambiente de reprodu o de ficheiros de m sica Gra as a este reprodutor poder ver a qualquer momento o t tulo...

Page 35: ...ch ou Hub Se por outro lado quer ligar a SPM5000 ao PC o cabo deve ser Cruzado Para realizar a configura o com cabo de SPM5000 com um router entre no cap tulo Setup Network e seleccione dentro de Rede...

Page 36: ...tilhar cheiros 13 1Windows XP 13 2WindowsVista 14 Con gura oWIFI 15 Actualiza o do rmware 16 Especi ca es t cnicas 36 Portuguese 12 2 Como consultar os dados de IP no PC emWindows XP Siga os seguintes...

Page 37: ...dows XP 12 3WindowsVista 13 Como partilhar cheiros 13 1Windows XP 13 2WindowsVista 14 Con gura oWIFI 15 Actualiza o do rmware 16 Especi ca es t cnica 37 Portuguese Seleccione Ver Estado Na janela emer...

Page 38: ...nicas 38 Portuguese Passo 2 Seleccione Partilhar esta pasta em rede e carregue em Aplicar 13 2 Partilhar cheiros atrav s de uma rede WindowsVista Importante Antes de realizar os passos necess rios par...

Page 39: ...ve de encripta o Introduza a chave com a ajuda dos bot es num ricos do controlo remoto Para Trocar n meros por letras mai sculas ou min sculas carregue no bot o FUNCTION do controlo remoto Uma vez int...

Page 40: ...ndowsVista 13 Como partilhar cheiros 13 1Windows XP 13 2WindowsVista 14 Con gura oWIFI 15 Actualiza o do rmware 16 Especi ca es t cnicas 40 Portuguese 16 Speci ca esT cnicas Formatos Suportados Videos...

Reviews: