background image

37

Viewing and erasing route waypoints

To view or erase route waypoints:
1. In the Set menu, scroll to 

Routes 

and short press 

Enter

. The

Route list is displayed.

2. Select a route with the arrow buttons and short press

Enter

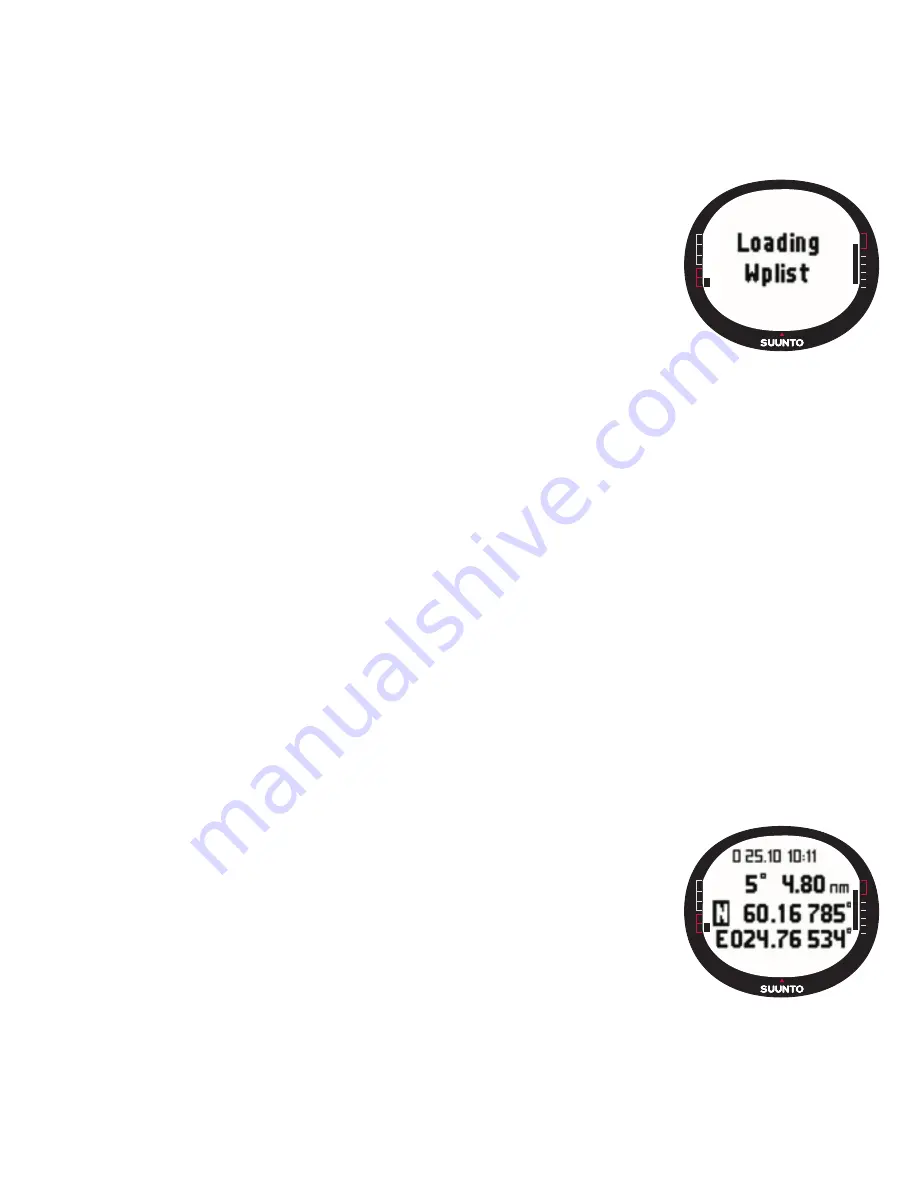
 to view the route information. A list of waypoints is

displayed.

3. The first waypoint is displayed in reversed color. Select a

waypoint with the arrow buttons and short press 

Enter

.

4. The waypoint menu is displayed. 

View 

is already the first menu item. Short press

Enter

 to select it. The following waypoint information is displayed:

Bearing and distance to the waypoint: 

The bearing and distance to the

waypoint are displayed from the previous waypoint, or if the GPS is active, from
the current location.

Waypoint coordinates: 

The coordinates of the selected waypoint.

5. Short press 

Stop/Cancel

 to exit the waypoint information and return to the waypoint

list.

6. To erase a waypoint, scroll to 

Erase 

in the waypoint menu and short press 

Enter

.

Suunto M9i displays the message “

ERASE


WAYPOINT

?”  Short Press 

Enter

 to confirm the

action. You return to the waypoint list.

Editing a route waypoint

To edit a waypoint:
1. In the Set menu, scroll to Routes and short press 

Enter

. The Route list is displayed.

2. Select a route with the arrow buttons and short press 

Enter

. The waypoint list

opens and the first waypoint is displayed in reversed color.

3. Select a waypoint with the arrow buttons and short press

Enter

. The waypoint menu is displayed.

4. Scroll to 

Edit 

with the arrow buttons and short press 

Enter

.

5. The attributes of the waypoint are activated. Choose the

order number of the waypoint in the waypoint list and change
the attributes of the coordinates with the arrow buttons
and short press 

Enter

 to accept the changes. Press 

Stop/

Cancel

 if you want to return to the waypoint list without

accepting changes.

Summary of Contents for M9i

Page 1: ......

Page 2: ...USTOMER SERVICE CONTACTS Suunto Oy Phone 358 9 875870 Fax 358 9 87587301 Suunto USA Phone 1 800 543 9124 Canada Phone 1 800 776 7770 European Call Center Phone 358 2 284 11 60 Suunto Website www suunto com ...

Page 3: ...8 2 1 4 GPS Activity and Accuracy Bar Display 8 2 2 BUTTONS 8 2 2 1 Short and Long Press 8 2 2 2 Start Data Button 8 2 2 3 Stop Cancel Button 9 2 2 4 Enter Button 9 2 2 5 Arrow Buttons 10 2 3MENUS 10 2 3 1 Basic Menu Structure 10 2 3 2 Navigating in Menus 10 2 4 Understanding GPS 12 2 4 1Overview 12 2 4 2 Line of sight Needed 12 2 4 3 Accuracy 12 2 4 4 GPS Usage 13 2 4 5 Versatility 13 3 MODES 14 ...

Page 4: ... 3 Barometric Memory 24 3 3 4 Weather Alarm 25 3 4 COMPASS MODE 26 3 4 1 Main Display 26 3 4 2 Function Menu 27 3 4 3 Calibrate 27 3 4 4 Declination 28 3 5 SAILING MODE 29 3 5 1 Main Display 29 3 5 2 Function Menu 30 3 5 3 Tracking 30 3 5 4 Tracks 31 3 5 5 Race 32 3 6 NAVIGATION MODE 32 3 6 1 Main Display 32 3 6 2 Function Menu 34 3 6 3 Navigate 34 3 6 4 Routes 35 3 6 5 Race 38 3 7 RACING MODE 39 ...

Page 5: ...Suunto Sail Manager Features 52 4 2 2 Changing the Suunto M9i Settings 53 4 3 WWW SUUNTOSPORTS COM 54 4 3 1 System Requirements 54 4 3 2 SuuntoSports com Sections 54 5 TECHNICALSPECIFICATIONS 57 6 GPS DATUM LISTING 58 7 GLOSSARY 66 8 USER SRESPONSIBILITY 69 9 COPYRIGHTANDTRADEMARK NOTICE 69 9 1PATENTNOTICE 70 10 CECOMPLIANCE 70 11 LIMITS OF LIABILITYAND ISO 9001 COMPLIANCE 70 12 AFTER SALES SERVIC...

Page 6: ...form the procedures described in this manual Never disassemble your Suunto M9i Protect it from shocks extreme heat and prolonged exposure to direct sunlight If not in use store your Suunto M9i in a clean and dry environment at room temperature Wipe your Suunto M9i clean with a lightly moistened warm water cloth If there are stubborn stains or marks you can apply mild soap to the area Do not expose...

Page 7: ...even when the battery is still fully operational If the battery warning indicator is activated in temperatures above 10 C 50 F recharge the battery Do not attempt to change the battery as this will void warranty Take the Suunto M9i to an authorized Suunto dealer for a battery change You can charge the battery with either the included mains charger universal mains voltage or through your PC s USB c...

Page 8: ...Mode Indicator On the left side of the display there is a mode indicator that shows the currently active mode The mode indicator displays the modes from the top down in the following order TIME WEATHER COMPASS SAILING and NAVIGATION The active mode is indicated by the moving segment next to the indicator bar When the RACING mode is active both the SAILING and the NAVIGATION segments are displayed ...

Page 9: ...d Long Press The buttons may have different functions depending on how long you press them The ordinary press or short press means that the button is pressed quickly The long press means that the button is pressed for more than 2 seconds 2 2 2 Start Data Button Short Press In the Time mode it starts the timing and records the split times Activates the information displays in the Sailing Navigation...

Page 10: ...ves to a lower menu level Activates the Function menu in all the main modes Records all the Function menu parameters in the temporary memory The param eters are erased when the unit returns to the main mode except for the one that has been confirmed by the user For more information on the Function menu see section 3 8 Function Menu If the GPS is not active it accesses the Function menu in order to...

Page 11: ...menu includes several functions all of which include sub functions or settings This is called the hierarchical menu structure Always when you press Enter to enter into a submenu for performing setting timer sync MOB etc the Suunto M9i records data like time direction and position in the temporary memory The data is utilized in the Function menu features 2 3 2 Navigating in Menus The menu items can...

Page 12: ...n modes In the Function menu you can Turn the GPS on or off manually GPS On Off Record and store the coordinates of a Man Over Board situation MOB View the current position Position ENTER Change the value with UP DOWN ENTER stores sensor data to temporary memory Press ENTER for over 2 sec Function menu GPS On Off See chapter 2 1 4 Time menu ALARM TIME DATE UNITS GENERAL TIME 24h DATE dd mm TEMP C ...

Page 13: ...d up 2 4 2 Line of sight Needed To ensure a good position measurement there must be a line of sight connection between the satellites and the receiver This means that the objects or materials between the satellites and the GPS receiver must not excessively attenuate the signal In practice water containing objects such as people trees or other dense vegetation can cause problems The signals will no...

Page 14: ...al position calculation and before the GPS becomes functional After the first position fix has been established it still takes additional 10 minutes before all relevant data has been received from the satellites The position estimate accuracy improves during this time as more satellites can be used for position calculation The downloaded data is valid roughly for the next four hours during which t...

Page 15: ...r on the unit s display indicates the fix See section 2 1 4 GPS Activity and Accuracy Bar Display 3 MODES 3 1 GENERAL INFORMATION Suunto M9i has six different modes Time Weather Compass Sailing Navigation and Racing You can switch between the modes with the arrow buttons Each mode has several sub modes The mode indicator on the left side of the display indicates the active mode 3 2 TIME MODE 3 2 1...

Page 16: ...owing the running time Press Stop Cancel to stop the timing After the timing has been stopped you can scroll the split times with Stop Cancel To reset the timer long press Stop Cancel If the stopwatch has not been reset after stopping the timing press Start Data to continue the timing Suunto M9i can display up to 29 split times NOTE When you have used the stopwatch you cannot select other shortcut...

Page 17: ...ow buttons and short press Enter The alarm is now set Deactivating alarms To deactivate the alarm 1 In the Set menu Alarm is already the first menu item Short press Enter to select it 2 Scroll to the alarm you want to set off and short press Enter The alarm information is displayed and the On Off indicator is displayed in reversed color 3 Press either the up or down button to change the alarm stat...

Page 18: ...nization on or off To set the time synchronization 1 In the Set menu scroll to Time Date and short press Enter 2 Scroll to Sync and short press Enter The On Off selection is activated 3 Change the On Off status with the arrow buttons and short press Enter The time synchronization is now set You re turn to the Set menu NOTE The time is synchronized each time the GPS is activated and it makes the fi...

Page 19: ... Enter The date selection is activated 6 Change the date with the arrow buttons and short press Enter The month selection is activated 7 Change the month with the arrow buttons and short press Enter The year selection is activated 8 Change the year with the arrow buttons and short press Enter You automatically return to the Set menu NOTE When you set the seconds for the time they are automatically...

Page 20: ... General and short press Enter The General menu is displayed 2 Scroll to Bright and short press Enter The brightness set ting is activated 3 Change the value with the arrow buttons and short press Enter The brightness is set and you return to the Set menu NOTE The default brightness setting is 3 Setting the contrast This setting adjusts the contrast of the Suunto M9i display The contrast is measur...

Page 21: ... information that shows the names of the modes can also be turned on or off To turn the display information on or off 1 In the Set menu scroll to General and short press Enter The General menu is displayed 2 Scroll to Info and short press Enter The display information setting is activated 3 Turn the display information on or off with the arrow but tons and short press Enter The display information...

Page 22: ... displayed 2 Scroll to Date and short press Enter The date format field is activated 3 Select the correct date format with the arrow buttons and short press Enter The date format is now set Setting the temperature unit The Temp setting defines the unit in which the temperature is displayed The options are Celsius C and Fahrenheit F To change the temperature unit 1 In the Set menu scroll to Units a...

Page 23: ...rt press Enter The elevation unit field is activated 3 Select the correct unit with the arrow buttons and short press Enter The elevation unit is now set NOTE Elevation is displayed only in position display as GPS elevation Setting the distance unit The Dist setting defines the unit in which the distance is displayed The units are kilometers km miles mi and nautical miles nm The short distance uni...

Page 24: ...0 30 000 respectively To change the position format 1 In the Set menu scroll to Units and short press Enter The Units menu is displayed 2 Scroll to Position and short press Enter 3 Select the correct format with the arrow buttons and short press Enter The position format is now set NOTE All positions are stored in WGS84 format in the Suunto M9i memory The position format setting refers only to the...

Page 25: ...pressure development during the last 6 hours in 15 minute intervals Shortcuts The third row shows alternatively the temperature or the current time Change the displayed information with Stop Cancel Temperature Displays the temperature in the selected unit For more information on defining the temperature unit see section 3 2 7 Units Time Displays the current time 3 3 2 Function Menu For more inform...

Page 26: ...ry content press either Enter or Stop Cancel at any time 3 3 4 Weather Alarm When active the weather alarm informs you if the air pressure drops more than 4 hPa 0 118 inHg in 3 hours To activate or deactivate the weather alarm 1 In the Set menu scroll to Baro Al with the arrow buttons The current status of the alarm can be seen in the Set menu 2 Short press Enter The on off field is activated 3 Ch...

Page 27: ...lays the cardinal and half cardinal point abbreviations Bearing The second row displays the bearing in degrees Shortcuts Bearing Lock This feature helps you follow a certain bearing Rotate your Suunto M9i horizontally until the de sired bearing is displayed on the second row and press Start Data Press Start Data again to select a new bear ing The bottom row displays the degree deviation to the lef...

Page 28: ...mpass heading or the heading changes too slowly Strong electro magnetic fields such as electric lines loudspeakers and magnets can affect the compass operation Therefore you should calibrate the compass if your Suunto M9i has been exposed to these fields NOTE Calibrate the compass before using it for the first time and before you leave for an extended outdoor activity NOTE Remember to hold the Suu...

Page 29: ...clination to On Off or Auto 2 Select On to set the compass declination manually and short press Enter 3 The direction field is activated Select East West with the arrow buttons and short press Enter 4 The degree field is activated Change the degrees with the arrow buttons and short press Enter 5 The declination is now set and you return to the Set menu Setting the compass declination with the GPS ...

Page 30: ...rt dfs Displays the distance from start in the selected unit Time from start tfs Displays the time from start Average speed avg Displays the average speed in the selected unit Sailing Data display The Sailing Navigation and Racing modes and the MOB function have special information displays that can be accessed from the main display of each respective mode To view the Sailing Data display 1 Press ...

Page 31: ...d the Racing modes 3 5 2 Function Menu For more information on the Function menu see section 3 8 Function Menu 3 5 3 Tracking The tracking function stores the vessel s position heading and speed in the Suunto M9i memory between a selected time period You can only set the tracking function on or off If you wish to alter the time period you need to do it in the Suunto Sail Manager software NOTE When...

Page 32: ...ct a track with the arrow buttons and short press En ter The following information is displayed Start time and coordinates Finish coordinates Total duration of the track in hours and minutes and the length of the track in selected units Maximum and average speed during the track The number of recorded memory points If the track has been recorded on a route created earlier the number of navigated w...

Page 33: ...a circle When the bearing indicator is inside the sighting marks you are moving in the direction of the set bearing The bearing indicator moves in a 120 degree arc in the upper part of the display If the direction of the unit deviates more than this from the tracked bearing the unit prompts the direction where to turn the unit with arrows Once the circle appears on top of the display the accurate ...

Page 34: ...r indicator is displayed on the left side of the lower horizontal dotted line of the display when Navigate is on Navigation Data display The Sailing Navigation and Racing modes and the MOB function have special information displays that you can access from the main display of the respective mode The Navigation data display shows either Waypoint information or a summary of the route To activate the...

Page 35: ...he last in nautical miles Number of waypoints The third row displays the total number of waypoints on the route NOTE When the GPS is on the unit displays active waypoint when entering information display If GPS is off route summary is displayed 3 6 2 Function Menu For more information on the Function menu see section 3 8 Function Menu 3 6 3 Navigate The Navigate function starts the navigation and ...

Page 36: ... inside a radius of 50 meters of the waypoint or passes at a distance larger than 100 meters of the perpendicular line to the route that goes through the waypoint 3 6 4 Routes The Routes menu contains information on the routes recorded in the Suunto M9i memory The routes and their individual waypoints can be viewed edited and erased Creating a new route To create a new route 1 In the Set menu scro...

Page 37: ...played 2 Scroll the list with the arrow buttons and select a route by short pressing Enter 3 In the route menu scroll to Create WP with the arrow buttons and short press Enter 4 The new waypoint of the route is displayed Enter the number of the waypoint on the route and the coordinates with the arrow buttons Short press Enter to confirm the new waypoint 5 To stop creating a new waypoint short pres...

Page 38: ...el to exit the waypoint information and return to the waypoint list 6 To erase a waypoint scroll to Erase in the waypoint menu and short press Enter Suunto M9i displays the message ERASE WAYPOINT Short Press Enter to confirm the action You return to the waypoint list Editing a route waypoint To edit a waypoint 1 In the Set menu scroll to Routes and short press Enter The Route list is displayed 2 S...

Page 39: ...outes NOTE When creating routes or waypoints in the Suunto M9i the unit names them with current date and time 3 6 5 Race When you select Race in the Set menu Suunto M9i switches to the Racing mode For more information on the Racing mode see section 3 7 To select the Racing mode 1 In the Set menu scroll to Race and short press Enter The On Off selection is activated 2 Change the setting to On with ...

Page 40: ...he left side of the lower horizontal dot line of the display To set the parameters in the Function menu short press Enter in the Racing mode s main display For information on the Function menu before the race see section 3 8 After you have set the parameters the following is displayed Distance to start line dsl The first row displays the distance to the start line Timer The second row displays the...

Page 41: ...ace Timer Displays the time from the start of the race Tacking Angle Difference TAD Displays the vessel s tacking angle difference Average speed Displays the vessel s average speed in the selected unit Racing data display The Sailing Navigation and Racing modes have special information displays that you can access from the main displays of the respective modes During the race the Racing data displ...

Page 42: ...nce from the start Total distance The second row displays the distance sailed during the race in nautical miles Shortcuts The third row displays either average speed or the timer To switch between these short press Stop Cancel Average speed Average speed during the race in knots Timer Time sailed in the race 3 7 2 Function Menu Function menu before the race The Racing mode has a unique Function me...

Page 43: ...to the buoys once their exact location has first been updated see Suunto Sail Manager Help The user can select a course from the Suunto M9i memory To select a course 1 In the Function menu scroll to Course with the Arrow buttons and short press Enter 2 Select a course with the arrow buttons and short press Enter Synchronizing or starting the timer To synchronize or to start the timer NOTE The time...

Page 44: ... line direction To set the start line parameters with two buoys 1 Sail to the first buoy and short press Enter in the Racing mode s main display Buoy location is now stored in the temporary memory 2 Scroll to Startline and short press Enter 3 Scroll to either Buoy S or Buoy P and short press Enter to confirm selection The text BUOY STORED is displayed Stop Cancel erases buoy location and returns b...

Page 45: ...ort press Enter The degree field is activated 6 The start line is now set WINDdir The WINDdir function allows you to record the wind direction and force To record the wind direction 1 Point the Suunto M9i to the wind and keep it level Short press Enter and keep the unit to the wind and level for 2 seconds The WINDdir is stored to the temporary memory 2 Scroll to Wind Dir and short press Enter The ...

Page 46: ...Function menu NOTE Before race start the wind direction is the line bias angle between the wind and the perpendicular line to the start line After race start wind direction displays geographic wind direction derived from unit s compass sensor Starboard Port Tack The Starboard Port Tack function allows you to set the reference heading for tacking angle difference measurement TAD 1 Short press Enter...

Page 47: ... buoy 1 is displayed in reversed color After you have recorded the first buoy Suunto M9i suggests you to record the next buoy Turn buoy 2 and so on Suunto M9i offers as many buoys as included in the race type WINDDir For more information on the WINDDir function see section 3 8 5 MOB With this function you can record the location of Man Over Board situations For more information on the MOB function...

Page 48: ...ry information to complete the function and discards the rest 3 8 1 GPS The GPS function allows you to turn the GPS on or off and to examine the accuracy of the GPS readings To turn the GPS on or off 1 In the Function menu scroll to GPS with the arrow buttons and short press Enter 2 Change the status to on or off with the arrow buttons and short press Enter The GPS function indicator appears on th...

Page 49: ...ees Activating the MOB function To activate the MOB function 1 The MOB location is recorded by short pressing enter in any of the main modes If the GPS is not on the GPS is first activated after selecting the MOB In this case MOB loca tion is recorded after the GPS makes its first fix In the Function menu scroll to MOB and short press Enter The bearing and distance to the MOB location are displaye...

Page 50: ...a to enter the MOB Data display in the MOB display 2 Short press Stop Cancel to exit the MOB Data display 3 8 3 Memory Point The Memory point function records the coordinates and all other sensor data of the current location To store a memory point press Enter in the main mode The current data is recorded in the temporary memory 1 In the Function menu scroll to MEMpoint and short press Enter The c...

Page 51: ... the Position function If the GPS is not on when you enter the Position menu the coordinates of the last GPS fix are displayed NOTE The position coordinates are updated as the instrument s position changes 3 8 5 WINDdir The WINDDir function allows you to record the wind direction and force To record the wind direction 1 In the Function menu scroll to Wind Dir point the Suunto M9i to the wind and k...

Page 52: ...k your local dealer for the availability of the ARCS products NOTE When purchasing ARCS charts you must have your user permit and PIN code available in order to register for the use of the chart The user permit and PIN code is provided in the Suunto M9i sales package 4 1 1 PC software installation 1 Insert the Sail Manager CD into your CD ROM drive before plugging in the USB cable 2 As the setup m...

Page 53: ... latest version of the Suunto Sail Manager can always be downloaded from www suunto com Please check for updates regularly as new features are developed continuously 4 2 1 Suunto Sail Manager Feature Tracks View tracks on chart or a list of track points edit track related information sort tracks in folders and upload tracks to suuntosports com Routes Create new routes edit existing routes view rou...

Page 54: ...s mph kt Wind unit m s kt Position deg dm Info off on Tones off on Datum WGS84 etc UTC Offset Select the correct time zone in relation to Greenwich time Fixrate Define how often the Suunto M9i displays updates of GPS related information You can set different fixrate for normal and race use Log interval Every x th fix is saved in the Suunto M9i memory You can set different log intervals for normal ...

Page 55: ... best viewed with 1024 x 768 4 3 2 Suuntosports com Sections Suuntosports com includes three sections all of which have several functions The following paragraphs describe only the basic functions of suuntosports com You can find detailed descriptions of all the site functions and activities and step by step instructions for using them in the site Help The Help is available on each page and its ic...

Page 56: ...our sailor friends and share information about each other s results give advice and discuss where and when you could go for a sailing trip together Groups can be either open or closed Closed groups mean that you have to apply for membership and be accepted before you can participate in group activities All groups have a home page that displays information about group events and includes sections f...

Page 57: ...e suuntosports com community connect to the Internet open your Web browser and go to http www suuntosports com When the opening page appears click the Register icon and register yourself and your Suunto sports instrument You can change and update your personal and equipment profiles in the My Suunto section afterwards After the registration you will automatically enter the suuntosports com home pa...

Page 58: ...ral crystal glass Rechargeable battery PC interface with a USB connector Charger Universal 110 240 V charger with changeable mains plugs Memory 50 routes 10 race routes 500 waypoints Barometer Display range 300 to 1100 hPa 8 90 to 32 40 inHg Resolution 1hPa 0 05 inHg Thermometer Display range 20 C to 60 C 5 F to 140 F Resolution 1 C 1 F Compass Resolution 1 GPS Resolution 1m 3 ft 12 channels ...

Page 59: ...r For information about setting the correct GPS datum see section 3 2 7 Units Number Name Description 000 ADI M Mean Solution Ethiopian and Sudan 001 ADI E Burkina Faso 002 ADI F Cameroon 003 ADI A Ethiopia 004 ADI C Mali 005 ADI D Senegal 006 ADI B Sudan 007 AFG Somalia 008 ARF A Botswana 009 ARF H Burundi 010 ARF B Lesotho 011 ARF C Malawi 012 ARF D Swaziland 013 ARF E Zaire 014 ARF F Zambia 015...

Page 60: ...034 OEG Old Egypt 035 PTB Mean Solution Burkina Faso and Niger 036 PTN Congo 037 SCK Namibia 038 SRL Sierra Leone 039 VOR Algeria 040 AIN A Bahrain Island 041 AIN B Saudi Arabia 042 BAT Sumatra 043 EUR H Iran 044 HKD Hong Kong 045 HTN Taiwan 046 IND B Bangladesh 047 IND I India and Nepal 048 INF A Thailand 049 ING A Vietnam 050 ING B Con Son Island Vietnam 051 INH A1 Thailand 1997 ...

Page 61: ...h Korea 064 TOY A Japan 065 TOY C Okinawa 066 TOY B South Korea 067 AUA Australia and Tasmania Australian Geodetic 1966 068 AUG Australia and Tasmania Australian Geodetic 1984 069 EST Estonia 070 EUR M Mean Solution Europe 1950 071 EUR A Western Europe 1950 072 EUR E Cyprus 073 EUR G England Channel Islands Scotland and Shetland Islands 074 EUR K England Ireland Scotland and Shetland Islands 075 E...

Page 62: ...a 093 SPK D Latvia 094 SPK E Kazakhstan 095 SPK F Albania 096 SPK G Romania 097 CCD Czechoslovakia 098 CAC Mean Solution Florida and Bahamas 099 NAS C Mean Solution CONUS 100 NAS B Western USA 101 NAS A Eastern USA 102 NAS D Alaska excluding Aleutian islands 103 NAS V Aleutian islands East of 180deg W 104 NAS W Aleutian islands West of 180deg W 105 NAS Q Bahamas excluding San Salvador Island 106 N...

Page 63: ...NAR E Aleutian Islands 121 NAR B Canada 122 NAR C CONUS 123 NAR H Hawaii 124 NAR D Mexico and Central America 125 BOO Columbia 126 CAI Argentina 127 CHU Paraguay 128 COA Brazil 129 PRP M Mean Solution Bolivia Chile Columbia Ecuador Guyana Peru and Venezuela 130 PRP A Bolivia 131 PRP B Northern Chile near 19deg S 132 PRP C Southern Chile near 43deg S 133 PRP D Colombia 134 PRP E Ecuador 135 PRP F G...

Page 64: ...ame 153 AIA Antigua Leeward Islands 154 ASC Ascension Island 155 SHB St Helena Island 156 BER Bermuda Islands 157 DID Deception Island Antarctica 158 FOT Nevis St Kitts Leeward Islands 159 GRA Faial Graciosa Pico Sao Jorge and Terceira Islands Azores 160 ISG South Georgia Islands 161 LCF Cayman Brac Island 162 ASM Montserrat Leeward Islands 163 NAP Trinidad and Tobago 164 FLO Corvo and Flores Isla...

Page 65: ...rican Samoa Islands 180 ATF Iwo Jima 181 TRN Tern Island 182 ASQ Marcus Island 183 IBE Efate and Erromango Islands 184 CAO Phoenix Islands 185 CHI Chatham Islands New Zealand 186 GIZ Gizo Island New Georgia Islands 187 EAS Easter Islands 188 GEO New Zealand 189 GUA Guam 190 DOB Guadalcanal Island 191 JOH Johnston Island 192 KUS Caroline Islands Fed States of Micronesia 193 LUZ A Philippines exclud...

Page 66: ...ka and Belitung Islands 207 CAZ Camp McMurdo Area Antarctica 208 EUR S Iraq Israel Jordan Lebanon S Arabia and Syria 209 GSE Kalimantan Indonesia 210 HEN Afghanistan 211 HER Former Yugoslavia 212 IND P Pakistan 213 PUK Russia 214 TAN Madagascar 215 VOI Tunisia Algeria 216 VOI 2 Tunisia Algeria 217 YAC Uruguay 218 RT90 Sweden 254 KKJ Kartta Koordinaatisto Järjestelmä Finland 255 WGS84 Global WGS84 ...

Page 67: ...66 7 GLOSSARY ...

Page 68: ...g The distance traveled on a straight line from the starting point towards the destination Distance Made on Course dmc The distance traveled on the chosen course towards the destination Distance to lay line dll Distance to the optimal line towards a waypoint Distance to finish dtf Distance to the finish line Distance to start line dsl Distance to start line Estimated Time of Arrival eta The estima...

Page 69: ...One nautical mile equals 1852 meters Navigation Traveling between two locations on a route with knowledge of the current location in relation to the route Position Exact map coordinates of a given location Tack Direction of the vessel in relation to the wind Tack angle difference tad A change in the tack angle caused by the wind Time to Lay line ttl Time to reach an optimal line towards a waypoint...

Page 70: ...M9i navigation information Make sure all conflicting information is resolved before continuing with navigation This instrument is intended for recreational use only Do not use this instrument for obtaining measurements that require professional or industrial precision 9 COPYRIGHT AND TRADEMARK NOTICE This publication and its contents are proprietary to Suunto Oy and are intended solely for the use...

Page 71: ...aser and only covers failures due to defects in materials and workmanship that occur during normal use while in the period of the warranty It does not cover battery battery replacement damage or failures resulting in accident misuse neglect mishandling alteration or modifications of the product or any failure caused by operation of the product outside the scope of its published specifications or a...

Page 72: ...tributor for further information You can locate your local Suunto distributor in www suunto com 12 1 ONLINE WARRANTY REGISTRATION Suunto s dive computers and wristop computers can be registered online at www suunto com With our new online warranty registration service we ve removed the need for paperwork and trips to the mailbox by making it possible to register your Suunto device online in real t...

Page 73: ...ualified service technician if the problem cannot be corrected Operation is subject to the following conditions 1 This device cannot cause harmful interference and 2 this device must accept any interference received including interference that may cause undesired operation Repairs should be made by authorized Suunto service personnel Unauthorized repairs will void warranty WARNING Read this manual...

Page 74: ...SPOSAL OF THE DEVICE Please dispose of the device in an appropriate way treating it as electronic waste Do not throw it in the garbage If you wish you may return the device to your nearest Suunto representative ...

Page 75: ... and their logos are registered or unregistered trademarks of Suunto Oy All rights reserved While we have taken great care to ensure that information contained in this documentation is both comprehensive and accurate no warranty of accuracy is expressed or implied Its content is subject to change at any time without notice ...

Page 76: ...Suunto Oy 10 2002 12 2005 ...

Reviews: