


VISION
SUPREME FIREPLACES
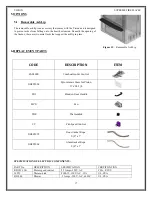
16
4.5.3 Chimney Installation Instructions
1.
Square holes providing a 2” minimum clearance to combustibles
from the chimney must be cut and framed in all ceilings, roof and
floors that the chimney will pass through.
2.
Install a firestop in every ceiling/floor or wall through which the
chimney passes. An attic radiation shield must be installed from
above at the attic level.
3.
Install the chimney support.
4.
Install the stove pipe.
5.
Consult the chimney manufacturer’s installation instructions and
install the chimney lengths. Lock each length in place.
6.
Install the roof support once the desired height is reached.
7.
Position the roof flashing. For sloping roofs, slide the top edge of the
flashing under the shingles. At least half of the flashing should be
under the shingles and the lower end over the shingles. Seal the joint
between the roof and the flashing with roofing cement or silicone.
Fix the flashing to the roof with roofing nails.
8.
Over the flashing, install the storm collar by tightening the bolt that
is supplied. Seal the joint using silicone caulking between the
chimney and the storm collar.
9.
Install the chimney rain cap.
WARNING: Do not seal or caulk the ventilating openings when
installing a ventilated roof flashing.
4.5.4 Typical Installations
The figure 14 is an example of typical chimney installations. Your installation may be different from this figure.
4.5.5 Offset Installation
In order to avoid obstacles or to extend the chimney outside, it is possible to offset the aforementioned by using elbows.
A maximum of two offsets (2 elbows per offset) is permitted.
The allowable maximum deviation is 45
o
in Canada and 30
o
in the US.
Secure the chimney parts according to the instructions given by the chimney manufacturer.
A support strap, a wall or a roof support must be installed above each offset in order to support the vertical length of the
chimney above the offset.
The chimney must extend vertically through a ceiling/floor. Do not install elbows in this area.
Use a support on the first 15 foot section.
To install an elbow:
1.
Turn the elbow in the direction needed and secure it to the chimney by following the chimney manufacturer’s
instructions.
2.
Follow the chimney manufacturer’s instructions to install the chimney lengths necessary for the offset.
3.
Secure a second elbow to turn the chimney in the vertical position.
4.
Cut and frame a hole in the ceiling and floor to allow the chimney to pass through.
5.
Install a firestop from below.
N.B.: Always install a ventilated flashing and a roof firestop, unless it is otherwise specified by the chimney
manufacturer.
Depending on the brand of the chimney support, an attic radiation shield may be required.
Figure 14
– Typical Chimney Installation


