SBI-7226T-T2 Blade Module User’s Manual
6-2
Items that use sub-menus are indicated with the
icon. With the item highlighted,
press the <E
NTER
> key to access the submenu.
The BIOS setup utility uses a key-based navigation system called hot keys. Most of
these hot keys (<F1>, <F10>, <E
NTER
>, <ESC>, <A
RROW
> keys, and so on) can be
used at any time during the setup navigation process. Press the <E
SC
> key to exit the
CMOS S
ETUP
menu.
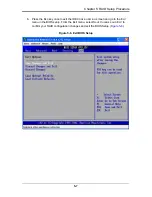
When you first enter the AMI BIOS Setup utility, you will see the M
AIN
M
ENU
screen. You
can always return to the M
AIN
M
ENU
by selecting the
Main
tab on the top of the screen
with the arrow keys. The M
AIN
M
ENU
screen provides you with a system overview, which
includes the version, built date and ID of the AMIBIOS, the type, speed and number of
the processors in the system and the amount of memory installed in the system.
System Time/System Date
You can edit the S
YSTEM
T
IME
/S
YSTEM
D
ATE
field to change the system time and date.
Highlight S
YSTEM
T
IME
or S
YSTEM
D
ATE
using the <A
RROW
> keys. Enter new values
through the keyboard. Press the <T
AB
> key or the <A
RROW
> keys to move between
fields.
The date must be entered in
DAY/MM/DD/YYYY
format. The time is entered in
HH:MM:SS
format. Please note that time is in a 24-hour format. For example, 5:30 A.M.
appears as 05:30:00 and 5:30 P.M. as 17:30:00.
6-3
Advanced Settings Menu
Choose
Advanced
from the BIOS Setup Utility main menu with the arrow keys. The
items with a triangle beside them have sub menus that can be accessed by highlighting
the item and pressing <E
NTER
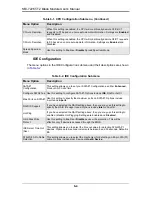
>. Below is a list of all submenus in the A
DVANCED
S
ETTINGS
menu:
•
CPU & Clock Configuration
•
IDE Configuration
•
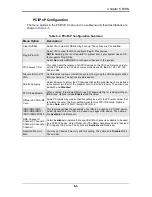
PCI/PnP Configuration
•
Super IO Configuration
•
Chipset Configuration
•
ACPI Configuration
•
AHCI Configuration
•
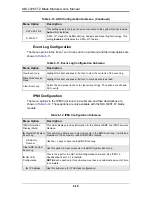
Event Log Configuration
•
IPMI Configuration
•
Intel VT-d Configuration
•
MPS Configuration
•
PCI Express Configuration
•
SMBIOS Configuration
•
Remote Access Configuration
•
System Health Monitor
Summary of Contents for SBI-7226T-T2
Page 1: ...SBI 7226T T2 Blade Module User s Manual Revison 1 0a...
Page 4: ...SBI 7226T T2 Blade Module User s Manual iv Notes...
Page 8: ...SBI 7226T T2 Blade Module User s Manual viii Notes...
Page 10: ...SBI 7226T T2 Blade Module User s Manual x Notes...
Page 12: ...SBI 7226T T2 Blade Module User s Manual xii Notes...
Page 18: ...SBI 7226T T2 Blade Module User s Manual 1 6 Notes...
Page 22: ...SBI 7226T T2 Blade Module User s Manual 2 4 Notes...
Page 32: ...SBI 7226T T2 Blade Module User s Manual 3 10 Figure 3 7 Installing a Hard Drive in a Carrier...
Page 44: ...SBI 7226T T2 Blade Module User s Manual 4 10...
Page 68: ...SBI 7226T T2 Blade Module User s Manual 6 16 Notes...
Page 78: ...SBI 7226T T2 Blade Module User s Manual A 10 Notes...


