


5-8
AS1021M-T2R User's Manual
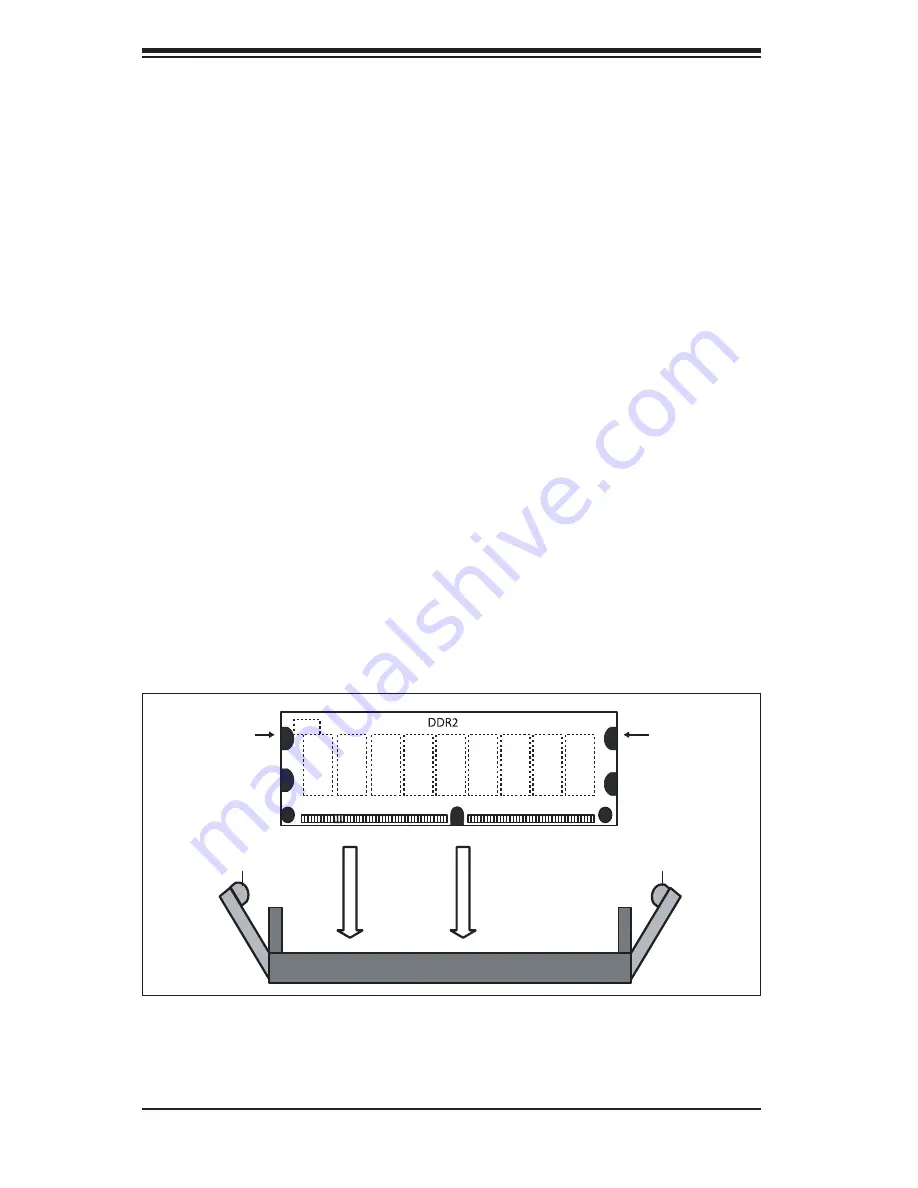
Figure 5-3a. Installing DIMM into Slot
To Install: Insert module vertically and press down until it snaps into place. Pay attention to
the
bottom
notch.
To Remove: Use your thumbs to gently push each release tab outward to free the DIMM from
the slot.
Memory Support
The H8DMR-i2 supports single or dual-channel, registered ECC DDR2-667/533/400
SDRAM.
Both interleaved and non-interleaved memory are supported, so you may populate
any number of DIMM slots (see note on previous page and charts on following
page). The CPU2 DIMM slots can only be accessed when two CPUs are installed
(however, the CPU2 DIMM slots are not required to be populated when two CPUs
are installed).
Populating two adjacent slots at a time with memory modules of the same size and
type will result in interleaved (128-bit) memory, which is faster than non-interleaved
(64-bit) memory. See charts on following page.
Optimizing memory performance
If two processors are installed, it is better to stagger pairs of DIMMs across both
sets of CPU DIMM slots, e.g. fi rst populate CPU1 slots 1A and 1B, then CPU2 slots
1A, and 1B, then the next two CPU1 slots, etc. This balances the load over both
CPUs to optimize performance.
Maximum memory (two CPUs)
: 16 GB for DDR2-667/533, 32 GB for DDR2-400.
If only one CPU is installed, maximum supported memory is halved (8 or 16 GB).
Note: Notch
should align
with its
receptive point
on the slot
Notch
Notch
Release
Tab
Release
Tab
Summary of Contents for AS1021M-T2R
Page 1: ...AS1021M T2R USER S MANUAL 1 0a SUPER ...
Page 5: ...v Preface Notes ...
Page 10: ...Notes x AS1021M T2R User s Manual ...
Page 25: ...Chapter 2 Server Installation 2 9 Figure 2 5 Accessing the Inside of the System ...
Page 30: ...3 4 AS1021M T2R User s Manual Notes ...
Page 70: ...6 10 AS1021M T2R User s Manual Figure 6 6 Removing Replacing the Power Supply ...
Page 90: ...A 2 AS1021M T2R User s Manual Notes ...


