background image

C

ontaCt

 I

nformatIon


•  www.supermicro.com (Email: [email protected])

•  Manuals: http://www.supermicro.com/support/manuals

•  Drivers & Utilities: https://www.supermicro.com/wftp/driver/

•  Safety: http://www.supermicro.com/about/policies/safety_information.cfm

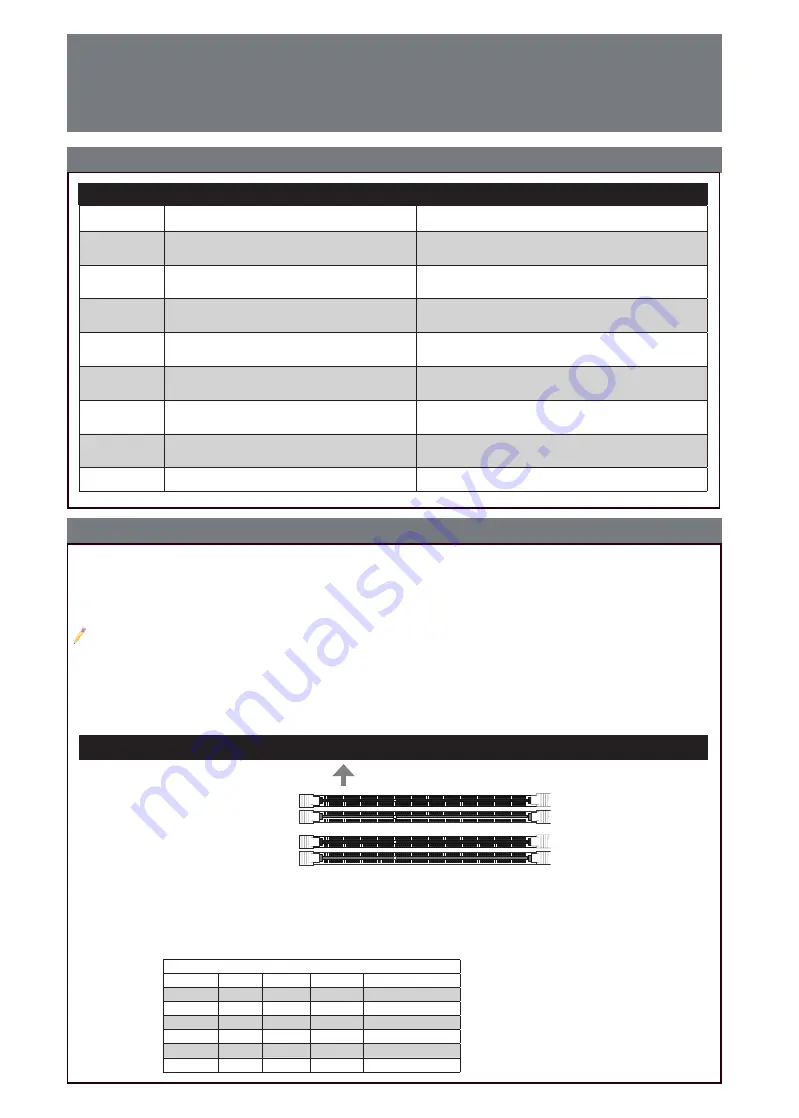
The C9Z390-PGW supports an 8th/9th Gen Intel® Core

TM

 i9/i7/i5/i3/Pentium®/Celeron® processor, up to 64GB 

of Unbuffered non-ECC UDIMM, 4000+MHz (OC) to 2666MHz/2400MHz (by CPU) in four 288-pin memory slots. 

Populating these DIMM slots with a pair of memory modules of the same type and size will result in interleaved 

memory, which will improve memory performance.

Note

: 1) For memory optimization, use only DIMM modules that have been validated by Supermicro. For the latest memory updates, please

           refer to our website at http://www.supermicro.com/products/motherboard.
        2) Always connect the power cord last, and always remove it before adding, removing or changing any hardware components.
        3) Only use an 8th/9th Gen Intel® Core

TM

 i9/i7/i5/i3/Pentium®/Celeron® processor to boot up, otherwise system will not be powered on.

        4) Overheating can seriously damage CPU and motherboard. Always make sure cooling fans function properly to protect CPU

           from overheating.

LED Indicators

LED Indicators

CPU & Memory Support

CPU & Memory Support

 Towards the CPU

Memory Population Guidelines

When  installing  memory  modules,  the  DIMM  slots  should  be  populated  in  the  following  order:  DIMMA2,  DIMMB2, 

then DIMMA1, DIMMB1.

• 

Always use DDR4 DIMM modules of the same size, type, and speed. 

• 

Mixed DIMM speeds can be installed. However, all DIMMs will run at the speed of the slowest DIMM.

Recommended Population (Balanced) 

DIMMB2

DIMMA2

DIMMB1

DIMMA1

Total System Memory

4GB

4GB

8GB

4GB

4GB

4GB

4GB

16GB

8GB

8GB

16GB

8GB

8GB

8GB

8GB

32GB

16GB

16GB

32GB

16GB

16GB

16GB

16GB

64GB

DIMMB2 

(Gray Slot)

DIMMA2 

(Gray Slot)

DIMMA1 

(Black Slot)

DIMMB1 

(Black Slot)

DIMM Memory Installation

LED

Description

Color/State

BOOT LED

Bootable Device POST (Power-On Self-Test)

Status

Bootable Device POST: 

Red ON                           

Bootable Device POST 

Completion: OFF

CPU LED

CPU POST (Power-On Self-Test) Status

CPU POST: 

Yellow ON                                                 

CPU POST 

Completion: OFF

DIMM LED

DIMM POST (Power-On Self-Test) Status

DIMM POST: 

Blue ON                                               

DIMM POST 

Completion: OFF

VGA LED

Onboard VGA POST (Power-On Self-Test) Status

Onboard VGA POST: 

Green ON                                             

Onboard VGA POST 

Completion: OFF

LED1

Power On

: Green On


S3 (Suspend to RAM) LED

Power On: Green On

S3: Green Blinking

LED2

PCI-E M.2 Connector 2 LED

PCI-E Device Detected: Green ON                             

Activity: Green Blinking 

LED3

PCI-E M.2 Connector 1 LED

PCI-E Device Detected: Green ON                             

Activity: Green Blinking 

LED4

Diagnostic LED

Digital Readout 

Summary of Contents for Supero C9Z390-PGW

Page 1: ...C9Z390 PGW a...

Page 2: ...this section in its entirety before installing or configuring components in the Supermicro chassis Battery Handling Warning There is a danger of explosion if the battery is replaced incorrectly Replac...

Page 3: ...chemical symbols Declaration of the Presence Condition of the Restricted Substances Marking Note 1 Exceeding 0 1 wt and exceeding 0 01 wt indicate that the percentage content of the restricted substa...

Page 4: ...rted 0x55 No Memory detected or memory failed 0x63 CPU DXE initialization is started 0x69 North Bridge DXE initialization is started 0x70 South Bridge DXE initialization is started 0x92 PCI Bus initia...

Page 5: ...Removal M 2 Device Installation and Removal Instructions Note Please do not install PCH M 2 heat spreaders when any one of the M 2 modules has a heatsink installed Version A Both Lanes Version B Singl...

Page 6: ...t Front Speaker Out Line In Line In Line In Line Out Front Speaker Out Front Speaker Out Front Speaker Out Orange Center Subwoofer Side Speaker Out Center Subwoofer Center Subwoofer Black Surround Pin...

Page 7: ...d with 12V on the cable connector Align the arrow with the 12V pin of RGB LED header Once they are aligned carefully install the cable into the header Failure to do so may have no impact on motherboar...

Page 8: ...PCIE M 2 M2 SYS_FAN2 HD AUDIO CPU SLOT7 PCI E 3 0 X16 SYS_FAN3 USB 6 7 3 1 LAN1 USB 4 5 3 1 LAN2 DIMMB2 DIMMB1 DIMMA2 DIMMA1 POWER BUTTON SYS_FAN1 RESET BUTTON CLEAR CMOS CPU_FAN1 CPU_FAN2 KB MOUSE US...

Page 9: ...onnects to I O cover s RGB board JRLED2 connects to PCH RGB board JRLED3 JRLED4 External 12V RGB strip Headers Please see page 7 for RGB LED light strip installation JSD1 SATA DOM Disk On Module Power...

Page 10: ...ors LED Indicators CPU Memory Support CPU Memory Support Towards the CPU Memory Population Guidelines When installing memory modules the DIMM slots should be populated in the following order DIMMA2 DI...

Page 11: ...tors memory support and CPU motherboard installation instructions Front Control Panel JF1 CPU Installation Heatsink Installation Heatsink with Fan Motherboard Mounting Hole Back Panel I O Connectors A...

Page 12: ...X8 IN X 16 PCIE M 2 M2 SYS_FAN2 HD AUDIO CPU SLOT7 PCI E 3 0 X16 SYS_FAN3 USB 6 7 3 1 LAN1 USB 4 5 3 1 LAN2 DIMMB2 DIMMB1 DIMMA2 DIMMA1 POWER BUTTON SYS_FAN1 RESET BUTTON CLEAR CMOS CPU_FAN1 CPU_FAN2...

Page 13: ...b JD1 1 4 3 4 JF1 JL1 JLED1 LED JPW1 24 ATX JPW2 12 8 CPU JRLED1 JRLED2 JRLED1 RGB PCH RGB JRLED2 RGB I O JRLED3 JRLED4 12V RGB RGB LED light strip JSD1 SATA DOM JSTBY1 JTPM1 TPM KB MOUSE PS 2 LAN1 LA...

Page 14: ...reTM i9 i7 i5 i3 Pentium Celeron Unbuffered DIMM non ECC DDR4 64GB 4000 MHz 2666MHz 2400MHz CPU 288 LED DIMMB2 DIMMA2 DIMMA1 DIMMB1 DIMM LED BOOT LED POST POST POST CPU LED CPU BIOS POST CPU POST CPU...

Page 15: ...t Button 2 HDD LED POWER LED Reset PWR POWER LED Ground Ground X X HDD LED NIC2 LED Overheat Fan Fail LED 15 16 NIC1 LED NIC1 LED A B C D E F G H I J K L M N O P Q R S C9Z390 PGW A PS 2 F RJ45 1GbE 1...

Page 16: ...X8 IN X 16 PCIE M 2 M2 SYS_FAN2 HD AUDIO CPU SLOT7 PCI E 3 0 X16 SYS_FAN3 USB 6 7 3 1 LAN1 USB 4 5 3 1 LAN2 DIMMB2 DIMMB1 DIMMA2 DIMMA1 POWER BUTTON SYS_FAN1 RESET BUTTON CLEAR CMOS CPU_FAN1 CPU_FAN2...

Page 17: ...1 1 4 3 4 JF1 JL1 JLED1 LED JPW1 24 ATX JPW2 8 CPU JRLED1 JRLED2 RGB LED JRLED1 PCH RGB JRLED2 RGB JRLED3 JRLED4 12V RGB RGB LED light strip JSD1 SATA DOM JSTBY1 JTPM1 TPM KB MOUSE PS 2 LAN1 LAN2 RJ45...

Page 18: ...ST VGA POST LED1 S3 Suspend to RAM LED S3 LED2 PCI E M 2 M2 LED3 PCI E M 2 M1 LED4 LED C9Z390 PGW Intel CoreTM i9 i7 i5 i3 Pentium Celeron Unbuffered non ECC DDR4 64GB 4 4000 MHz 2666MHz 2400MHz CPU 2...

Page 19: ...LED POWER LED Reset PWR POWER LED Ground Ground X X HDD LED NIC2 LED Overheat Fan Fail LED 15 16 NIC1 LED NIC1 LED A B C D E F G H I J K L M N O P Q R S C9Z390 PGW A PS 2 F RJ45 1GbE LAN1 K USB7 3 1...

Page 20: ...X8 IN X 16 PCIE M 2 M2 SYS_FAN2 HD AUDIO CPU SLOT7 PCI E 3 0 X16 SYS_FAN3 USB 6 7 3 1 LAN1 USB 4 5 3 1 LAN2 DIMMB2 DIMMB1 DIMMA2 DIMMA1 POWER BUTTON SYS_FAN1 RESET BUTTON CLEAR CMOS CPU_FAN1 CPU_FAN2...

Page 21: ...SATA0 5 Intel Z390 ATA SATA 3 0 0 5 6Gb sec JD1 1 4 3 4 JF1 JL1 JLED1 LED JPW1 24 pin ATX JPW2 12V 8 pin CPU JRLED1 JRLED2 JRLED1 I O RGB JRLED2 PCH RGB JRLED3 JRLED4 12V RGB RGB LED 7 JSD1 SATA DOM D...

Page 22: ...ducts motherboard 2 3 8 9 Intel CoreTM i9 i7 i5 i3 Pentium Celeron 4 CPU CPU LED LED CPU CPU DIMM DIMMA2 DIMMB2 DIMMA1 DIMMB1 DDR4 DIMM DIMM DIMM DIMM DIMMB2 DIMMA2 DIMMB1 DIMMA1 Total System Memory 4...

Page 23: ...Power Button Overheat Fan Fail LED 1 NIC2 LED Reset Button 2 HDD LED POWER LED Reset PWR POWER LED Ground Ground X X HDD LED NIC2 LED Overheat Fan Fail LED 15 16 NIC1 LED NIC1 LED JF1 CPU I O A PS 2...

Page 24: ...X8 IN X 16 PCIE M 2 M2 SYS_FAN2 HD AUDIO CPU SLOT7 PCI E 3 0 X16 SYS_FAN3 USB 6 7 3 1 LAN1 USB 4 5 3 1 LAN2 DIMMB2 DIMMB1 DIMMA2 DIMMA1 POWER BUTTON SYS_FAN1 RESET BUTTON CLEAR CMOS CPU_FAN1 CPU_FAN2...

Page 25: ...tel Z390 ATA SATA 3 0 0 5 6Gb sec JD1 1 4 3 4 JF1 JL1 JLED1 LED JPW1 24 ATX JPW2 8 CPU JRLED1 JRLED2 RGB LED 5V JRLED1 PCH RGB JRLED2 I O JRLED3 JRLED4 RGB LED 12V P7 JSD1 SATA DOM Disk On Module JSTB...

Page 26: ...o com products motherboard 2 3 8 9 Intel CoreTM i9 i7 i5 i3 Pentium Celeron 4 FAN CPU LED LED BOOT LED POST POST ON POST CPU LED CPU POST CPU POST ON DIMM LED POST POST ON VGA LED VGA POST VGA POST ON...

Page 27: ...it is not guaranteed JF1 CPU I O A PS 2 F 1GbE LAN 1 K USB 3 1 Gen2 7 P S PDIF B USB 3 1 Gen1 2 G USB 3 1 Gen2 4 Type A L WIFI BT Q C USB 3 1 Gen1 3 H USB 3 1 Gen2 5 Type C M HDMI R D 1 I 10GbE LAN 2...

Page 28: ...C9Z390 PGW QUICK REFERENCE GUIDE Notes...

Page 29: ...C9Z390 PGW QUICK REFERENCE GUIDE Notes...

Page 30: ...C9Z390 PGW QUICK REFERENCE GUIDE Notes...

Page 31: ...C9Z390 PGW QUICK REFERENCE GUIDE Notes...

Page 32: ...C9Z390 PGW QUICK REFERENCE GUIDE Notes...

Page 33: ...C9Z390 PGW QUICK REFERENCE GUIDE Notes...

Page 34: ...a...

Reviews: