background image

3-3

Chapter 3: Installation

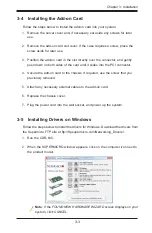
3-4   Installing the Add-on Card

Follow the steps below to install the add-on card into your system.

1.  Remove the server cover and, if necessary, set aside any screws for later 

use.

2.  Remove the add-on card slot cover. If the case requires a screw, place the 

screw aside for later use.

3.  Position the add-on card in the slot directly over the connector, and gently 

push down on both sides of the card until it slides into the PCI connector.

4.  Secure the add-on card to the chassis. If required, use the screw that you 

previously removed.

5.  Attach any necessary external cables to the add-on card.

6.  Replace the chassis cover.

7.  Plug the power cord into the wall socket, and power up the system.

3-5   Installing Drivers on Windows

Follow the steps below to install the drivers for Windows. Download the drivers from 
the Supermicro FTP site at ftp://ftp.supermicro.com/Networking_Drivers/.

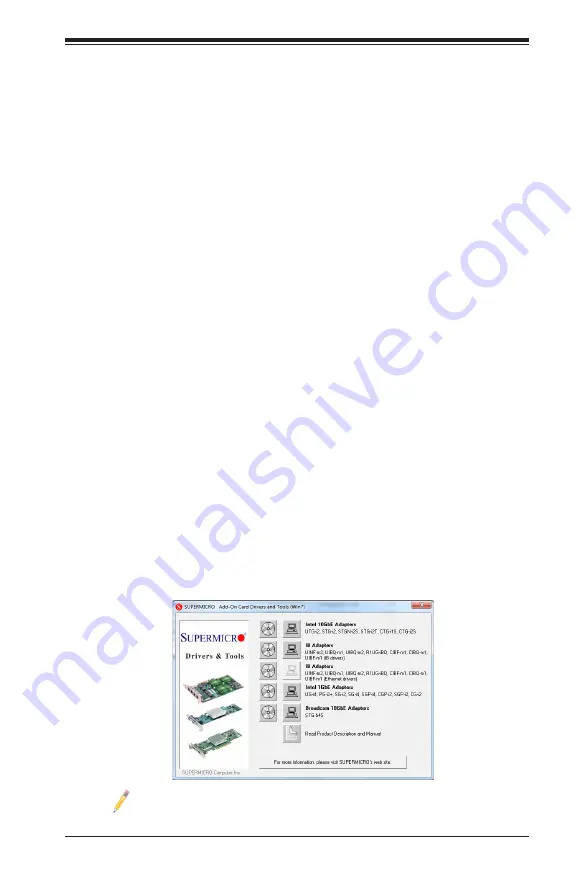
1.  Run the CDR-NIC.

2.  When the SUPERMICRO window appears, click on the computer icon next to 

the product model.

Note

: If the 

FOUND NEW HARDWARE WIZARD

 screen displays on your 

system, click CANCEL.

Summary of Contents for Supero AOC-CTG-i1S

Page 1: ...User s Guide Revision 1 0b AOC CTG i1S...

Page 2: ...IBILITY OF SUCH DAMAGES IN PARTICULAR SUPER MICRO COMPUTER INC SHALL NOT HAVE LIABILITY FOR ANY HARDWARE SOFTWARE OR DATA STORED OR USED WITH THE PRODUCT INCLUDING THE COSTS OF REPAIRING REPLACING INT...

Page 3: ...of publishing The card you have received may or may not look exactly the same as the graphics shown in this user s guide Returning Merchandise for Service A receipt or copy of your invoice marked with...

Page 4: ...T 10GbE Standard LP PCI E x8 Intel X540 2 RJ45 10Gb port 5 9 14 99cm x 2 73 6 9cm 13 STGN i2S 10GbE Standard LP PCI E x8 Intel 82599ES 2 SFP 10Gb port 4 0 10 2cm x 2 73 6 9cm 11 2 STGN i1S 10GbE Stand...

Page 5: ...Super Micro Computer B V Het Sterrenbeeld 28 5215 ML s Hertogenbosch The Netherlands Tel 31 0 73 6400390 Fax 31 0 73 6416525 Email sales supermicro nl General Information support supermicro nl Technic...

Page 6: ...1 2 Chapter 2 Hardware Components 2 1 Add On Card Image and Layout 2 1 2 2 Major Components 2 1 2 3 Connectors and PCB LEDs 2 2 USB Ports 2 2 SFP Port 2 2 SFP PCB LEDs 2 2 Chapter 3 Installation 3 1...

Page 7: ...website at http www supermicro com products nfo networking cfm adapter 1 2 Key Features The key features of this add on card include the following Single SFP Connector MicroLP form factor PCI Express...

Page 8: ...MA engine that enhances data acceleration and lowers CPU usage Direct Cache Access DCA to avoid cache misses MSI X support to minimize the overhead of interrupts allowing load balancing between multip...

Page 9: ...etwork Monitoring RMON statistics counters iSCSI remote boot OS Support Windows 7 2003 2008 2008 R2 Vista RedHat EL SuSe SLES FreeBSD 8 0 VMware Cables Support SFP direct attached twin axial cables up...

Page 10: ...e fiber cables up to 3000m AOC TSR FS SFP transceiver module for short range fiber cables up to 300m AOC GBIC FSR2 SFP transceiver module for short range fiber cables up to 300m single speed 10Gb CBL...

Page 11: ...o Twin Server Systems with microLP expansion slot see table below Notes 1 1U Bracket 2 2U Bracket This product is only available as an integrated solution with Supermicro server systems For the most c...

Page 12: ...1 6 AOC CTG i1S Add on Card User s Guide Notes...

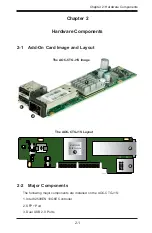
Page 13: ...Add On Card Image and Layout The AOC CTG i1S Image The AOC CTG i1S Layout 1 2 2 Major Components The following major components are installed on the AOC CTG i1S 1 Intel 82599EN 10GbE Controller 2 SFP...

Page 14: ...out on Page 2 1 for the location of the SFP port USB Ports Two USB 2 0 ports are located on the add on card Refer to the add on card layout on page 2 1 for the location of the USB ports SFP PCB LEDs T...

Page 15: ...dd on card by its edges only do not touch its components or peripheral chips Put the add on card back into the antistatic bags when not in use For grounding purposes make sure that your system chassis...

Page 16: ...57L Factory installed I O bracket BKT 0058L Customer installed I O bracket for 2U system For 2U System For 1U System 3 3 Before Installation To install the add on card properly be sure to follow the i...

Page 17: ...he PCI connector 4 Secure the add on card to the chassis If required use the screw that you previously removed 5 Attach any necessary external cables to the add on card 6 Replace the chassis cover 7 P...

Page 18: ...configuration of the installed kernel sources If you have just recompiled the kernel reboot the system at this time Follow the instructions below to build the driver manually 1 Move the base driver ta...

Page 19: ...xample insmod lib modules KERNEL VERSION kernel drivers net ixgbe ixgbe ko In addition when using 2 6 based kernels make sure that older ixgbe drivers are removed from the kernel before loading the ne...

Page 20: ...IP address to the interface enter the following ifconfig ixgb interface_num IP_address 6 Verify that the interface works Enter the following where IP_address is the IP address for another machine on t...

Page 21: ...s conf files i386 file and add the following line dev ixgb ixgb_hw c optional ixgb dev ixgb ixgb_ee c optional ixgb dev ixgb if_ixgb c optional ixgb Remove the following lines from the usr src sys con...

Page 22: ...3 8 AOC CTG i1S Add on Card User s Guide Notes...

Page 23: ...expected to result in significant injury or loss of life or catastrophic property damage Accordingly Supermicro disclaims any and all liability and should buyer use or sell such products for use in su...

Reviews: