USER’S MANUAL
Revision 1.0
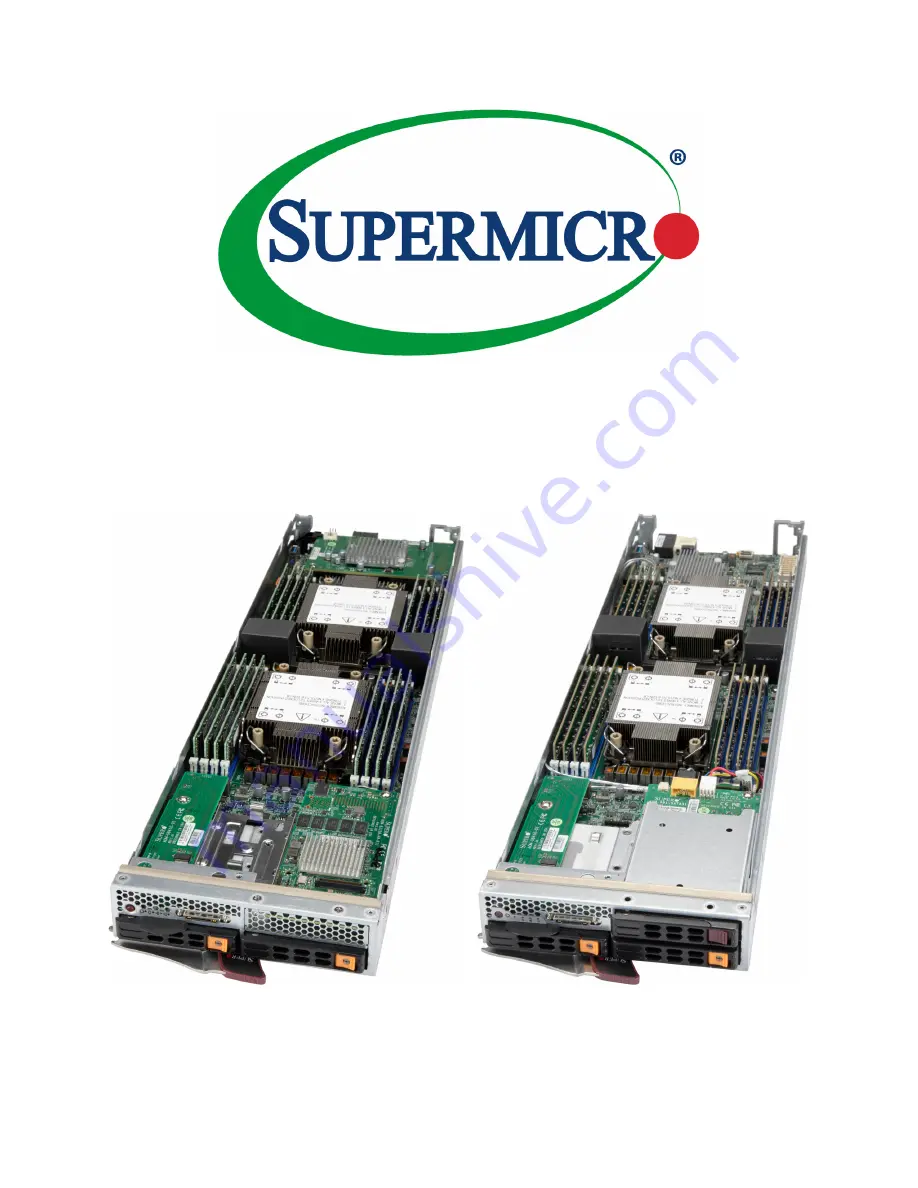
SuperBlade Server
SBI-420P-1C2N SBI-420P-1T3N
Page 1: ...USER S MANUAL Revision 1 0 SuperBlade Server SBI 420P 1C2N SBI 420P 1T3N...
Page 2: ...ss A device or in residential environment for Class B device This equipment generates uses and can radiate radio frequency energy and if not installed and used in accordance with the manufacturer s in...
Page 3: ...nd utilities https www supermicro com wftp Product safety info http www supermicro com about policies safety_information cfm If you have any questions contact our support team at support supermicro co...
Page 4: ...wering Up or Down 16 Powering Up a Blade Unit 16 Powering Down a Blade Unit 16 2 4 Processor and Heatsink Installation 17 The Processor Carrier Assembly 18 The Processor Heatsink Module PHM 20 Install...
Page 5: ...the Server Air Flow 44 Overheating 44 3 4 CMOS Clear 44 3 5 Where to Get Replacement Components 45 3 6 Returning Merchandise for Service 45 Chapter 4 Motherboard Connections 4 1 Motherboard Layout 46...
Page 6: ...om Europe Address Super Micro Computer B V Het Sterrenbeeld 28 5215 ML s Hertogenbosch The Netherlands Tel 31 0 73 6400390 Fax 31 0 73 6416525 Email sales supermicro nl General Information support sup...
Page 7: ...e Add on Module SBI 420P 1T3N SATA NVMe hybrid ports AOM SB1 SATA31 SBI 420P 1C2N SAS NVMe hybrid ports AOM B3108 H8 B11 In addition several important parts are listed below Main Parts List Descriptio...
Page 8: ...ipset Intel C621A Memory Sixteen slots for up to 2TB of 3DS LRDIMM LRDIMM 3DS RDIMM RDIMM DDR4 ECC memory with speeds of 3200 2933 2666MT s DIMM size up to 128G at 1 2V Storage Drives SBI 420P 1C2N Tw...
Page 9: ...ME SAS or SATA the drive carriers display status lights 3 Storage Drive SBI 420P 1T3N only one hot swap 2 5 drive bay for SATA 4 KVM Keyboard video mouse connector 5 Service Asset Tag Pull out identif...
Page 10: ...Green Power on Flashing amber Before the BMC is ready blinks until every node is ready 3 KVM UID LED Steady blue Indicates that KVM has been initialized Flashing blue Unit IDentifier indicator The UI...
Page 11: ...11 Chapter 1 Introduction 1 4 Components Figure 1 4 Components Labeled see next page 3 8 2 2 SBI 420P 1C2N SBI 420P 1T3N 1 3 5 6 4 7...
Page 12: ...DIMM slots 4 Air Shrouds Direct air flow 5 Module SBI 420P 1C2N only enables Broadcom 3108 RAID controller 6 Module SBI 420P 1T3N only provides SATA for third drive 7 Chipset Motherboard chipset 8 Mez...
Page 13: ...inux may be mixed together in the same blade enclosure 2 1 Unpacking the System Inspect the box the system was shipped in and note if it was damaged in any way If any equipment appears damaged please...
Page 14: ...ade Unit Installing a Blade Unit into the Enclosure Make sure the cover of the blade unit is on before insertion Installing a Blade Unit into the Enclosure 1 Pull open the blade locking handle and slo...
Page 15: ...onboard battery etc To remove the cover remove the screw as illustrated below Slide the cover toward the rear and lift it off To replace the cover fit the six studs on the inside of the cover into th...
Page 16: ...by the use of the onboard BMC chip in the blade module Powering Down a Blade Unit A blade unit may be powered down in any of the following ways Press the power button on the blade unit Use IPMIView or...
Page 17: ...rd Check that the plastic protective cover is on the blade CPU socket and that none of the socket pins are bent If they are contact your retailer When handling the processor avoid touching or placing...
Page 18: ...g down Locate the gold triangle at the corner of the processor and the corresponding hollowed triangle on the processor carrier as shown below These triangles indicate the location of pin 1 Latch Latc...
Page 19: ...processor under latch 1 on the carrier and then press the other end down until it snaps into latch 2 and is properly seated on the carrier Processor Carrier Assembly Top View Processor Carrier Assembl...
Page 20: ...the thermal grease facing up Note the two triangle cutouts A B located at the diagonal corners of the heatsink as shown in the drawing below 2 On the processor carrier assembly find pin 1 as noted by...
Page 21: ...llation and Setup Installing the PHM into the CPU Socket 1 Remove the plastic protective cover from the CPU socket Gently squeeze the grip tabs then pull the cover off CPU Socket with Plastic Protecti...
Page 22: ...fasteners a b c d on the CPU socket 3 Locate four PEEK nuts A B C D and four rotating wires 1 2 3 4 on the heatsink as shown below 4 Check that the rotating wires 1 2 3 4 are in the unlatched position...
Page 23: ...the CPU socket making sure that each nut is properly aligned with its corresponding threaded fastener Latched State Top View 7 Press all four rotating wires outward to latch the PHM onto the CPU socke...
Page 24: ...CPU Socket Be sure the system is shut down and all AC power cords are unplugged 1 Use a t30 bit screwdriver to loosen the four PEEK nuts on the heatsink in the sequence of A B C and D 2 Press the fou...
Page 25: ...r Assembly from the PHM Detach the four plastic clips a b c d on the processor carrier assembly from the four corners of the heatsink A B C D as shown below and lift off the processor carrier assembly...
Page 26: ...the Carrier Assembly Unlock the lever from its locked position and push it upwards to disengage the processor from the carrier as shown below right Carefully remove the processor from the carrier Pro...
Page 27: ...for 83xx 63xx 53xx 43xx Processors Type Ranks Per DIMM and Data Width DIMM Capacity GB Speed MT s One Slot per Channel DRAM Density One DIMM per Channel 4 Gb 8 Gb 1 2 Volts RDIMM SRx8 8GB 16GB 3200 S...
Page 28: ...nd capacity results in interleaved memory which improves memory performance Use memory modules of the same type and speed as mixing is not allowed x4 and x8 DIMMs can be mixed in the same channel Mixi...
Page 29: ...C1 E1 F1 G1 CPU2 A1 B1 E1 F1 2 CPUs 12 DIMMs CPU1 A1 B1 C1 E1 F1 G1 CPU2 A1 B1 C1 E1 F1 G1 2 CPUs 14 DIMMs CPU1 A1 B1 C1 D1 E1 F1 G1 H1 CPU2 A1 B1 C1 E1 F1 G1 2 CPUs 16 DIMMs CPU1 A1 B1 C1 D1 E1 F1 G1...
Page 30: ...power from the system as described in Section 3 1 Follow the memory population sequence in the table above 1 Push the release tabs outwards on both ends of the DIMM slot to unlock it Notches Release...
Page 31: ...cator and a status indicator For RAID configurations using a controller the meaning of the status indicator is described in the table below For OS RAID or non RAID configurations some LED indications...
Page 32: ...ng a Hot Swap Drive Carrier from the Chassis 1 Press the release button shown below as 1 on the drive carrier which will extend the drive carrier handle 2 Use the drive carrier handle to pull the driv...
Page 33: ...wn and the connector end toward the rear of the carrier 3 Tilt the drive to insert it onto the two posts on the right inside of the carrier 4 Pull out the two spring locking clasps and allow the drive...
Page 34: ...Server Health NVMe SSD 2 Select Device Group and Slot and click Eject After ejecting the drive Status LED indicator turns green 3 Remove the drive Note that Device and Group are categorized by the CP...
Page 35: ...an NVMe Drive There are two ways to check using IPMI Checking a Drive IPMI Server Health NVMe SSD Shows the temperatures of all NVMe drives as in Figure 2 6 IPMI Server Health Sensor Reading NVME_SSD...
Page 36: ...ff for a plastic clasp Figure 2 7 Installing M 2 SSD Installing an M 2 SSD Caution Use industry standard anti static equipment such as gloves or wrist strap and follow precautions to avoid damage caus...
Page 37: ...begin the installation Installing by using PXE Boot common method Preboot Execution Environment PXE is used to boot a computer over a network To install the OS via PXE the following conditions must b...
Page 38: ...as SDA This is normal since in this case the connection for SATA HDDs is from two different controllers So under Native IDE mode which is the default your Linux OS will see one drive as HDA and the ot...
Page 39: ...erred Another option is to go to the Supermicro website at http www supermicro com products Find the product page for your motherboard and Download the Latest Drivers and Utilities Insert the flash dr...
Page 40: ...t Platform Management Interface IPMI IPMI provides remote access monitoring and management through the baseboard management controller BMC and other management controllers distributed among different...
Page 41: ...lacing the Battery Begin by removing power from the system as described in section 3 1 1 Push aside the small clamp that covers the edge of the battery When the battery is released lift it out of the...
Page 42: ...stem Cooling Installing the Air Shrouds Air shrouds concentrate airflow to maximize fan efficiency Installing the Standard Air Shrouds Position the air shrouds as illustrated in the figure below slidi...
Page 43: ...covers are installed properly Make sure all fans are present and operating normally Check the routing of the cables Verify that the heatsinks are installed properly 3 4 CMOS Clear JBT1 is used to clea...
Page 44: ...he RMA number should be prominently displayed on the outside of the shipping carton and mailed prepaid or hand carried Shipping and handling charges will be applied for all orders that must be mailed...
Page 45: ...CH BMC LAN CTRL BMC Memory CPLD0 DA5 MB PWR 25G Midplane Dual Boot for CPLD CPLD Flash VROC CPLD DA4 M 2 MH BMC Flash BAR CODE MAC CODE REV 1 00 B12DPT 6 P2 DIMMC1 P2 DIMMF1 P2 DIMME1 P2 DIMMH1 P2 DIM...
Page 46: ...SB 2 0 support via Cable CBL 0218L JLED HDD2 SATA Activity LED JM2 1 M 2 MH M 2 slot PCIe 4 0 x4 and M 2 Mounting Hole M 2 MH JTPM1 Trusted Platform Module Port 80 connector MEZZ1 MEZZ2 PCI Mezzanine...
Page 47: ...2933 3200 DDR4 2666 2933 3200 DDR4 2666 2933 3200 DDR4 2666 2933 3200 DDR4 2666 2933 3200 DDR4 2666 2933 3200 DDR4 2666 2933 3200 DDR4 2666 2933 3200 DDR4 2666 2933 3200 DDR4 CPU2 D1 2666 2933 3200 D...
Page 48: ...WM Control TPM Header The JTPM1 header is used to connect a Trusted Platform Module TPM Port 80 which is available from Supermicro A TPM Port 80 connector is a security device that supports encryption...
Page 49: ...n Definition 1 Ground 2 3 3V Standby 3 Ground 4 PCH_RAID_KEY I SATA 3 0 Port for SBI 420P 1T3N The motherboard has one SATA 3 0 port I SATA1 which is supported by the Intel C621A PCH Connect this port...
Page 50: ...r is on both pins and Open indicates the jumper is either on only one pin or has been completely removed Connector Pins Jumper Setting 3 2 1 3 2 1 JBT1 contact pads ME Recovery JPME1 is used for ME Fi...
Page 51: ...Connections 4 5 LED Indicators BMC Heartbeat LED LEDM1 is a BMC Heartbeat indicator It blinks green when the BMC is working properly M 2 Activity LED LED1 is an M 2 Activity indicator When it is blin...
Page 52: ...e When an option is selected it is highlighted in white Settings printed in Bold are the default values In the left frame a indicates a submenu Highlighting such an item and pressing the Enter key ope...
Page 53: ...e keyboard Press the Tab key or the arrow keys to move between fields The date must be entered in MM DD YYYY format The time is entered in HH MM SS format Note The time is in the 24 hour format For ex...
Page 54: ...ion ACPI Settings Trusted Computing SIO Common Settings T1s Auth Configuration All Cpu Information RAM Disk Configuration iSCSI Configuration IPv4 Network Configuration VLAN Network Configuration IPv6...
Page 55: ...pter 5 UEFI BIOS 55 Boot Boot Mode Select Delete Boot Option Delete Driver Optioni UEFI Application Boot Priorities UEFI NETWORK Drive BBS Priorityies Save Exit Save Options Default Options Boot Overr...
Page 56: ...w RAM failed at offset nnnn of the 64k block at which the error was detected System RAM Failed at offset nnnn System RAM failed at offset nnnn of in the 64k block at which the error was detected Exten...
Page 57: ...RAM cache failed and BIOS disabled the cache On older boards check the cache jumpers You may have to replace the cache See your dealer A disabled cache slows system performance considerably CPU ID CP...
Page 58: ...ss and display it on the screen If it cannot locate the address it displays Press F1 to resume F2 to Setup F3 for previous Displayed after any recoverable error message Press F1 to start the boot proc...
Page 59: ...04h Get CPU type 06h Initialize system hardware 07h Disable shadow and execute code from the ROM 08h Initialize chipset with initial POST values 09h Set IN POST flag 0Ah Initialize CPU registers 0Bh E...
Page 60: ...ix Dispatch Manager 36h Warm start shut down 38h Shadow system BIOS ROM 3Ah Auto size cache 3Ch Advanced configuration of chipset registers 3Dh Load alternate registers with CMOS values 41h Initialize...
Page 61: ...s 67h Initialize Multi Processor APIC 68h Enable external and CPU caches 69h Setup System Management Mode SMM area 6Ah Display external L2 cache size 6Bh Load custom defaults optional 6Ch Display shad...
Page 62: ...rmine number of ATA drives optional 90h Initialize hard disk controllers 91h Initialize local bus hard disk controllers 92h Jump to UserPatch2 93h Build MPTABLE for multi processor boards 95h Install...
Page 63: ...y MultiBoot menu BEh Clear screen optional BFh Check virus and backup reminders C0h Try to boot with INT 19 C1h Initialize POST Error Manager PEM C2h Initialize error logging C3h Initialize error disp...
Page 64: ...l POST Errors Code Description E0h Initialize the chipset E1h Initialize the bridge E2h Initialize the CPU E3h Initialize system timer E4h Initialize system I O E5h Check force recovery boot E6h Check...
Page 65: ...etects error 2C 2E or 30 base 512K RAM error it displays an additional word bitmap xxxx indicating the address line or bits that failed For example 2C 0002 means address line 1 bit one set has failed...
Page 66: ...ment for assistance Only certified technicians should attempt to install or configure components Read this appendix in its entirety before installing or configuring components in the Supermicro chassi...
Page 67: ...er equipo considere los riesgos de la corriente el ctrica y familiar cese con los procedimientos est ndar de prevenci n de accidentes Al final de cada advertencia encontrar el n mero que le ayudar a e...
Page 68: ...at werken dient u zich bewust te zijn van de bij een elektrische installatie betrokken risico s en dient u op de hoogte te zijn van de standaard procedures om ongelukken te voorkomen Gebruik de nummer...
Page 69: ...de alimentaci n Attention Avant de brancher le syst me sur la source d alimentation consulter les directives d installation Circuit Breaker Waarschuwing Raadpleeg de installatie instructies voordat u...
Page 70: ...orrientes del edificio Aseg rese de que el dispositivo de protecci n no sea superior a 250 V 20 A Attention Pour ce qui est de la protection contre les courts circuits surtension ce produit d pend de...
Page 71: ...entes de energ a y del cable el ctrico quitado de los m dulos de fuente de alimentaci n antes de tener acceso el interior del chasis para instalar o para quitar componentes de sistema Attention Le sys...
Page 72: ...rdelen dient u alle spanningsbronnen en alle stroomkabels aangesloten op de voeding en van de behuizing te verwijderen Equipment Installation Warning Only trained and qualified personnel should be all...
Page 73: ...ation in restricted access areas A restricted access area can be accessed only through the use of a special tool lock and key or other means of security This warning does not apply to workstations Adv...
Page 74: ...acceso a una de estas reas mediante la utilizaci n de una herramienta especial cerradura con llave u otro medio de seguridad Attention Cet appareil doit tre install e dans des zones d acc s r serv s L...
Page 75: ...type semblable ou quivalent recommand e par le fabricant Jeter les piles usag es conform ment aux instructions du fabricant Advertencia Existe peligro de explosi n si la bater a se reemplaza de maner...
Page 76: ...ikant aanbevolen wordt Gebruikte batterijen dienen overeenkomstig fabrieksvoorschriften afgevoerd te worden Redundant Power Supplies Warning This unit might have more than one power supply connection...
Page 77: ...at stroomloos te maken Advertencia Puede que esta unidad tenga m s de una conexi n para fuentes de alimentaci n Para cortar por completo el suministro de energ a deben desconectarse todas las conexion...
Page 78: ...tung Advertencia Cuando el sistema est en funcionamiento el voltaje del plano trasero es peligroso Tenga cuidado cuando lo revise Attention Lorsque le syst me est en fonctionnement des tensions lectri...
Page 79: ...o debe cumplir con las normas de electricidad locales y nacionales Backplane Waarschuwing Een gevaarlijke spanning of energie is aanwezig op de backplane wanneer het systeem in gebruik is Voorzichtigh...
Page 80: ...nationale elektriciteitsvoorschriften Warnung Die Entsorgung dieses Produkts sollte gem allen Bestimmungen und Gesetzen des Landes erfolgen Warning Ultimate disposal of this product should be handled...
Page 81: ...t ou le recyclage de ce produit sont g n ralement soumis des lois et ou directives de respect de l environnement Renseignez vous aupr s de l organisme comp tent Hot Swap Fan Warning Warning Hazardous...
Page 82: ...los destornilladores y todos los objetos lejos de las aberturas del ventilador Attention Pieces mobiles dangereuses Se tenir a l ecart des lames du ventilateur Il est possible que les ventilateurs so...
Page 83: ...zen von UL oder CAS zertifizierten Kabeln mit UL CSA gekennzeichnet an Ger ten oder Produkten die nicht mit Supermicro gekennzeichnet sind AC AC UL CSA UL CSA Supermicro Supermicro UL CSA UL CSA Super...
Page 84: ...qu sur le code pour tous les autres appareils lectriques sauf les produits d sign s par Supermicro seulement AC AC UL CSA UL CSA Supermicro UL CSA UL CSA Supermicro Advertencia Cuando instale el produ...
Page 85: ...chaffen Aansluitmethode deze moet altijd voldoen aan de lokale voorschriften en veiligheidsnormen inclusief de juiste kabeldikte en stekker Het gebruik van niet geschikte Kabels en of Adapters kan een...
Page 86: ...tel Rapid Storage Technology enterprise Intel RSTe Driver for Linux Windows https downloadcenter intel com download 28108 Intel Virtual RAID on CPU Intel VROC and Intel Rapid Storage Technology enterp...
Page 87: ...ROC Keys VROC Package Description Part Number Intel MM Number Standard RAID 0 1 10 Supports 3rd party SSDs AOC VROCSTNMOD 951605 Premium RAID 0 1 5 10 Supports 3rd party SSDs AOC VROCPREMOD 951606 Int...
Page 88: ...e Restrictions and Requirements section on a previous page 2 Reboot the server and press DEL key to enter BIOS 3 Switch to Advanced Chipset Configuration North Bridge IIO Configuration Intel VMD Techn...
Page 89: ...g Intel VMD controller 6 Select the desired PCIe slot to Enable or Disable Intel VMD functionality according to the current hardware configuration being used Hot Plug Capability can also be Enabled or...
Page 90: ...k on each CPU to be enabled or disabled In this example we enabled CPU1 Slot1 Figure C 5 and CPU2 Slot5 Figure C 6 our 4x U 2 form factor SSDs as well as CPU1 M 2 C 1 and CPU1 M2 C 2 our 2x M 2 form f...
Page 91: ...el R Virtual RAID on CPU All Intel VMD Controllers Create RAID Volume 10 Set Name 11 Set RAID Level 12 If cross controller RAID is required select Enable RAID spanned over VMD Controller 13 Select spe...
Page 92: ...emove the device Hot plug Physically install the device ESXi will automatically discover NVMe SSDs but a manual scan may be required in some cases Related Information Links 1 https kb vmware com s art...
Page 93: ...therboard B12DPT 6 Chassis MCP 680 41001 0N WxHxD 1 75 x 6 5 x 23 5 in 44 5 x 165 x 597 mm Storage Drives SBI 420P 1C2N Two hot swap 2 5 SAS or NVMe SBI 420P 1T3N Two hot swap 2 5 SATA or NVMe and one...
Page 94: ...61000 4 6 EN 61000 4 8 EN 61000 4 11 Green Environment 2011 65 EU RoHS Directive EC 1907 2006 REACH 2012 19 EU WEEE Directive Product Safety 2014 35 EU LVD Directive UL CSA 60950 1 62368 1 USA and Ca...