


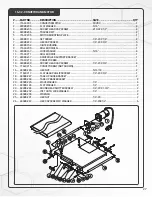


14
INSTALLING AND WRAPPING ABRASIVES (CONTINUED)
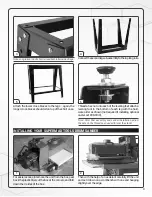
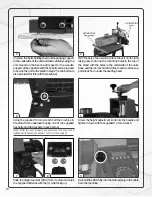
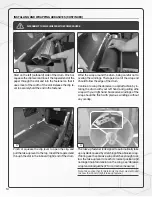
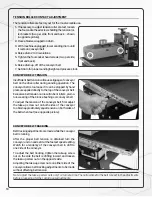
Pinch or squeeze the clip lever to open the clip, and
pull the take-up lever to the top. Insert the tapered end
through the slot in the inboard (right) end of the drum.
The take-up fastener is designed to automatically take
up any slack caused by stretching of the abrasive wrap.
If during use the abrasive wrap stretches enough to al-
low the take-up lever to reach its lowest position and
no longer maintain tension on the wrap, see "Abrasive
wrap tension adjustment" for corrective measures.
Note: Take notice that for detail only the drum was removed
to show the inboard (right) take-up fastener.
3
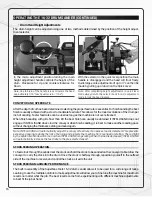
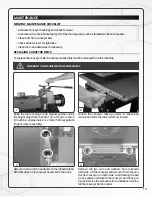
Start on the left (outboard) side of the drum. Pinch or
squeeze the clip lever and insert the tapered end of the
paper through the slot and into the fastener so that it
uses most of the width of the slot. Release the clip le-
ver to securely hold the end in the fastener.
Wind the wrap around the drum, being careful not to
overlap the windings. The tapered cut of the wrap end
should follow the edge of the drum.
Continue to wrap the abrasive in a spiral fashion by ro-
tating the drum with your left hand and guiding athe
wrap with your right hand. Successive windings of the
wrap should be flush with previous windings without
any overlap.
1
2
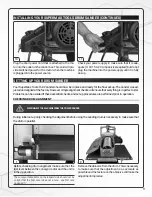
DISCONNECT THE MACHINE FROM THE POWER SOURCE.
4
Summary of Contents for 16-32
Page 23: ...23 16 32 WIRING DIAGRAM...
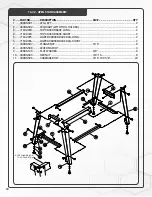
Page 26: ...16 32 HEAD ASSEMBLY 26...
Page 29: ...NOTES 29...
Page 30: ...P 1 888 454 3401 F 1 651 454 3465 SuperMaxTools com sales SuperMaxTools com...


