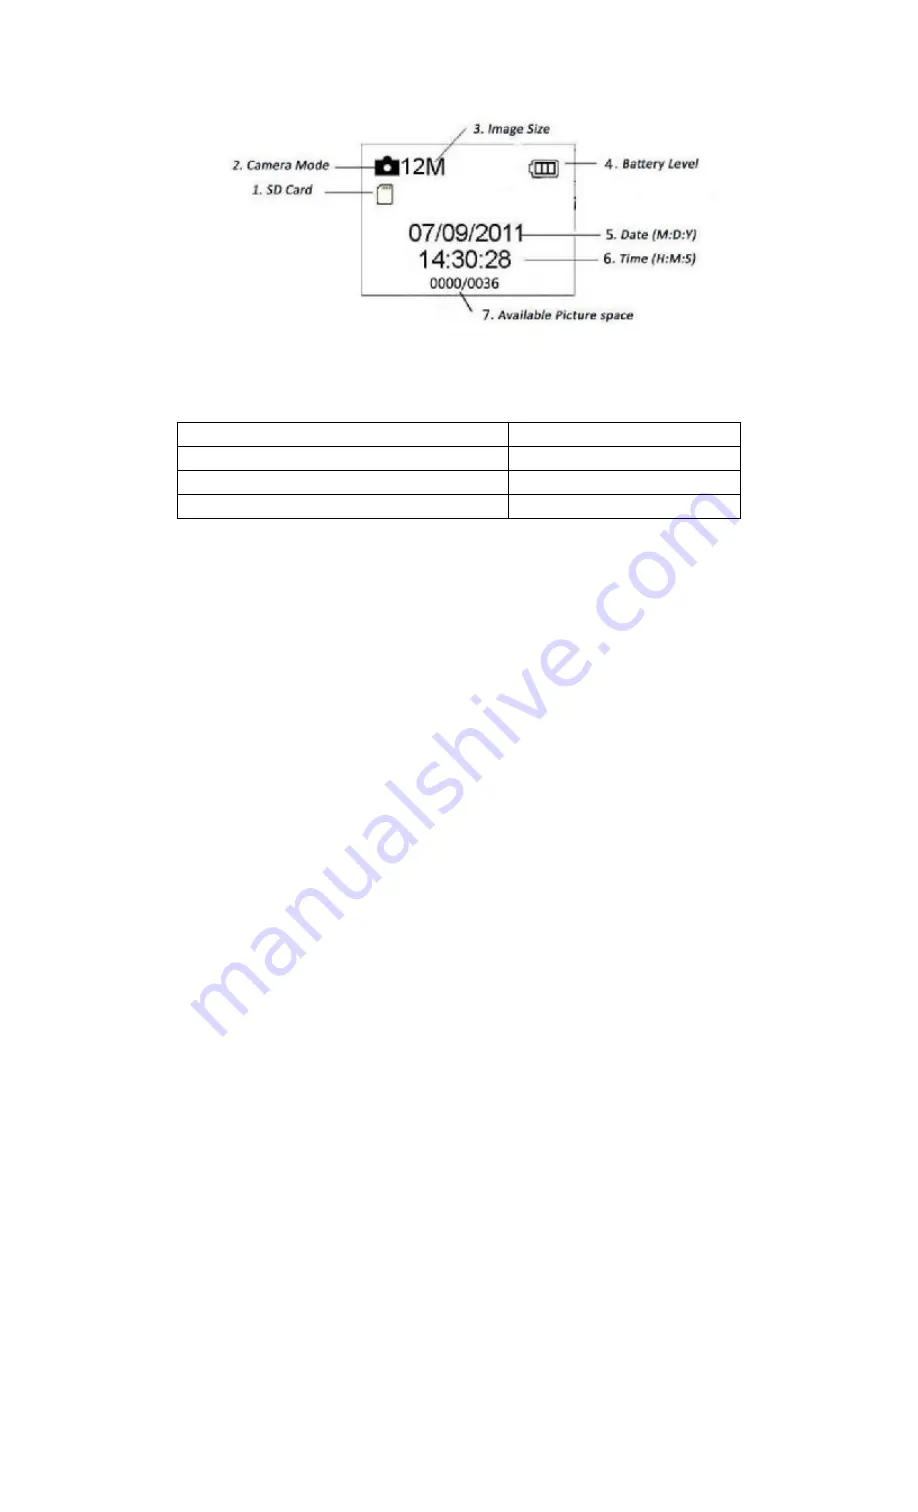
Suntek HC-300A User Manual Download Page 5

ENG-5 


1.6


Supported Format 

Item 

Format 

Photo 

JPG 

Video 

AVI 

File Format 

FAT32 

Here are some important notices. You don

t need to concern about the file system 

format of the camera unless you have problems with reading the SD-card by your other 
equipment. If this happened, please format the SD-card in the camera or in a computer 
at first and then reinsert the card into your camera to make a try. 

2.Cautions 

> The working voltage of the camera is 9.0V. The camera is supplied by four or 8X AA 
batteries.   
> Please unlock the write-protect before inserting the SD-card.   
Please insert the SD-card when the power switch is at OFF position before Config the 
camera.   
> Please do not insert or take out the SD-card when the power switch is at ON position.   
It is recommended to format the SD-card by the camera when used at the first time.   
> The camera will be in USB mode when connected to a USB port of a computer. In this 
case, the SD-card functions as a removable disk.   
> Please ensure sufficient power when having firmware upgrade, otherwise the upgrade 
process could be interrupted incorrectly. If any fault occurs after improper upgrading 
process, the camera may stop function properly.   
 

Summary of Contents for HC-300A

Page 1: ...ENG 1 User Manual HC 300A ...

Page 2: ...es or Videos 7 3 5 Power Off 7 4 Advanced Operations 7 4 1 Settings Menu 7 4 1 1Photo Setting 8 4 1 2Video Setting 8 4 1 3 System Setting 9 4 1 4Default 9 4 1 4 General Settings 9 4 1 5 Set Camera Mode 10 4 1 6 Format SD Card 10 4 1 7 Set Photo Size 10 4 1 8 Set Video Size 11 4 1 9 Set Date and Time 11 4 1 10 Set Multi 12 4 1 11 Set ISO 12 4 1 12 Set Video Length 12 4 1 13 Set Video Sound 12 4 1 1...

Page 3: ...e the unit begins to take color photos and video until there is insufficient light dusk when it begins to take infrared monochrome photos and video It is easy to use there is a 2 0 inch colorful LCD display on camera It is resistant against water and snow for outside uses 1 2 Camera Body Interface The camera has the following I O interfaces USB connector SD card slot TV output Take a few moments t...

Page 4: ...e or video directly 2 Press directly the picture or video recorded can be viewed 3 Viewing picture press or 4 Viewing video press to play press again to stop press to return 1 5 Shooting Information Display When the camera is turned on the power switch is slid to CONFIG position the shooting information will be displayed in the monitor ...

Page 5: ...r 8X AA batteries Please unlock the write protect before inserting the SD card Please insert the SD card when the power switch is at OFF position before Config the camera Please do not insert or take out the SD card when the power switch is at ON position It is recommended to format the SD card by the camera when used at the first time The camera will be in USB mode when connected to a USB port of...

Page 6: ... marked side upwards Please note that the SD card can only be plugged in one direction Make sure that the write protect switch of the SD card is on the write position 3 3 Power on and Enter into the ON Mode Before switching on please pay attention to the following 1 Avoid temperature and motion disturbances that could be construed as animals or humans such as trees that are exposed to direct sunli...

Page 7: ...like deleting images or videos will be described in Advanced Operations chapter 3 5 Power Off Slide the power switch to OFF position to power off the camera Please note that even in the OFF mode the camera still consumes certain power at µA level Therefore please remove the battery if the camera will not be used for a long time 4 Advanced Operations From the basic operations of the camera in previ...

Page 8: ...ENG 8 4 1 1Photo Setting 4 1 2Video Setting ...

Page 9: ... 720P WVGA QVGA Video Length 10s 10s 30s 60s 90s Date Time Same as last time YY MM DD MM DD YY DD MM YY Adjust Distance High Low Medium High Language English English French Germany Spanish Russian Danish Dutch Poland Portuguese Swedish Italian Finnish Timer 0 0 0 to 23 59 59 Adjust Format Internal Memory Internal Memory SD Card Password Off Off On 4 1 4 General Settings The operating steps are sui...

Page 10: ...tant data a Press to display the setting menu b Press to select System setting c Press to select Format d Press to select SD Card e Press the select switch to choose Enter to enter into submenu f Press to select OK OK will be highlighted g Press to start formatting the SD card During formatting the display screen will show a message Please Wait as below Press MENU to cancel setting and return to i...

Page 11: ...ent setting then press menu to return to info display Press to cancel setting and return to info display 4 1 9 Set Date and Time You can change the date and time of the device by setting this parameter when necessary e g after every battery change The date format is day month year the time format is hour minute second The valid value for year is between 2010 and 2050 Provided that the date and tim...

Page 12: ...and press to save the setting 4 1 11 Set ISO This menu could only help you get a better photo at night there are 4 values Auto 100 200 400 a Press to display the setting menu under CAMERA column b Press to select ISO 100 200 400 selectable c Press to save the current setting 4 1 12 Set Video Length The following shows how to set video length to 30 Seconds provided that the previous value is 10 Sec...

Page 13: ...in to the interval setting d Press to select 1 minute e Press to save the current setting and then press to return to info display 4 1 15 Set Timer This parameter defines a certain time lapse in a day when The Camera can be triggered In the rest of the time the device is shut off The effective value of the hour ranges from 0 to 23 while the minute ranges from 0 to 59 Provided that the camera shoul...

Page 14: ...e named folder File numbering continues by adding one to the last number for each new image or video The saving name is like PTDC0001 JPB or PTDC0001 AVI Through the suffix you can distinguish whether the file is an image with suffix jpg or a video with suffix avi 4 4 Firmware Upgrade This camera is equipped with an automatic upgrade function for you Upgrading is needed only when an improved firmw...

Page 15: ...d 1314 Triggering Interval 1 second 30mins default 1 sec Selectable Image Resolution 12MP 8MP 5MP Multiple Frame 1 3 6 9 Video Resolution 1080P 720P VGA File Format JPEG AVI Date Time Imprint Yes Moon Phase Imprint Yes Exposure Auto Device Serial No 4 Digits and 26 alphabet set by yourself Default camera ID CAM000 Periodic shot 1Second 24Hours Stand by current 0 2mA Stand by time 3Months 8 AA batt...

Reviews: