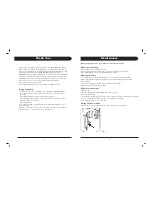
Parts
5
Operation - Mechanical Models
8
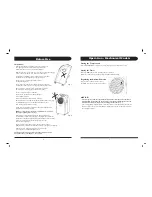
Turning ON/OFF
Set TIMER to ON for continuous operation
(the unit will operate as long as it is not turned off).
Power indicator comes on.
To turn off the unit, turn the TIMER to the OFF position
Setting Function / Ventilation Speed
WA-7500M
Turn the speed switch to select the required setting:
LOW FAN, HIGH FAN, LOW COOL, HIGH COOL
SPEED OFF
Low Fan
High Fan
High Cool
Low Cool
SPEED
1. Power indicator
2. Fan operating indicator
3. Cooling operating indicator
4. Full water indicator
5. Thermostat
6. Speed switch with options for - LOW FAN,
HIGH FAN, LOW COOL, HIGH COOL
7. Timer (1-8 hours) as well as ON/OFF switch
WA-7500M
10
11
12
13
14
15
1. Control Panel
2. Cooling Air Outlet
3. Handle
4. Castors
5. Air Filter
6. Air Inlet
7. Exhaust Air Outlet
8. Cord Hanger
9. Water Stopper (Rubber Plug inside)
Accessories
10. Adaptor - for insertion over the
hose and into the back of the
air conditioner
11. Exhaust Hose
12. Foam Strip - for filling the open
window space and with a hole for
connection to the exhaust hose
13. Foam Strip - for filling the open
window space
14. Round Connector - to be used
between hose and window kit or
between hose and wall
15. Cap - for round connector


