

5
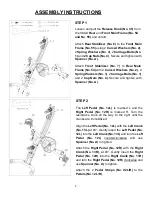
ASSEMBLY INSTRUCTIONS
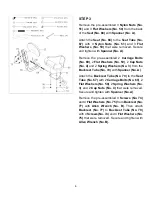
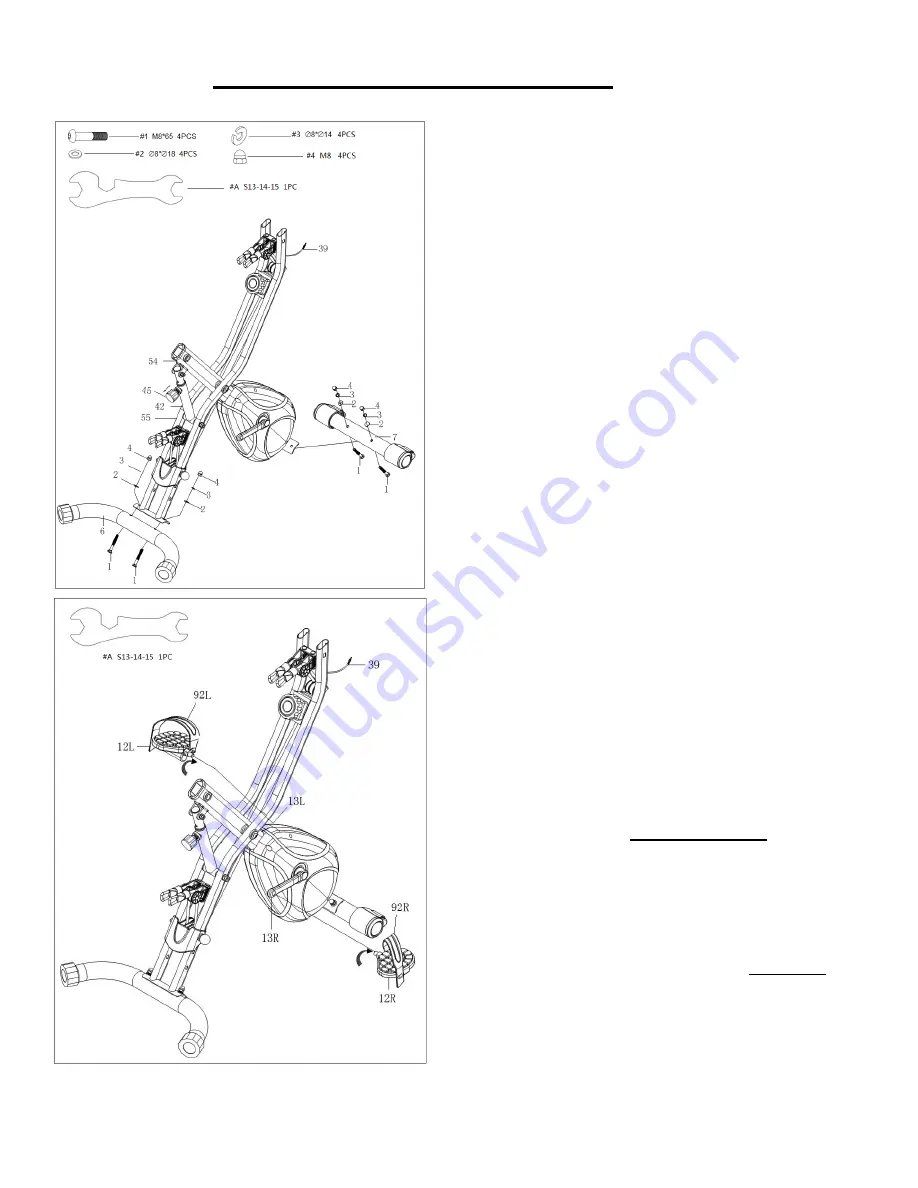
STEP 1
Loosen and pull the
Release Knob (No. 45)
from
the folded
Rear
and
Front
Main Frame (No. 54
and No. 55)
and unfold.
Attach
Rear Stabilizer (No. 6)
to the
Front Main
Frame
(No. 55)
using 2
Curved Washers (No. 2)
,
2
Spring Washers (No. 3)
, 2
Carriage Bolts (No.
1)
and
2 Cap Nuts (No. 4)
. Secure and tighten with
Spanner (No. A)
.
Attach
Front Stabilizer (No. 7)
to
Rear Main
Frame (No. 54)
with 2
Curved Washers (No. 2)
, 2
Spring Washers (No. 3)
, 2
Carriage Bolts (No. 1)
and 2
Cap Nuts (No. 4)
. Secure and tighten with
Spanner (No. A)
.
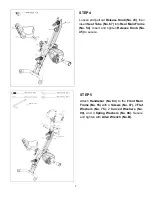
STEP 2
The
Left Pedal (No. 12L)
is marked L and the
Right Pedal (No. 12R)
is marked R. Turn the
resistance knob all the way to the right until the
cranks are immobilized.
Align the
Left Pedal (No. 12L)
with the
Left Crank
(No. 13L)
at 90°. Gently insert the
Left Pedal (No.
12L)
into the
Left Crank (No. 13L)
and turn the
Left
Pedal (No. 12L)
counterclockwise
and use
Spanner (No. A)
to tighten.
Attach the
Right Pedal (No. 12R)
with the
Right
Crank (No. 13R)
, at 90°. Gently insert the
Right
Pedal (No. 12R)
into the
Right Crank (No. 13R)
and
turn the
Right Pedal (No. 12R)
clockwise
and
use
Spanner (No. A)
to tighten.
Attach the 2
Pedal Straps
(No. 92L/R)
to the
Pedals (No.12 L/R)
.


