Step 8: Plug the pre-assembled K into the tube connector on C as Fig. 8 show.
Step 9: Insert the end of three connector J1(J2) into the tube of L, and attach L to C with CC, GG and II as
Fig.9-1 show. Attach the hook on N to the connector of L as Fig. 9-2 show.
Step 10: Unscrew the nut on U downward as Fig. 10-1 show. Attach the U to C as Fig. 10-2 show.
Step 11: Connect the upper of M to E/ D/D 1 on G with AA/FF/HH as Fig. 11 show.
Step. 12: Connect the bottom part of M to A with BB/FF/HH as Fig. 12 show.
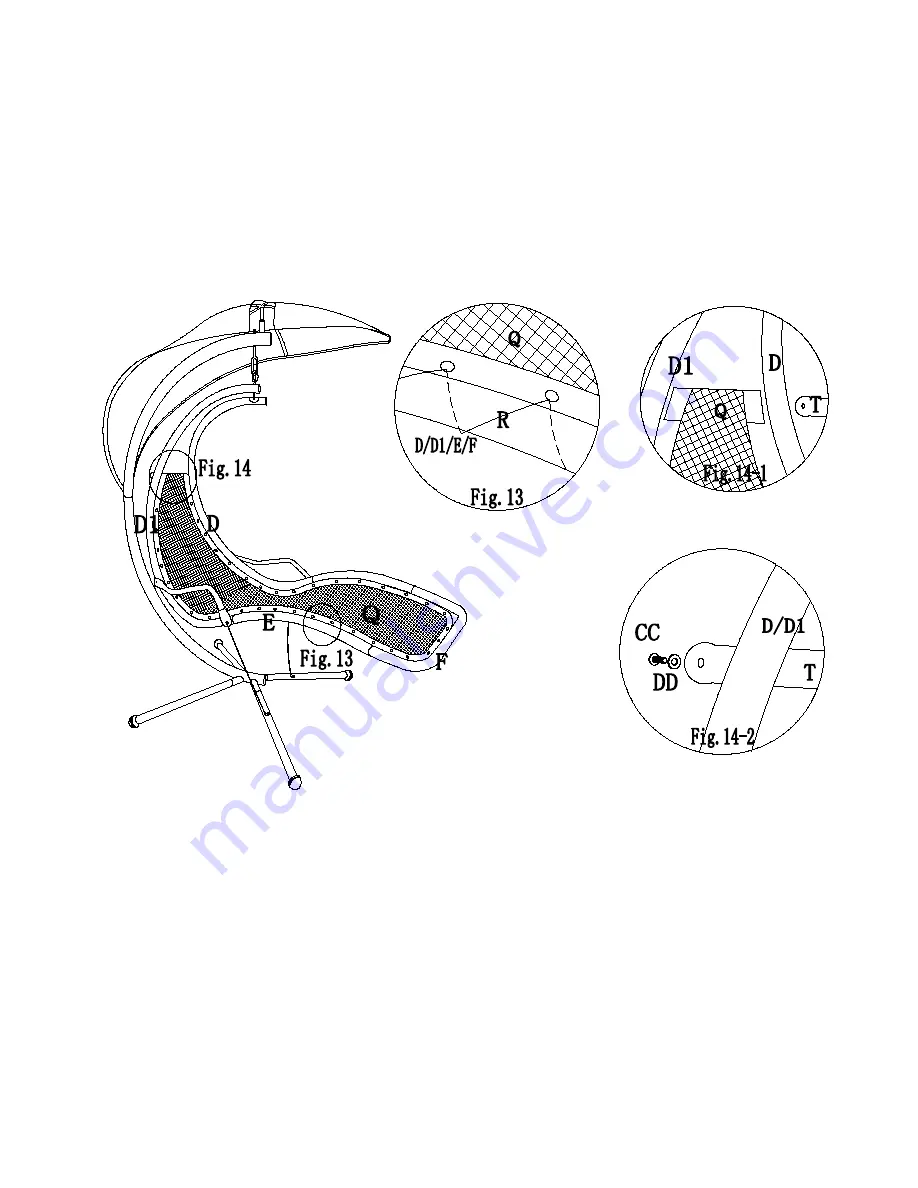
Step 13: Have rope R cross through the holes on Q, hang Q on the U shape F on the connector E of D/D1 as
Fig. 13 show. (Note: the end of the Rope should be at the place where it start on the lower part of T)
Step 14: Have the connector tube T throgh Q as Fig. 14-1 show, lock T on D/D1 with CC/DD as Fig. 14-2 show.


