10
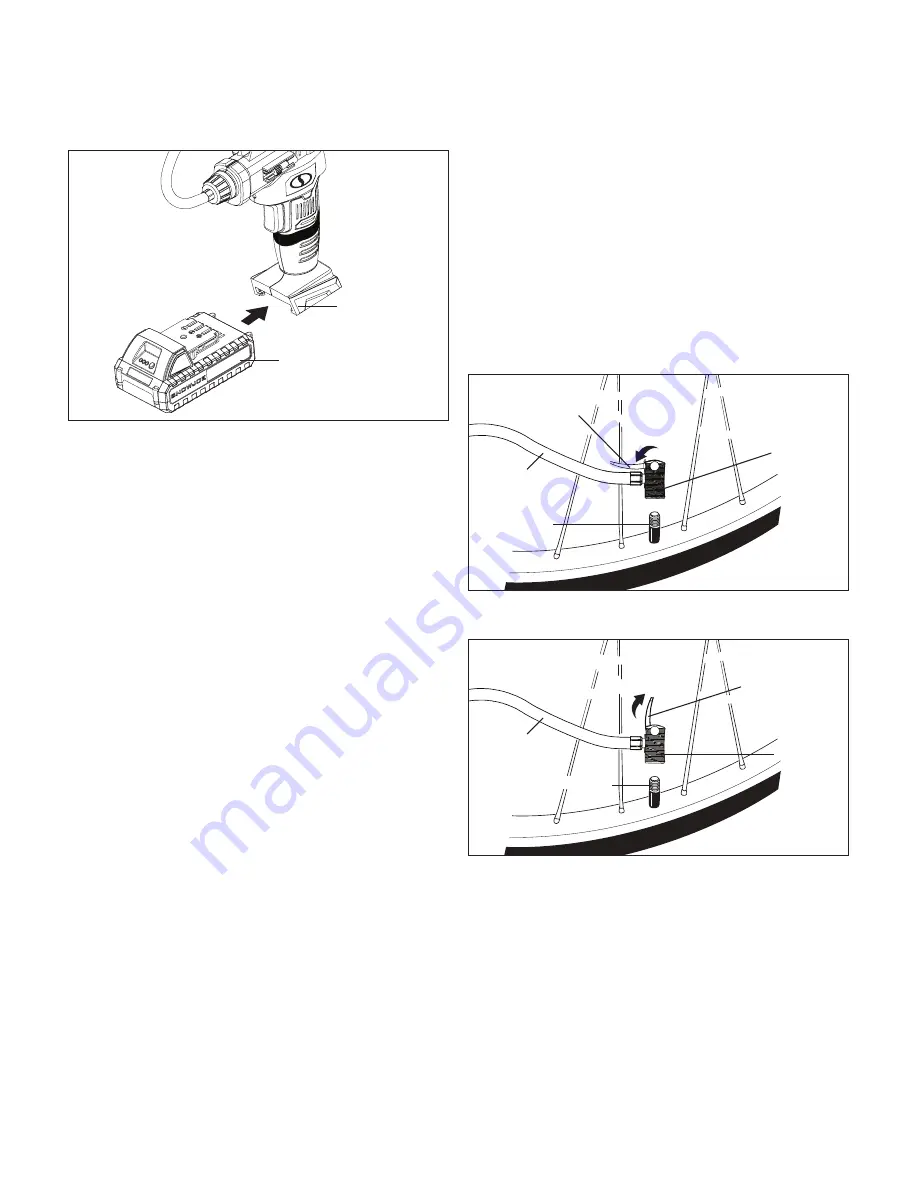
4. Slide the battery into the battery compartment until it
clicks to lock it into position (Fig. 5).
Operation
m
WARNING!
Always wear safety goggles when
operating the air compressor. Failure to do so could result
in objects being thrown into your eyes, resulting in possible
serious injury.
m
WARNING!
Do not use any attachments or accessories
not recommended by the manufacturer of this air compressor.
The use of attachments or accessories not recommended can
result in serious personal injury.
m
WARNING!
The air compressor is capable of inflating
to 120 PSI, 8.27 BAR, or 827 KPA max. To avoid over inflation,
carefully follow instructions on items to be inflated. Never
exceed recommended pressures. Use only recommended air
handling parts acceptable for pressure not less than 120 PSI.
m
CAUTION!
Do not leave items to be inflated unattended
while air compressor is in use. These items can burst and
could cause serious injury.
m
WARNING!
The air compressor is not designed to
inflate large volume items such as boats, pools, rafts, large air
beds, etc. It is also not designed for commercial application.
m
WARNING!
Since the pressure display is not calibrated,
and is therefore not binding for exact values, tire pressure must
be checked using a calibrated measuring device before driving
a vehicle with vehicle tires inflated with the air compressor.
m
WARNING!
Risk of injury. Do not direct air stream at
body.
m
WARNING!
Hot surface. To reduce the risk of burns, do
not touch metal clamps of hose assembly.
Inflating with the Air Hose
The air chuck on the air hose can be used without adapters to
inflate tires or with any item with a valve stem that fits the air
chuck opening.
1. Place air chuck on valve stem (Fig. 6).
2. Push air chuck down so that the threaded section of the
valve stem is inside the air chuck (Fig. 6).
3. Clamp the end of the air chuck down onto the valve stem
by pressing air chuck clamp down until it stops or is
parallel with the air hose.
4.
To remove, lift air chuck clamp and remove air chuck from
valve stem (Fig.7).
Fig. 5
Battery
Battery
compartment
Fig. 6
To lock
Air chuck
Air chuck
clamp
Air hose
Valve stem
Fig. 7
To unlock
Air chuck
clamp
Air chuck
Air hose
Valve stem


