background image

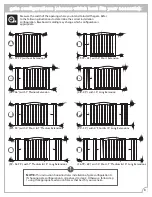
gate configurations (choose which best fits your scenario):

Measure the width of the opening where you intend to install the gate. Refer 

to the following illustrations to determine the correct installation 

configuration. Baseboard molding may change which configuration is 

appropriate. 

A

B

C

D

E

F

G

H

(36

˝

- 39.75

˝

) without Extensions

(39.75

˝

- 43

˝

) with 4

˝ Short Extension

(43

˝

- 46

˝

) with 7

˝

 Medium Extension

(46

˝

- 49

˝

) with 10

˝ Long Extension

(47

˝

- 50

˝

) with 4

˝ Short & 

7

˝

 Medium Extensions 

(50

˝

- 53

˝

) with 4

˝ Short & 10˝ Long Extensions

(53

˝

- 56.75

˝

) with 7

˝ Medium & 10˝ Long 

Extensions 

(56.75

˝

- 60

˝

) with 4

˝ Short, 7˝ Medium & 10˝ Long Extensions

!

NOTE:

 This instruction book illustrates installation of gate configuration H. 

If choosing gate configuration A, skip ahead to step 2. Otherwise, follow step 

1 using the appropriate extension frames that best fit your scenario.

3

Summary of Contents for 27070A

Page 1: ...up to 5 ft Please read the following instructions carefully Keep this instruction manual and save for future reference For technical support contact us at 1 401 671 6551 or www summerinfant com conta...

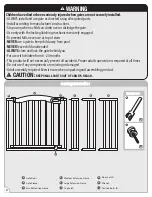
Page 2: ...ng when a child can climb over or dislodge the gate Use only with the locking latching mechanism securely engaged To prevent falls never use at top of stairs NEVER use a gate to keep child away from p...

Page 3: ...5 without Extensions 39 75 43 with 4 Short Extension 43 46 with 7 Medium Extension 46 49 with 10 Long Extension 47 50 with 4 Short 7 Medium Extensions 50 53 with 4 Short 10 Long Extensions 53 56 75 wi...

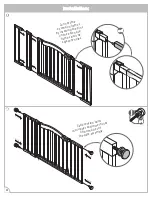
Page 4: ...stallation 2 Connect the extension frames by inserting the pins on the extension frames into the adjacent holes Slide tension bolts into upper and lower holes on both sides of the gate assembly I x4 1...

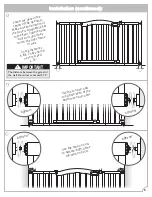
Page 5: ...r exceed 2 75 Stand the gate in the center of the opening Make sure the bottom of the gate is completely flat to the floor Slide tension bolts out until they touch the door frame or wall Use the tensi...

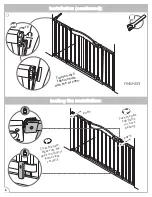
Page 6: ...on H Close the gate Make sure the upper and lower latches lock securely Tighten all 4 tension nuts with the wrench insert push Push the gate and frame to check stability 1st 2nd 6 6 Installation conti...

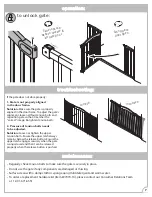
Page 7: ...d Solution Loosen or tighten the upper tension bolts Ensure the upper latch always remains below the release button Ensure the upper latch engages securely when the gate swings closed and that it can...

Page 8: ...tions Team at 1 401 671 6551 Colors and styles may vary MADE IN CHINA 1 19 Summer Infant USA Inc 1275 Park East Drive Woonsocket RI 02895 USA 1 401 671 6551 2019 Summer Infant USA Inc We re here to he...

Reviews: