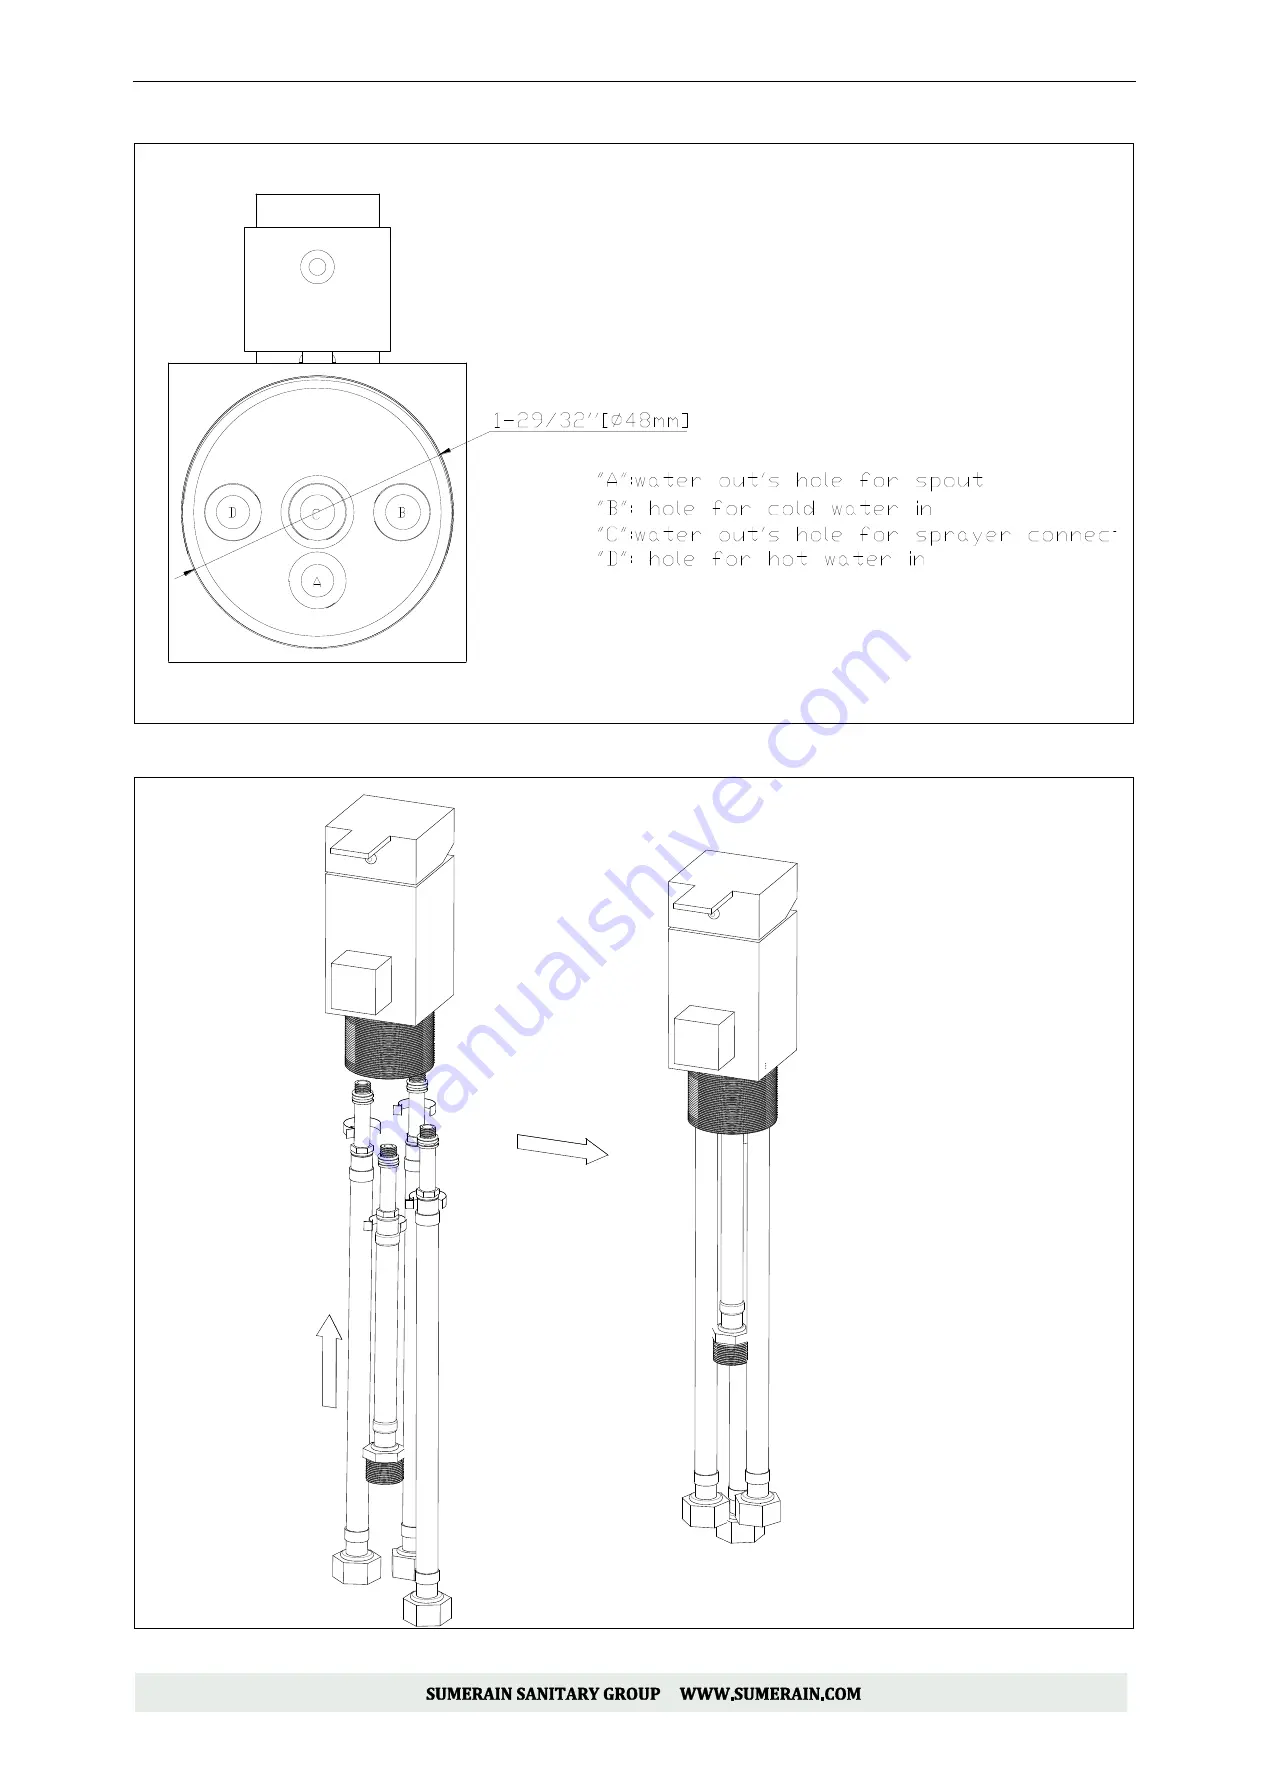
5.3
Screw in the hoses to the bottom of faucet valve assembly as below drawing
Bottom view of control valve
Hoses connection
Page 1: ...MODEL S2095CW Version 3 0 ROMAN WATERFALL BATHTUB FAUCET MODEL FINISH S2095CW CHROME S2095NW BRUSHED NICEKL S2095DW MATTE BLACK S2095BGW BRUSHED GOLD...
Page 2: ...questions regarding this product call 1 866 203 0866 or email to supports sumerain com Sincerely SUMERAIN customer service department 1 Unpack your new product and ensure that all the parts are conta...
Page 3: ...commercial products THIS WARRANTY DOES NOT COVER AND SUMERAIN WILL NOT PAY FOR A Conditions malfunctions or damage not resulting from defects in material or workmanship B Conditions malfunctions or da...
Page 4: ...les One knobs Faucet Total Height 8 25 32 223mm Spout Reach 3 27 32 98mm Spout Width 7 25 32 198mm Spout Height 4 11 32 110mm Max deck thickness 1 0 25mm Valve Type Ceramic Disc Valve Faucet Body Mate...
Page 5: ...FRONT VIEW OF FAUCET SIDE VIEW OF SPOUT...
Page 6: ...SIDE VIEW OF CONTROL VALVE FRONT VIEW OF CONTROL VALVE...
Page 7: ...hly 3 CHECKING THE CONTENTS OF THE BOX Upon opening the box check to ensure that all the following items are included If any of these items are missing please contact SUMERAIN consumer service by emai...
Page 8: ...LLATION HOLES INSPECTION Verify that the hole sizes and positions in the wall are correct the diameter of mounting hole recommend 32mm 1 1 4 and maximum 48mm 1 7 8 the max thickness of deck should be...
Page 9: ...pipe before connect to the faucet allow the water flush 3 5 minutes to flush out dirt and debris Shut off the water supply again after done 5 2 Position spout with shank onto mounting surface attach r...
Page 10: ...5 3 Screw in the hoses to the bottom of faucet valve assembly as below drawing Bottom view of control valve Hoses connection...
Page 11: ...5 4 Place faucet valve assembly with hoses across the mounting surface secure it with lock nut by screwdriver 5 5 Connect the hoses to the spout shank as below drawing...
Page 12: ...upport assembly as below Tighten the rubber washer and fasten with lock nut from underneath 5 7 Through the sprayer hose across the center hole of sprayer holder as below diagram Insert hand shower sl...
Page 13: ...5 8 Connect shower hose to the extender hose of control valve as drawing 5 9 Install the hand shower into the end of shower hose with correct position...
Page 14: ...5 10 Connect all components with flexible hose 6 INSPECTION 6 1 Turn on hold and cold water supply and check all connection for ensuring no leaking anywhere INSTALL FINISH...
Page 15: ...rface or the spout you can clean it by a commercial limescale remover such as Lime Away or CLR Dilute the remover according to the label instructions The faucets might have some rusty if your faucet u...
Page 16: ...A 610 NATHAN ROAD MONGKOK KL HONGKONG Factory Address Floor 3th No 2 ZhongXing Road ShuiNuan City Industrial Zone Shuikou town Kaiping City Guangdong Province China U S Support line 1 866 203 0866 Fac...