SUMERAIN S1364BGW Installation Manual Download Page 14

SUMERAIN SANITARY GROUP     WWW.SUMERAIN.COM


6. FUNCTION INSPECTION   
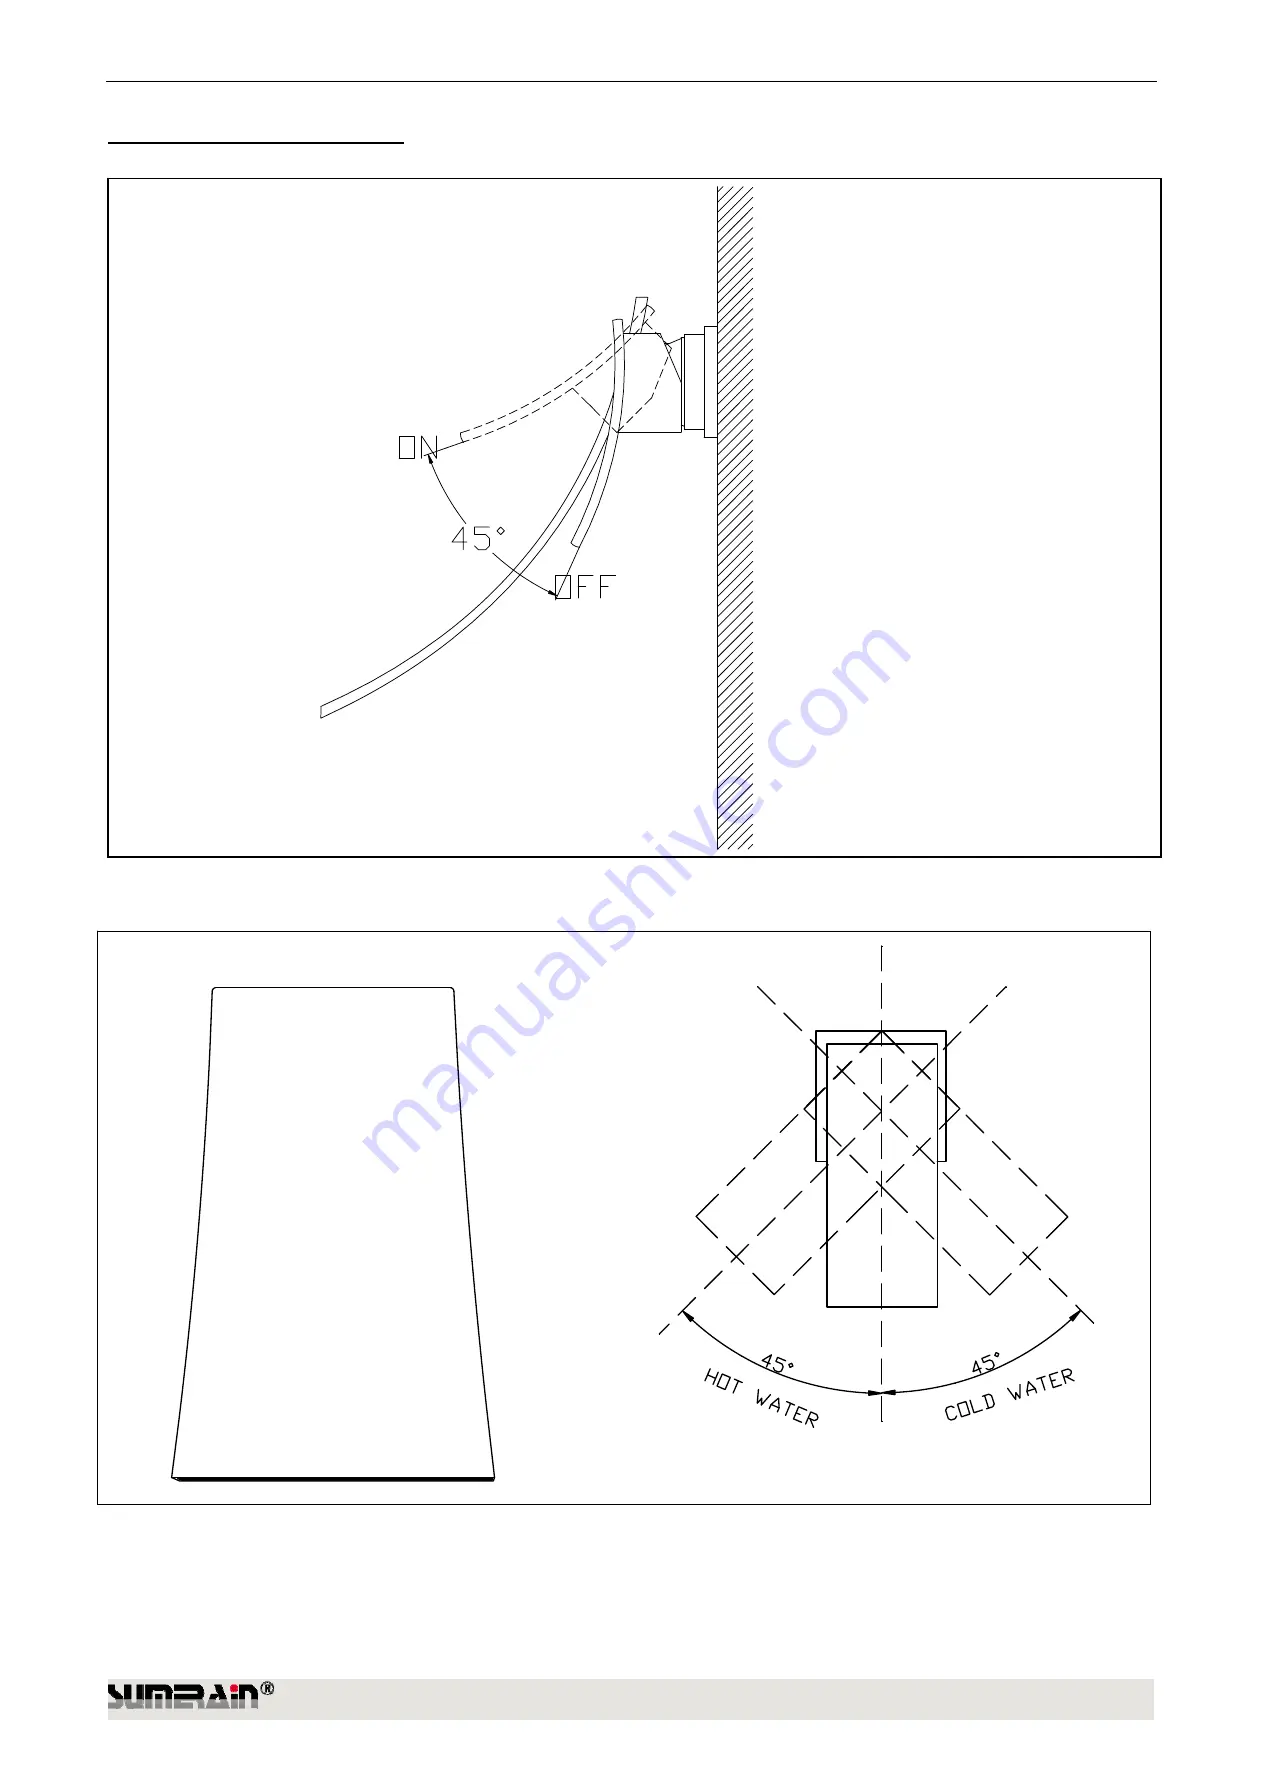
6.1 

Turn on the handle, the water outflow from the spout and then turn off the handle, the water stop out flowing. 


6.2 

Turn right the handle, the cold water coming, on the contrary way, turn left the handle, hot water coming 


Summary of Contents for S1364BGW

Page 1: ...SUMERAIN SANITARY GROUP WWW SUMERAIN COM INSTALLATION GUIDE Version 5 3 WALL MOUNTED WATERFALL TUB FILLER MODEL FINISH S1364CW CHROME S1364NW BRUSHED NICKEL S1364DW MATTE BLACK S1364BGW BRUSHED GOLD...

Page 2: ...you in the future If you have any questions regarding this product call 1 866 203 0866 or email to supports sumerain com Sincerely SUMERAIN customer service department 1 Unpack your new product and e...

Page 3: ...one year with respect to SUMERAIN and commercial products THIS WARRANTY DOES NOT COVER AND SUMERAIN WILL NOT PAY FOR A Conditions malfunctions or damage not resulting from defects in material or workm...

Page 4: ...GOLD Installation Holes Two Number of Handles One Handle style Lever Faucet Total Height Spout Reach 5 23 32 Spout width 4 27 32 Spout Height Installation type Wall mounted Valve Type Ceramic cartridg...

Page 5: ...SUMERAIN SANITARY GROUP WWW SUMERAIN COM DIMENSION FRONT VIEW OF FAUCET RIGHT SIDE VIEW OF FAUCET FRONT VIEW OF ROUGH IN VALVE...

Page 6: ...unit and clean the mounting surface thoroughly 3 CHECKING THE CONTENTS OF THE BOX Upon opening the box check to ensure that all the following items are included CODE ITEM NAME QTY CODE ITEM NAME QTY 1...

Page 7: ...MERAIN COM 4 VALVE TRIM INSTALLATION 4 1 Make a mounting rack normally use woods as materials for preparing install the rough in valve The mounting rack s face should be 1 3 4 at least and Max 2 1 2 b...

Page 8: ...TARY GROUP WWW SUMERAIN COM 4 2 Apply Teflon tape on the shank and then connect to rough in valve 4 3 Secure the rough in valve to the mounting rack with screws The rough in valve needs to be horizont...

Page 9: ...the hot and cold water supply pipe before connect to the valve allow the water flush 3 5 minutes to flush out dirt and debris Shut off the water supply again after finish 4 5 Connect rough in valve to...

Page 10: ...SUMERAIN SANITARY GROUP WWW SUMERAIN COM 4 6 Install the finished wall 4 7 Attach the escutcheon to finish wall...

Page 11: ...SUMERAIN SANITARY GROUP WWW SUMERAIN COM 4 8 Attach and Install the spout adapter to shank 4 9 Attach the spout to the spout adapter and fasten by set screw with Allen key...

Page 12: ...SUMERAIN COM 4 10 Slide the escutcheon over the cartridge sleeve and attached to the finished wall 4 11 Place handle onto the valve stem and tighten set screws by using the Allen wrench that is provid...

Page 13: ...GROUP WWW SUMERAIN COM 4 12 Attach the screw cover to handle for covering the set screw ASSEMBLE FINISHED 5 INSPECTION 5 1 Turn on hold and cold water supply and check all connection for ensuring no...

Page 14: ...6 FUNCTION INSPECTION 6 1 Turn on the handle the water outflow from the spout and then turn off the handle the water stop out flowing 6 2 Turn right the handle the cold water coming on the contrary w...

Page 15: ...LR Dilute the remover according to the label instructions The faucets might have some rusty if your faucet under hard water condition please rub it with aluminum foil dipped in water until the surface...

Reviews: