


9
This section will explain how to connect your microMIDI to a DAW (digital
audio workstation) using a recording interface or a USB to MIDI cable to
control an amp or the TRS/FX link of a pedal�
Steps:
1� Plug in a 9VDC Center negative, 2�1mm x 5�5mm
(Standard for pedals)�
2� Connect your amplifier's "switch jack" or pedal's "FX Link" via
1/8" - 1/4" TRS cable or mono (TS) cable to microMIDI's TRS jack�
3� Connect the MIDI IN to your recording interface with MIDI outs
or to a computer using a USB to MIDI cable�
4� Be sure your DAW or MIDI switching device is set to communicate on the
same MIDI channel as your microMIDI (1-16)�
5� Consult the MIDI table on page 10 to learn the Program Change and Control
numbers you need to correspond with the TRS combinations of your amp's
footswitch or pedal's PC and CC numbers�
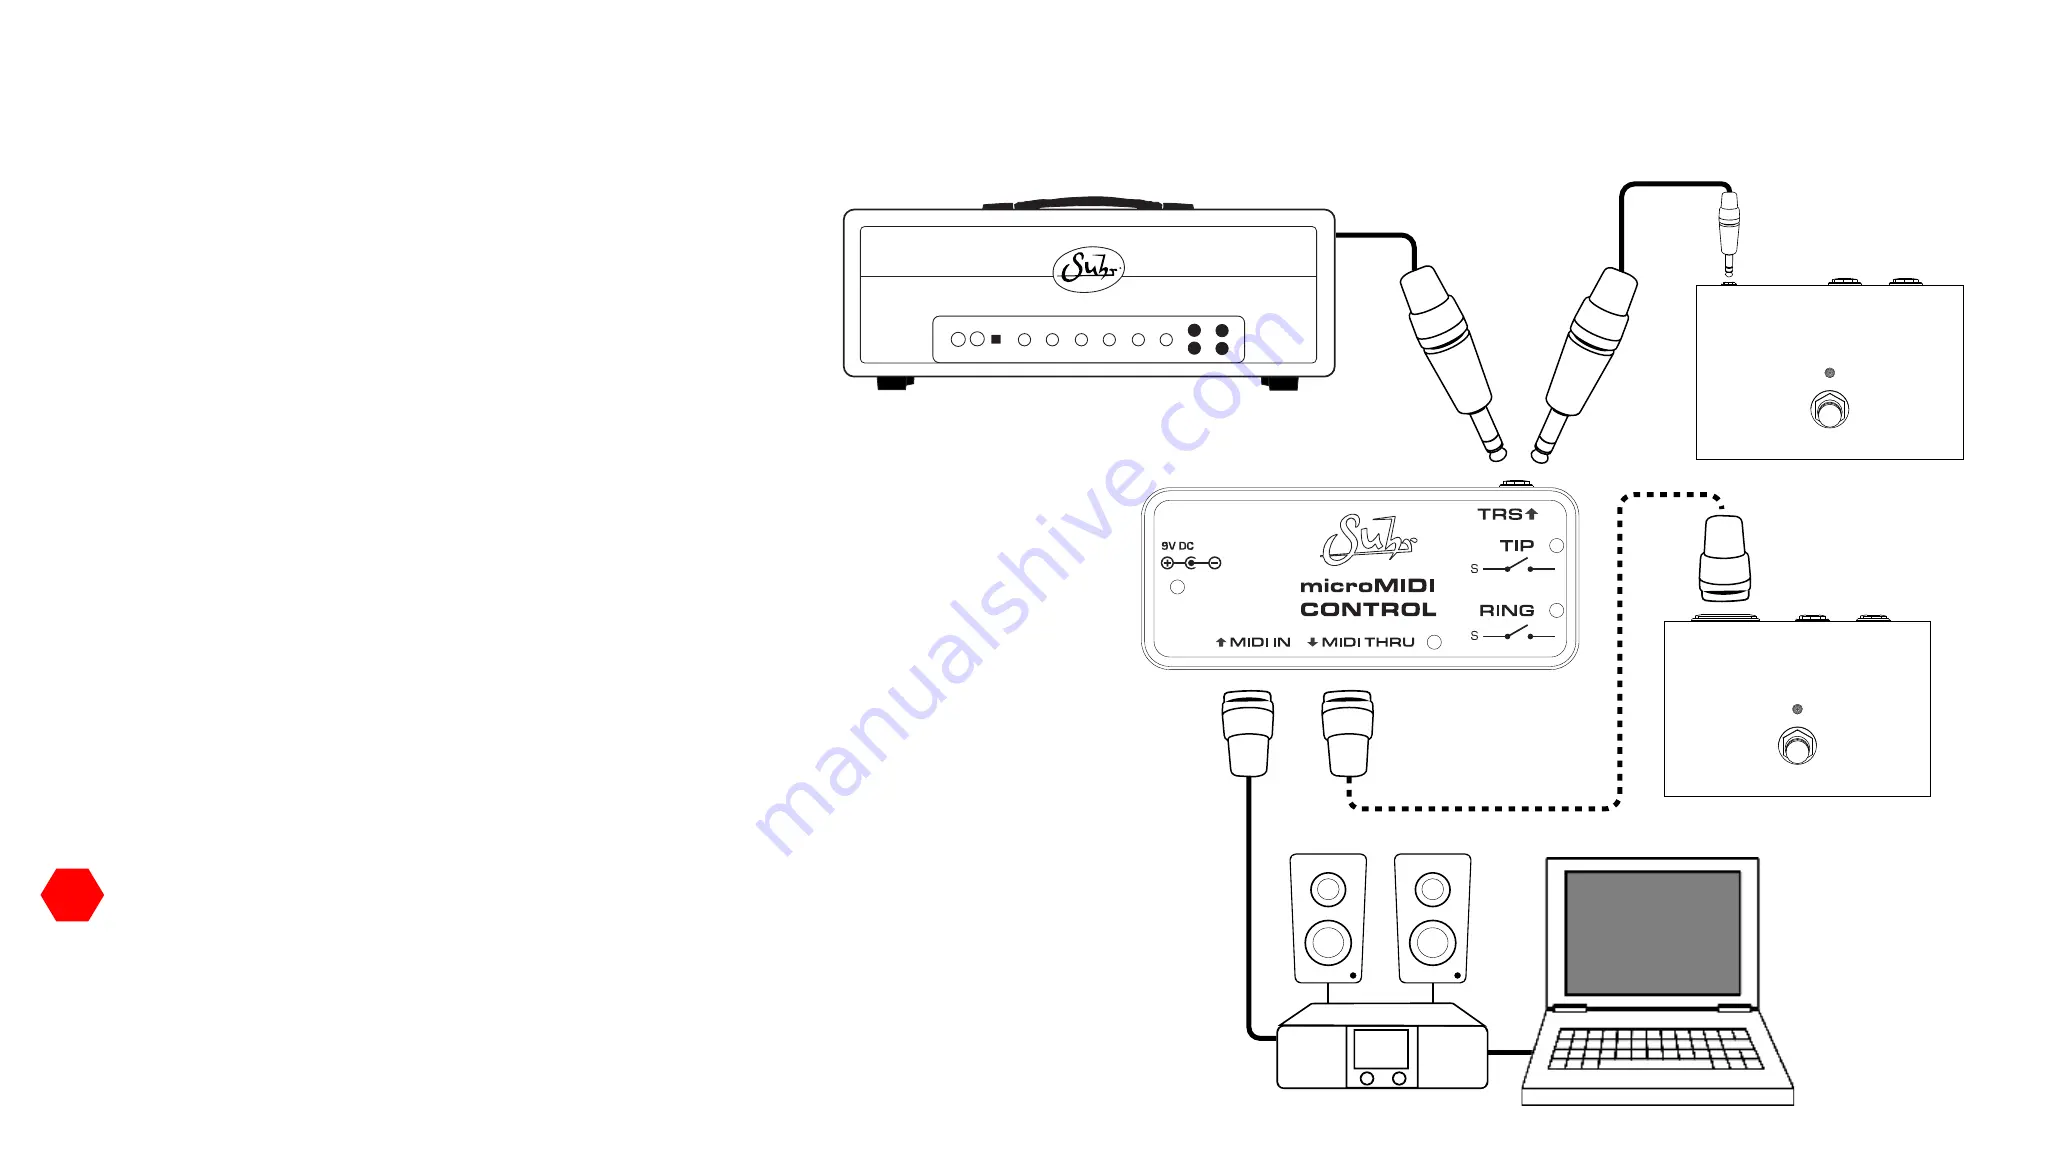
How to connect microMIDI to a DAW
Audio Interface with MIDI outs
Input
Output
FX PEDAL
MIDI
Input
Output
FX PEDAL
FX Link
Effect Pedal with ‘FX link’ or TRS switching input ( e.g. Suhr Alexa Chorus Pedal)
or
IMPORTANT NOTE: Refer to your specific DAW's documentation to
learn how to send MIDI PC or CC numbers�
!
!
Summary of Contents for microMIDI Control
Page 1: ...User Guide...


