


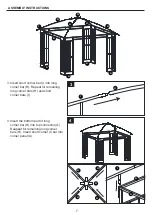


7
ASSEMBLY INSTRUCTIONS
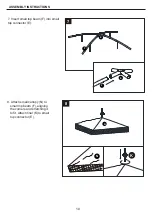
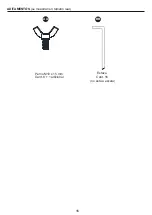
3. Insert short corner bar (I) into long
corner bar (H). Repeat for remaining
long corner bars (H) and short
corner bars (I).
4. Insert the bottom part of long
corner bar (H) into top connector (G).
Reapeat for remaining long corner
bars (H). Insert short corner (I) bar into
corner panel (A).
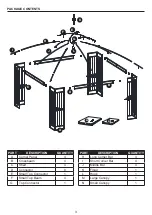
3
I
I
A
A
A
A
H
H
H
H
G
I
B
H
4
H
H
H
G
H
A
A