background image

50

max 50W

<1W(Compliance with MEPS)

100V ~ 250V

50Hz ~ 60Hz

1 X RCA cinch

2 X RCA cinch

3 X RCA cinch

9pin D-sub

IEC 169 - 24

IEC 169 - 24

IEC 169 - 2

IEC 169 - 2

Fiber Optic

Digital Video/Audio Output

USB A-type

MINI-DIN

RJ-45

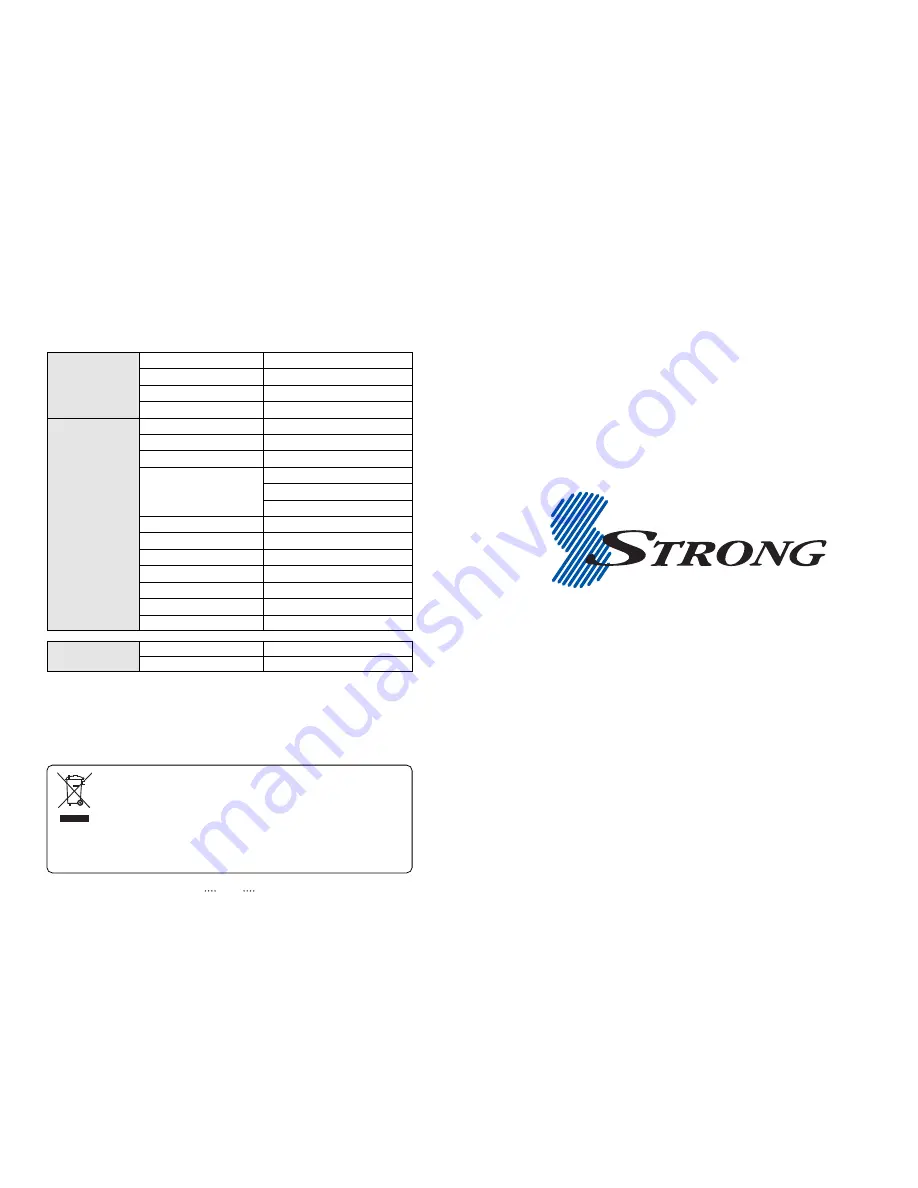
Power consumption

Passive standby

Supply voltage

Supply frequency

Video 

Audio L/R

Component(Y/Pb/Pr)

Serial data

Terrestrial ant input

Terrestrial ant output

S/PDIF

HDMI

USB

S-VIDEO

LAN

Power supply

Rear Panel 

connectors

335 X 58.5 X 247(mm)
3 Kg

Size (W X H X D)
Weight (Net)

Physical
Specification

Disposal of Old Electrical & Electronic Equipment(Applicable in the European Union and other
European Countries with separate collection systems)

This symbol on the product or on its packaging indicates that this product shall not be treated as household
waste. Instead it shall be handed over to the applicable collection point for the recycling of electrical and
electronic equipnent. By ensuring this product is disposed of correctly, you will help prevent potential
negative consequences for the environment and human health, which could otherwise be caused by
inappropirate waste handling of this product. The recycling of materials will help to conserve natural
resources.
For more detailed information about recycling of this product, please contact your local city office, your
household waste disposal service or the shop where you purchased the product.

STRONG TECHNOLOGIES PTY LTD.

60 WEDGEWOOD ROAD, HALLAM, VICTORIA 3803

PH:

+61 3 8795 7990  

FAX:

+61 3 8795 7991

TECHNICAL SUPPORT: 1 800 820 030

STRONG & CO. (FAR EAST), LTD.

P. O. BOX 85, YOKOHAMA, KANAGAWA-KEN

JAPAN 231-91  

FAX

: +81 45 651 1842

www.strong-technologies.com

[email protected]

ڡ

Strong Technologies Pty Ltd., 2009

E109000257A

Summary of Contents for SRT 5492

Page 1: ...se 5 3 1 Accessories 4 Controls Functions 6 4 1 Front Panel 4 2 Rear Panel 4 3 Remote controller 4 4 Front Display 5 How to Connect 11 6 Operation 12 6 1 Getting Started 6 2 System Setting 6 3 Channel...

Page 2: ...D in 12 Languages Multi Picture Display and Zoom 16 9 Full Screen 4 3 Letterbox Full Screen Electronic Program Guide Teletext Subtitle Auto Voltage AC 90 250V SMPS Support MEPS Minimum efficiency perf...

Page 3: ...midity Where the temperature is too high or too low Where there is no ventilation Moving the unit to a hot area from a cold one will cause condensation Do not operate the unit for one or two hours or...

Page 4: ...2 USB USB A type USB 2 0 3 S PDIF Fiber Optic Digital audio output Optical 4 RS 232C DB 9 Low speed serial port 5 HDMI HDMI Digital Video Audio Output 6 LAN RJ 45 10 100Mbps Ethernet 7 VIDEO RCA cinch...

Page 5: ...evious menu Vol Up Down To change the volume level in non menu mode 19 18 17 16 15 14 13 12 11 10 9 8 7 6 5 4 3 2 1 Double arrow Up Down To move to the next or previous page when many pages are availa...

Page 6: ...player 13 Lights when the current channel is Radio mode 14 Lights when the current channel is TV mode 15 Lights when the signal comes in via TV Antenna 16 Indicates when the current playback mode in...

Page 7: ...z or 8 MHz Select the Search Type All channel FTA Only TV Only Select the Network Search ON OFF Press to begin the scan Figure 6 1 5 Figure 6 1 6 Figure 6 1 7 Figure 6 1 8 12 Operation 6 1 Getting Sta...

Page 8: ...s a text data service sometimes available from the Service Provider FREEZE You can press this key to freeze the video Press it again to resume the video GROUP When watching TV or listening to Radio yo...

Page 9: ...ess to change the TV aspect ratio 4 3 Pan Scan or Letter Box 16 9 Full Screen or Pillar Box 6 1 Getting Started Figure 6 1 13 Figure 6 1 14 Figure 6 1 15 Figure 6 1 16 6 1 Getting Started Multi Pictur...

Page 10: ...and sleep time Figure 6 2 1 GMT Usage Set this ON for the local time to be determined by adjusting the time difference with the GMT Greenwich Meantime according to your location Current Date If GMT Us...

Page 11: ...eds the selection a PIN code is required to access the channel program Current Password To change your password first enter your current password New Password Enter the new password that you want to s...

Page 12: ...e Support download from a LAN BLUE button appear input target IP address button to connect after input a target IP Choose a update software and button for downloading Note Have to run PC tool before c...

Page 13: ...d input user PID You can select TV or Radio channels in an alternative way by pressing the TV RADIO button You can choose a channel list group by pressing the GROUP button Press on Edit Channels The f...

Page 14: ...Figure 6 3 5 Press on the channel that you want to lock unlock the lock icon will be displayed removed Press the EXIT button to return to the previous menu Figure 6 3 5 6 3 Channels 6 3 Channels Figu...

Page 15: ...nter your password Press the EXIT button to return to the previous menu and confirm deletion Figure 6 3 7 6 3 Channels 5 Skip Channels This submenu allows you to skip channels Once a channel is set to...

Page 16: ...the selected program will be reserved and the event color will change You can select TV or Radio channels by pressing the TV RADIO button You can choose a channel list group by pressing the GROUP butt...

Page 17: ...move Press the RED button to undo the previous move You can undo only one step Press the GREEN button to restart the game Press the YELLOW BLUE buttons to jump to the previous next level You can jump...

Page 18: ...6 6 Storage Figure 6 6 1 Figure 6 6 2 6 5 Games 3 Snake Press on Snake The following menu will be displayed Figure 6 5 5 You can choose a skill level using Press to start the game Figure 6 5 6 or pre...

Page 19: ...ft Recording Time 10Min 30Min 60Min Figure 6 6 5 6 6 Storage 2 JPG menu Press to select a picture Figure 6 6 3 Press to show the picture you want to display RED Sets the time interval between slides G...

Page 20: ...pop up Select a channel Record Select the record or timer ON OFF Power Off Select operation of Power off after you finish recording CH CH CH CH Figure 6 6 10 6 6 Storage 5 File Manager Press YELLOW bu...

Page 21: ...ize Total Size Figure 6 8 1 To see a full screen press once more And then the following time bar will appear Figure 6 8 2 CH CH Figure 6 8 1 Figure 6 8 2 40 6 7 System Information You can check the cu...

Page 22: ...playing speed Figure 6 8 5 The speed will change to x2 x4 and x8 2 Trick Mode Figure 6 8 4 Figure 6 8 5 Edit Menu You will be asked to enter a password whenever you try to enter it Press The pop up m...

Page 23: ...ion and playback starts from this point Note The maximum number of the bookmark is 20 in a file Figure 6 8 8 6 8 DVR RWD Rewind When playing the file you can press to adjusting the playing speed Figur...

Page 24: ...e 1 Do not remove the USB device while recording a program 3 Instant Recording You can record a current channel by using If you then press a time banner will be displayed Figure 6 8 9 Press once more...

Page 25: ...ecoder System resource Video decoder Teletext MPEG Audio Serial data interface Remote control USB Terrestrial ant input Troubleshooting There may be various reasons for the abnormal operation of the u...

Page 26: ...ted as household waste Instead it shall be handed over to the applicable collection point for the recycling of electrical and electronic equipnent By ensuring this product is disposed of correctly you...

Reviews: