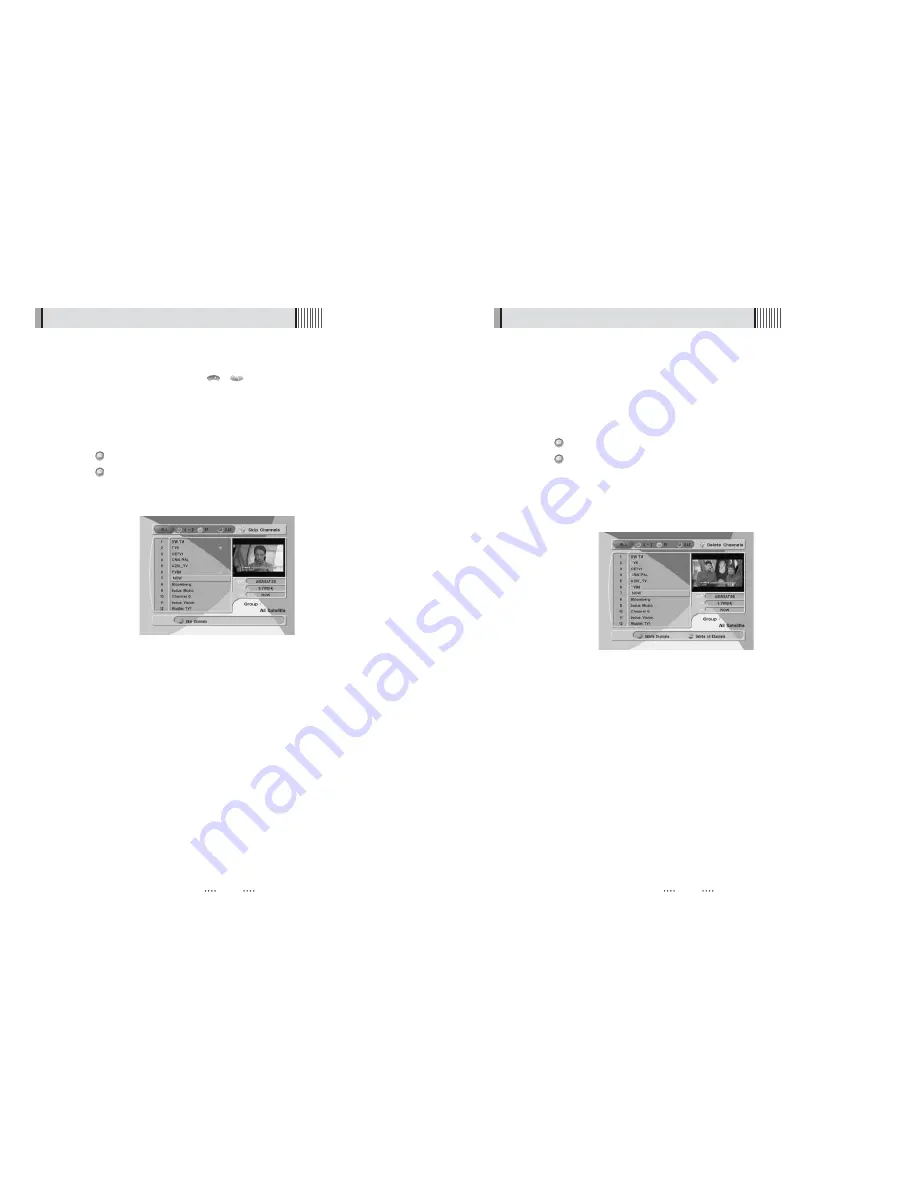
Strong SRT 4651X User Manual Download Page 15

29

28

6) Delete Channels

This submenu allows you to delete channels. You can select TV or Radio channels in an
alternative way by pressing the 

TV/RADIO

button. You can choose a channel list group by

pressing the 

GROUP

button.

ҫ

ҫ

Note : Be careful! If you delete a channel, you will not be able to access it again until

you rescan. 

͈

Press 

on ‘Delete Channels’. The following menu will be displayed. <Figure 6-25>

͉

Press 

on the channel that you want to set/unset for deletion; the delete icon will be

displayed/removed. 

͊

Press the 

INFO

button to delete all channels in the current list; you will be asked to enter your

password. 

͋

Press the 

EXIT

button to return to the previous menu and confirm deletion.

<Figure 6-25>

6.3 Channels

<Figure 6-24>

This submenu allows you to skip channels. Once a channel is set to be skipped, it will be
whenever you navigate channels using 

in non-menu mode. You can select TV or

Radio channels in an alternative way by pressing the 

TV/RADIO

button. You can choose a

channel list group by pressing the 

GROUP 

button.

ҫ

ҫ

Note : You can still access a ‘skipped’ channel if you enter its number using the

NUMERIC buttons in non-menu mode.

͈

Press 

on ‘Skip Channels’. The following menu will be displayed.<Figure 6-24>

͉

Press 

on the channel that you want to skip/un-skip; the skip icon will be displayed /

removed. 

͊

Press the 

EXIT

button to return to the previous menu. 

CH

CH

5) Skip Channels

6.3 Channels

Summary of Contents for SRT 4651X

Page 1: ...1 Accessories 4 Controls Functions 6 4 1 Front Panel 4 2 Rear Panel 4 3 Remote Controller 5 How to Connect 10 6 Operation 11 6 1 Getting Started 6 2 System Setting 6 3 Channels 6 4 Electronic Program...

Page 2: ...memory function Total of 10 000 programmable channels Advanced Channel List menu Multi satellite search Games with stereo sound Software channels database upgrades via RS 232C PC to STB STB to STB Pa...

Page 3: ...he unit to a hot area from a cold one will cause condensation Do not operate the unit for one or two hours or until it has dried completely User s manual 1 User s manual Remote control 1 Batteries AAA...

Page 4: ...3 5 9 10 12 2 4 6 No Name Connector Function 1 LNB INPUT IEC 169 24 FEMALE IF input from LNB to digital tuner 2 LOOP OUT IEC 169 24 FEMALE IF loop through output from digital tuner 3 AUDIO L RCA cinch...

Page 5: ...8 7 Left Right To change the volume level in non menu mode and modify a setting in menu mode OK To show the Channel List in non menu mode and select an item or confirm in menu mode TV RADIO To switch...

Page 6: ...w to Connect Connect the TV antenna to TV ANT IN Connect the RF IN of the TV to RF OUT When available you may instead connect the video and audio of the TV to video and audio Connect the red and white...

Page 7: ...Move You can move the dish to the West East Limit If you want to set limits press Disable Limit You can disable the East and West limits Goto Center Move the dish to the initial 0 position Set East W...

Page 8: ...ose Auto Scan to search using transponders frequencies in memory or chose Blind Scan to look for new satellite transponders Through this function the receiver searches for all the available channels a...

Page 9: ...tomatically VOL VOL Figure 6 9 You can use to navigate between channels until you find the channel you want If you know the channel number you can enter it with the NUMERIC buttons and wait 2 seconds...

Page 10: ...es you can choose the number of pictures such as 1X2 2X2 2X3 or 3X3 Teletext YELLOW The Teletext service is a text data service sometimes available from the Service Provider Figure 6 11 6 1 Getting St...

Page 11: ...e for the menu Transparency Set the OSD transparency of the menu 1 100 Information Timeout Select the display duration of the information banner 1 2 3 5 or 10 seconds Volume Timeout Select the display...

Page 12: ...ll Lock Set ON to require entering a PIN code to access the installation menu Channel Lock Set ON to require entering a PIN code to access the channels menu Lock Channel Confirm Set ON to require ente...

Page 13: ...ton Press on Edit Channels The following menu will be displayed Figure 6 21 Press on the channel that you want to edit Press on Edit Name to rename the channel the keypad will be displayed Similarly y...

Page 14: ...Press on the channel that you want to lock unlock the lock icon will be displayed removed Press the EXIT button to return to the previous menu 4 Lock Channels Figure 6 23 6 3 Channels 6 3 Channels Fi...

Page 15: ...r your password Press the EXIT button to return to the previous menu and confirm deletion Figure 6 25 6 3 Channels Figure 6 24 This submenu allows you to skip channels Once a channel is set to be skip...

Page 16: ...a channel VOL VOL CH CH 2 Timer 6 4 Electronic Program Guide 6 4 Electronic Program Guide This submenu allows you to access the electronic program guide when available Press the EPG button to display...

Page 17: ...to the previous menu Press to rotate a block Press to move a block Press to drop a block You can see the next block in the top right small window Press the EXIT button to quit the game CH VOL VOL CH...

Page 18: ...ay information about the selected MP3 file GROUP Shows the MP3 file list INFO Shows information about the MP3 file you selected CH CH VOL VOL VOL VOL CH CH Figure 6 34 Figure 6 35 6 6 USB Menu 6 6 USB...

Page 19: ...date etc Figure 6 38 Note This information is useful to download new software and or repair the receiver Figure 6 38 6 8 Conditional Access System To Enjoy CONAX CAS7 scrambled channels you will need...

Page 20: ...le correctly Adjust the direction of the antenna Check the cable connections the LNB and other equipment connected between the LNB and the receiver or adjust the antenna Type the setting values correc...

Page 21: ...t channel number Size W X H X D Weight Net RF modulator PAL G I K TV Type Physical Specification max 25W 90V 250V 50Hz 60Hz 1 X RCA cinch 2 X RCA cinch 3 X RCA cinch 9pin D sub IEC 169 24 IEC 169 24 I...

Reviews: