background image

17

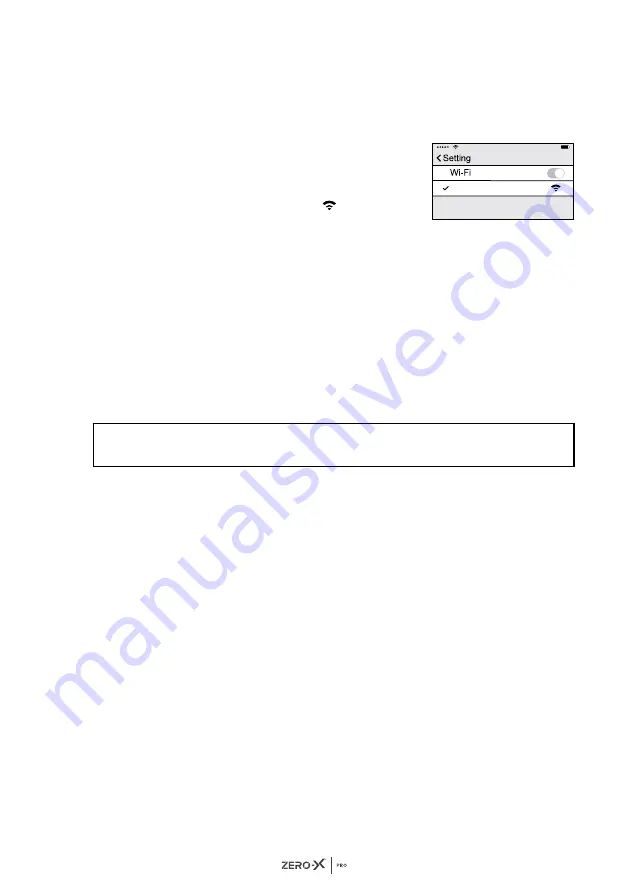
8.3  CONNECTING YOUR SMARTPHONE TO THE DRONE'S WIFI

1. 

Go to your mobile phones settings menu and enter the WiFi 
settings. 

2. 

Turn on your Drone.

3. 

If your smartphone WiFi is turned off, 
turn it on and search for ZXMP-D500_
XXXXXXX in the available networks. 
Select ZXMP-D500_XXXXXXX, once the 
connection is successful a   

icon

 will 

appear next to it.

8.4  SAVING PHOTOS AND VIDEOS

•  If your Drone does not have a Micro SD card inserted, all photos and 

videos will be saved with the App onto your smartphone, however, 
the image quality will not be as sharp on your connected mobile 
device compared to images and videos that are saved onto the 
Micro SD card.

•  If you have the Micro SD card inserted, all photos and videos will be 

saved to it.

•  You can also download the images that have been saved onto the 

micro SD card onto your Zero-X Evolved 4K app.

NOTE:

•  Only mobile phones that support the 5G WiFi (802.11.ac) can make FPV connections.

9.0  PRE-FLIGHT CHECKLIST

•  Check your Drone, controller and device are all fully charged.
•  All blades are installed correctly.
•  All arms are fully unfolded.
•  Camera lens is clean, free of dirt and dust.
•  The Zero-X Pro Evolved 4K App is downloaded and installed on your device. 
•  All parts used are genuine Zero-X Pro ZXMP-D500 products. Using other 

parts that are not made specifically for the Drone can be unsafe or cause 
the Drone to fail.

ZXMP-D500_XXXXXX

Summary of Contents for Zero-X Pro ZXMP-D500

Page 1: ...USER MANUAL stratus ZXMP D500...

Page 2: ......

Page 3: ...1...

Page 4: ...REEN DISPLAY 11 5 3 PAIRING YOUR DRONE AND REMOTE CONTROL 11 5 4 PHOTO VIDEO CONTROLS 12 5 5 ONE KEY TAKE OFF LANDING 12 5 6 ONE KEY RETURN TO HOME BUTTON 12 5 7 DRONE LOW BATTERY WARNING 13 5 8 REMOT...

Page 5: ...UR DRONE 23 13 3 OPTIMAL TRANSMISSION ZONE 24 13 4 UNLOCKING THE DRONE 24 13 5 LOCKING THE DRONE 24 13 6 SETTING A HOME POINT 25 13 7 BASIC FLIGHT CONTROLS 25 14 0 BEGINNER MODE 26 15 0 SPEED MODE 27...

Page 6: ...re using your Drone within the parameters of these laws Zero X takes no responsibility for the operation of this product DO NOT fly your Drone any closer than 30 metres from people animals or building...

Page 7: ...ODUCT CONTENTS 3 1 Stratus Drone 2 Remote Control 3 Rotor Blades x 4 4 USB AC Wall Charger 5 USB Charging Cable 6 User Manual 7 Small Screw Driver 8 Screws 9 Quickstart Guide 10 Carry Case 1 2 6 4 5 8...

Page 8: ...Light 7 Power Switch 1 2 4 3 7 6 5 10 11 9 1 Photo Video 2 Left Thumb Stick Yaw left Right 3 Lock Unlock Button 4 Mobile Phone Holder 5 Return to Home Button 6 Right Thumb Stick Forward Backward Left...

Page 9: ...e batteries when charging or leave them in direct sunlight After each flight or crash please check battery for any damage or swelling If the battery is damaged leaking making noise punctured or malfor...

Page 10: ...mediately and charge the battery to avoid unnecessarily losing your Drone To keep the battery life as long as possible avoid removing the battery from the charging cable before charging is complete If...

Page 11: ...ar the lock click into place 4 3 REMOVING A MICRO SD CARD To remove your Micro SD Card follow the instructions below 1 Press the Micro SD Card into the unit until a click is heard and the card release...

Page 12: ...To Power Off slide the button to the left NOTE Insert the batteries in the correct orientation DO NOT charge non rechargeable batteries The transmitter needs two charged and working AA batteries to o...

Page 13: ...will switch to flashing alternatively yellow 3 The remote control will begin to pair with the Drone automatically Once a successful connection has been made the remote control will beep two times The...

Page 14: ...your smartphone will be de scaled to save space 5 5 ONE KEY TAKE OFF LANDING When you have unlocked your Drone short press the button on the remote control as shown in the picture below The Drone wil...

Page 15: ...light is flashing red slowly or rapidly this indicates your battery levels are very low and you should finish your flight The battery icon on the remote LCD screen will be accompanied by a steady bee...

Page 16: ...re two ways to lock the motors 1 After you have successfully landed the Drone pull the throttle down to the bottom and hold for 3 seconds This will stop the motors and lock the Drone Refer to section...

Page 17: ...See Pic 2 below for reference The remote control will beep when the throttle mode changes To revert to original throttle mode hold down the button again for 3 seconds the remote control will beep agai...

Page 18: ...for the Zero X Evolved 4K App For Android phones go to the Google Play Store and search for the Zero X Evolved 4K app OR scan the QR code to download the App The Zero X Evolved 4K App requires iOS 11...

Page 19: ...red to images and videos that are saved onto the Micro SD card If you have the Micro SD card inserted all photos and videos will be saved to it You can also download the images that have been saved on...

Page 20: ...s in compass horizontal calibration mode The indicator light is Green and flashing slowly Drone is in compass vertical calibration mode The indicator light is Red and flashing slowly Drone battery is...

Page 21: ...eselect the Beginner mode in the App s Flight Settings To download the App please refer to page 16 12 0 UNDERSTANDING KEY CONTROLS Please read through the instructions below before launching the Drone...

Page 22: ...low battery levels 1 When the rear indicator light is flashing red slowly you will notice the battery icon displayed as on the remote LCD screen This will cause the remote control to beep If your Dro...

Page 23: ...ode you cannot cancel this unless stated above To continue flying you will need to charge the battery or insert a spare charged battery Spare batteries available separately WARNING DO NOT PRESS ANY KE...

Page 24: ...e below 0 5 metres the optical flow system may not be able to locate the Drone Flying over monochrome surfaces such as pure black pure white red green surfaces with strong reflections water or transpa...

Page 25: ...ation process It is recommended not to wear smart watches while flying your Drone as it may interfere with the GPS signal NOTE It is recommended to calibrate your Drone before each flight STEP 1 HORIZ...

Page 26: ...on page 22 You can connect to WIFI at this time to view real time video Please refer to 8 3 CONNECTING YOUR SMARTPHONE TO THE DRONE s WIFI on page 17 on how to connect to WIFI 13 4 UNLOCKING THE DRONE...

Page 27: ...s indicator lights will turn solid green when the home point is successfully recorded 13 7 BASIC FLIGHT CONTROLS To get smooth and stable movement in the video push the control sticks gently Push the...

Page 28: ...o change the orbit radius move the slider to set the desired radius between 5m 50m 4 Return to Home RTH The default factory setting is 15 metres To change this move the slider to set the new RTH altit...

Page 29: ...shown in the diagram 3 When headless mode is enabled the Drone will move in the direction of the remote control regardless of its orientation This makes it easy to bring the Drone home when it is far...

Page 30: ...NOTE Follow Me mode depends on the GPS signal of your mobile device The GPS signal can vary depending on the amount of buildings trees mobile towers or congestion from too many mobile phones in the v...

Page 31: ...e you have either drawn or marked the way point points on your map max 18 points click submit and swipe right to confirm your waypoint route The Done will now fly according to the saved path 4 Press t...

Page 32: ...con on the remote control LCD screen will begin to flash slowly indicating that a video is being recorded To exit out of video mode long press the button again 19 4 VIEWING PHOTOS AND VIDEOS To view y...

Page 33: ...SEARCH button to view the approximate flight position from when the WiFi was disconnected You can also view the Drone s position in FLIGHT LOG on the map via the longitude and latitude coordinates by...

Page 34: ...stem with the hole in the rotor blade 5 Lock the blade into position by putting the copper plate cover back over the screws that were removed in step 1 making sure not to over tighten NOTE It is impo...

Page 35: ...your discount Happy flying There you will be able to find and buy the spare parts listed below Visit www zero x com au www zero x co nz to make your purchase ZXMP D500BACCW SPARE PART BACK ARM COUNTE...

Page 36: ...claim the warranty you must return the product to the retailer from which it was purchased or if that retailer is part of a National network a store within that chain along with satisfactory proof of...

Page 37: ...your Zero X In the event of any loss damage or injury you will not look to Zero X to compensate you or anyone else You release and waive for yourself and your insurer all subrogation and other rights...

Page 38: ...erwise made available via Zero X Zero X liability for damages especially for breach of duty or obligation delay in performance non performance or malperformance shall be precluded except when these ar...

Page 39: ...37 25 0 NOTES...

Page 40: ...38...

Page 41: ...39...

Page 42: ...zero x com au www zero x co nz Zero X v1 0 2022 ANOTHER DIRECTED BRAND www directed com au www directed co nz All Images Information and Content are Copyright 2022 Directed Electronics Australia Pty L...

Reviews: