


Operating & Maintaining the Eden 3-D Printer
7–6
DOC-
22000
Rev.
A
Printing
Indicators
When
the
printer
is
ready,
the
main
Eden
interface
screen
changes
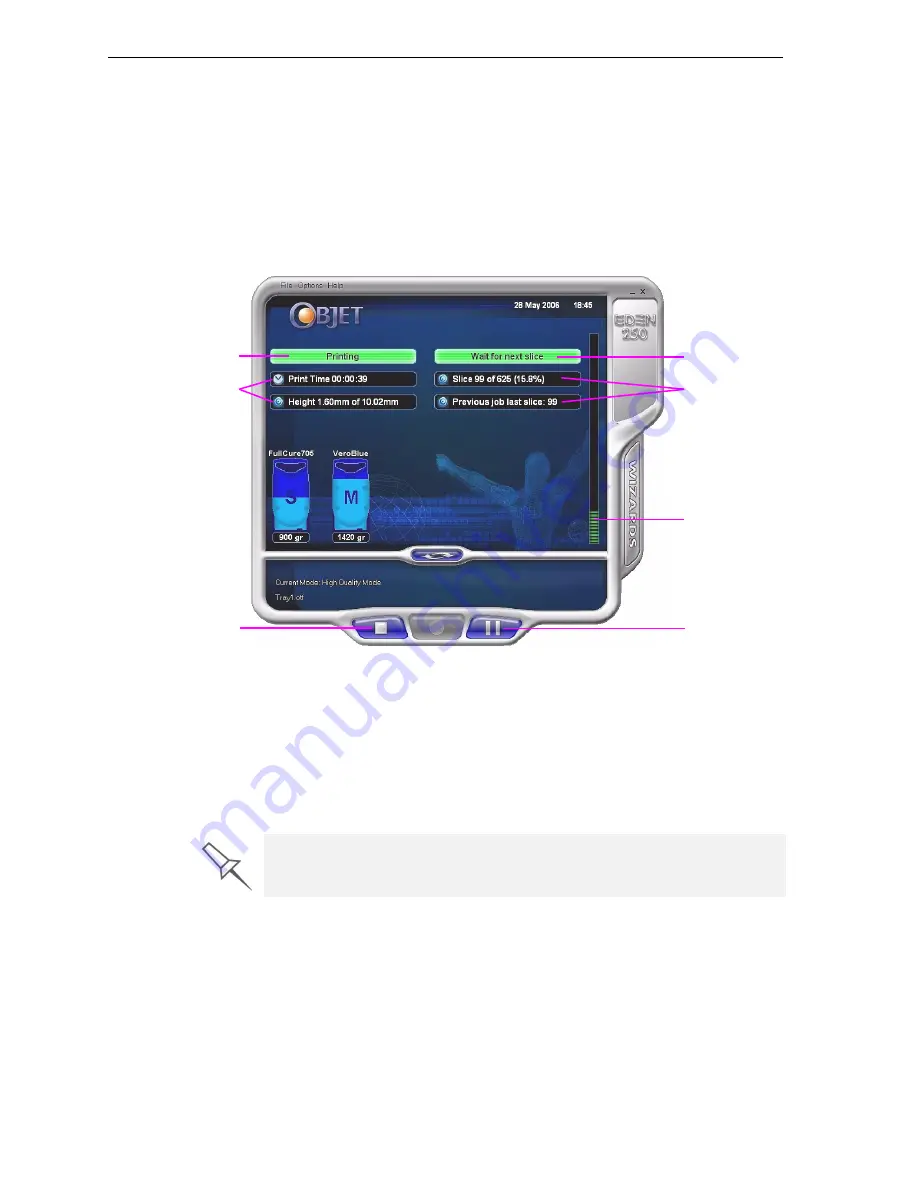
(see
•
The
mode
changes
from
Pre
‐
to
Printing
.
•
The
specific
activity
being
performed
is
shown
in
the
“current
activity”
field.
•
Current
job
‐
printing
information
is
displayed.
•
The
printing
progress
bar
is
displayed.
•
The
Stop
and
Pause
buttons
are
enabled.
Figure 7-4: Eden interface during printing
When
printing
begins,
Job
Manager
sends
seven
slices
to
the
Eden
printer.
This
is
the
standard
buffer
between
the
Job
Manager
and
the
printer.
As
each
slice
is
printed,
the
Job
Manager
sends
another
slice
to
the
printer.
Depending
on
the
size
of
the
model(s)
to
be
produced,
printing
can
take
between
several
hours
to
several
days.
As
long
as
there
is
enough
model
and
support
material
in
the
supply
cartridges,
printing
proceeds
automatically
until
the
job
is
finished.
Resuming Production After Printing has Stopped
If
the
printing
process
is
interrupted
for
any
reason,
Job
Manager
stops
sending
slices
to
the
Eden
printer.
To continue printing the model:
1. Switch
the
printer
to
online
mode
by
clicking
the
red
button
at
the
bottom
of
the
Eden
interface
(see
3).
The
button
changes
from
red
to
green
(see
Current Activity
Job information
Progress bar
Pause button
Stop button
Printer mode
Job information
During printing, the server computer must remain on and it must
communicate with the Eden printer. Do not log-off Windows until printing is
finished.


