background image

Grilling in the main oven
Caution:  
Accessible parts may
be hot when the grill is used -
young children should be kept
away.

The grill lights and main oven facia
neons will not operate when the
programmer is set for automatic
operation.
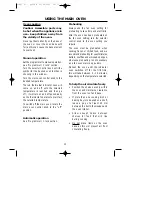
The grill / fanned grill are fixed
settings using the inner element only.

Detachable grill pan handle

Place the handle over the edge of
the grill pan.  The handle should be
removed from the pan during grilling,
to prevent overheating.
The handle is designed for removing /
inserting the grill pan under the grill
when grilling.  
If cleaning the grill pan when it is hot,
use oven gloves to move it.  

Do not

use

the handle to pour hot fats from the
grill pan.

Aluminium foil

Using aluminium foil to cover the grill
pan, or putting items wrapped in foil
under the grill can create a fire hazard,
and the high reflectivity can damage
the grill element.

Conventional grill

The door must be open when the grill
is used for conventional grilling.
(i) Turn the selector control knob to

the conventional grill setting.

(ii) Turn the oven control knob to the

grill setting.

Fanned grill

The door must be closed when the
fanned grill is used.
When opening the door, take care to
avoid skin contact with any steam
which may escape from the cooking.
(i) Turn the selector control knob to

the fan grill setting.

(ii) Turn the oven control knob to the

grill setting.

When the fanned grill is selected, only
the inner element will come on.
Fanned grilling may be faster than
conventional grilling because air is
being circulated around the food.
Thin portions of food, such as bacon
or fish fillets, may not need turning.
For best results, preheat the grill for
3 - 5 minutes.

9

USING THE MAIN OVEN

grill pan

handle

grill pan

trivet

23897 01 - Q900EM  20/09/2002  09:12  Page 11

Summary of Contents for Q900EM

Page 1: ...Q900EM Multi function Electric Double Oven Grill User Installation Instructions 23897 01 Q900EM 20 09 2002 09 12 Page 1 ...

Page 2: ...23897 01 Q900EM 20 09 2002 09 12 Page 2 ...

Page 3: ...g in the main oven 9 Oven cooking 10 Conventional Oven 11 Top Heat Only 11 Base Heat Only 11 Fan Oven 11 Fan Base Heat Only 11 Intensive Bake 11 Defrosting and cooling 12 Slow cooking 12 Programmer Clock 13 Cleaning 17 Installation Instructions 19 22 Technical Data 23 Stoves Customer Support 24 1 CONTENTS 23897 01 Q900EM 20 09 2002 09 12 Page 3 ...

Page 4: ... guarantee this appliance must be correctly installed and operated in accordance with these instructions and only be used for normal domestic purposes Please note that the guarantee and Service availability only apply to the UK and Republic of Ireland Before using the appliance for the first time remove any protective polythene film and wash the oven shelves and furniture in hot soapy water to rem...

Page 5: ...l the oven is cool then remove the oven shelves The lens cover on the light can be removed by pulling away from the oven side Unscrew the bulb Please note that oven light bulbs are not covered by guarantee Electrical connection Please refer to the Installation Instructions For your safety employ a competent electrician Warning This appliance must be earthed In the event of a power cut 1 Switch off...

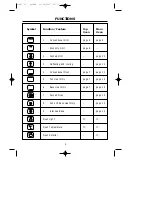
Page 6: ...l page 10 3 Defrosting and cooling page 12 4 Conventional Oven page 7 page 12 5 Top Heat Only page 7 page 12 6 Base Heat Only page 7 page 12 7 Fanned Oven page 12 8 Fan and Base Heat Only page 12 9 Intensive Bake page 12 Oven Light Oven Temperature Oven Selector 4 FUNCTIONS 23897 01 Q900EM 20 09 2002 09 12 Page 6 ...

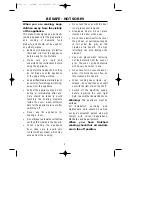
Page 7: ...ance door take care to avoid skin contact with any steam which may escape from the cooking Do not use the oven with the door inner glass panel removed Drop down doors Do not place items on the door when open Do not use aluminium foil to cover the grill pan or put items wrapped in foil under the grill as this creates a fire hazard The high reflectivity can also damage the element Use oven gloves wh...

Page 8: ...l knob to the off position Important the door must be kept open when the grill is used as the grill will not operate with the door closed To switch on the grill lights Turn the top oven control knob clock wise until the light symbol is showing in the window Please note that you cannot turn on the lights when the programmer is set for automatic operation Detachable grill pan handle Place the handle...

Page 9: ...atic operation See Programmer Clock section Important Never put items directly on the base of the oven or cover the oven base with foil as this may cause the element to overheat Caution The ceramic grill glass gets extremely hot when the top oven grill is in use so take extra care to avoid touching it Top heat and base heat The top oven offers the advantage that it can be used with either bottom h...

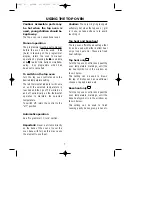
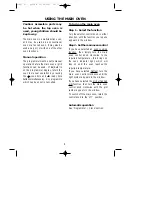
Page 10: ...n Turn the selector control knob in either direction until the function you require appears in the window Step 2 Set the main oven control If you have selected an oven cooking function then simply turn the main oven control knob clockwise to the required temperature this brings on the neon indicator light which will stay on until the oven reaches the required temperature If you have selected Defro...

Page 11: ... the grill can create a fire hazard and the high reflectivity can damage the grill element Conventional grill The door must be open when the grill is used for conventional grilling i Turn the selector control knob to the conventional grill setting ii Turn the oven control knob to the grill setting Fanned grill The door must be closed when the fanned grill is used When opening the door take care to...

Page 12: ...ways use the fan oven setting for preheating to save time and electricity After the oven has been preheated on the fan oven setting turn the selector control knob to the oven setting you require The oven must be preheated when cooking frozen or chilled food and we recommend preheating for yeast mixtures batters soufflés and whisked sponges otherwise preheating is not necessary as a fan oven warms ...

Page 13: ...rature This setting can be used to finish cooking pastry bases pies or pizzas etc Fan oven i Turn the selector control knob to the fan oven symbol ii Turn the main oven control knob to the required temperature The fan oven comes on when the oven is switched on and circulates the air around the oven to give a fairly even temperature throughout the oven Fan and base heat only i Turn the selector con...

Page 14: ...ide for more information on using the Defrost function Slow cooking Turn the selector control to either conventional oven or fanned oven Do not try to slow cook using any of the other oven functions For roasting joints of meat or poultry and for pot roasts preheat the oven to 190 C 200 C and cook for 30 minutes then adjust the oven temperature control to 110 120 C for the remainder of the cooking ...

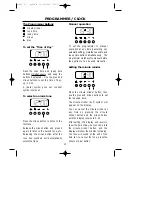
Page 15: ...y time cancelling any automatic setting press the cook time and ready time buttons simultaneously The programmer must be set to manual before the appliance can be used manually Setting the minute minder Press the minute minder button then use the plus and minus buttons to set the required time The minute minder bell symbol will appear on the display You can cancel the minute minder at any time by ...

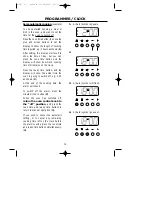
Page 16: ...ch cooking time still remains on the clock Press the ready time button and the display will show the actual time the oven is going to switch off eg 3 30 as shown 2 At the end of the cooking time the alarm will sound To switch off the alarm press the minute minder button 3 When the oven has switched off return the oven control knob to the off position and press the cook time and ready time buttons ...

Page 17: ...me required eg 2 hours as shown 5 Press the ready time button and the present ready time will be displayed Using the plus and minus buttons you can set the display to show the actual time you want the oven to switch off eg 18 00 hours 6 00 pm 6 The display will revert to show time of day After setting the programmer turn the oven control to the required temperature The oven will automatically swit...

Page 18: ...ob to the off position and press the cook time and ready time buttons simultaneously 11 If you wish to cancel the automatic setting before cooking has started and return to manual operation press the cook time and ready time buttons simultaneously 11 To cancel any remaining cooking time left on the clock before the alarm sounds press the cook time and ready time buttons simultaneously 11 A U T O A...

Page 19: ...plastic metal finish parts HANDLES CONTROL KNOBS Only use a clean cloth wrung out in hot soapy water Vitreous enamel surfaces GRILL PAN TOP OVEN GRILL COMPARTMENT MAIN OVEN COMPARTMENT FLOOR Use a mild cream cleaner Look for one which has the Vitreous Enamel Council s recommendation seal eg Cif Stubborn marks may be removed with a moistened Brillo pad The grill pan may be cleaned in a dishwasher o...

Page 20: ...y FACIA PANEL HANDLES DOOR PANELS Only use a clean cloth wrung out in hot soapy water and dry with a soft cloth Stubborn marks can be removed using Luneta We recommend that you clean the whole of the stainless steel area to maintain a uniform finish Supplies can be purchased from H R P C contact direct sales order line on 01772 819 672 Do not use undiluted bleach or any products containing chlorid...

Page 21: ...the polythene bag on the top of the appliance but leave the appliance in the base tray packaging until you are ready to install it Note When removing the appliance from the base tray packaging care should be taken to ensure the outer frame trim is not damaged 2 i When installed in a typical 600mm deep built in housing unit the false back should be removed from the housing unit to provide the neces...

Page 22: ...nimum internal dimensions as shown Please note that all sizes are nominal some variation is to be expected 20 869 mm min 560 mm 17 mm min 880 mm min 888 mm min 7 mm 6 mm 550 mm min 595 mm 541 mm 892 mm 547 mm 30 80 mm INSTALLATION INSTRUCTIONS 23897 01 Q900EM 20 09 2002 09 12 Page 22 ...

Page 23: ...ation 1 Access to the mains terminal is gained by opening the terminal block cover at the rear of the appliance use a small flat bladed screwdriver 2 Connection should be made with suitable twin and earth heat resistant flexible cable minimum 4mm2 which is suitable for use up to 25 amps 3 First strip the wires then push the cable through the cable clamp in the terminal block cover 4 Connect the ca...

Page 24: ...nce into cabinet Note The unit housing the appliance must be appropriately fixed To secure the appliance to the housing unit open the grill top oven door and screw 2 screws through the top corner holes in the front frame ensuring that the appliance is centrally located Take care not to damage the appliance or cabinet 22 front frame edging strip glass outer door extrusion edging strip front frame I...

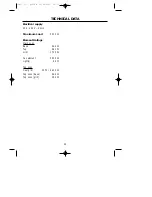
Page 25: ...um Load 5210 W Element Ratings Main oven Base 960 W Top 960 W Grill 1725 W Fan element 2400 W Light s 25 W Top oven Dual grill 1370 2610 W Top oven base 960 W Top oven grill 390 W 23 TECHNICAL DATA 23897 01 Q900EM 20 09 2002 09 12 Page 25 ...

Page 26: ... in a queue Calls are answered in strict rotation as our Customer Support Representatives become available Enter appliance numbers here for future reference Please ensure you have the above details Model No and Serial No to hand when calling Stoves Customer Support They are essential to booking your call Model No Serial No 24 STOVES PLC STONEY LANE PRESCOT MERSEYSIDE L35 2XW STOVES CUSTOMER SUPPOR...

Page 27: ...23897 01 Q900EM 20 09 2002 09 12 Page 27 ...

Page 28: ...08 23897 01 2001 RS2 23897 01 Q900EM 20 09 2002 09 12 Page 28 ...

Reviews: