


450 Series USB Encoder
Engineering Manual
www.storm-interface.com
450 Series USB Encoder Engineering Manual rev 1.5 Jun 2018 Page 3 of 48
Quickstart Guide
Before starting make sure that you have :
The encoder
A compatible Storm keypad.
A USB mini-B cable between your keypad and the host computer.
A panel with the correct cutout for your keypad
A copy of the configuration utility if you want to customise the configuration
Installation
Ensure your computer is powered up before connecting the encoder.
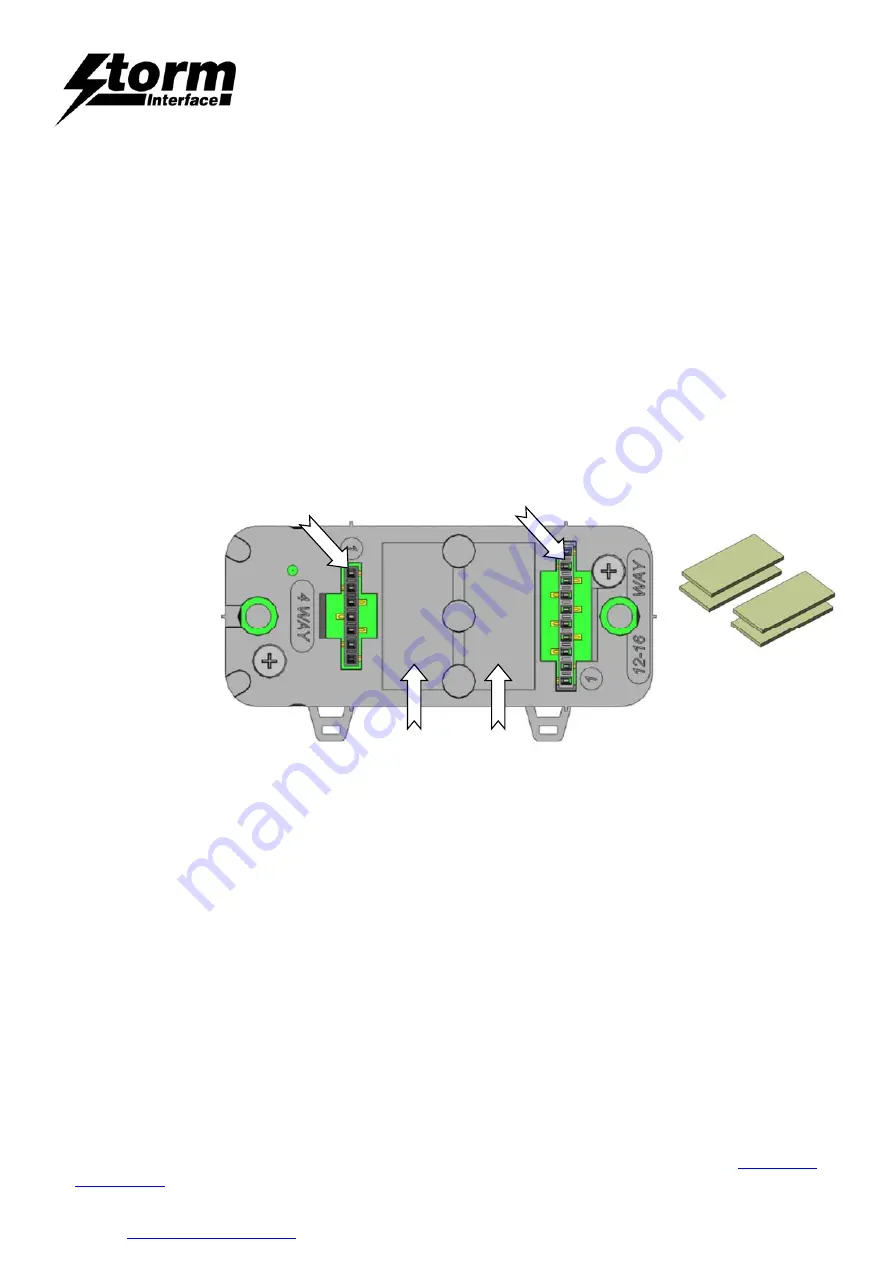
Note that there are two different sockets for the keypad connection, depends if a 4 way or 12/16 way
keypad is being used. Make sure that the correct socket is used before using the sticky pads to fix the
encoder in place.
Socket for 4 way keypad Socket for 12/ 16 way keypad
Sticky pads go here
( one per position, unless using 700 Series underpanel
which needs 2 per)
Push the encoder onto the keypad pins ; make sure the pad sticks down
Plug in the mini B USB cable on the side of the encoder
One Time Only Initialisation
This initialisation process must be completed the first time you turn it on. The encoder has to recognise the
keypad, and you have to select the layout that matches the keypad layout.
a)
PRESS AND HOLD
the bottom right hand key on the keypad – this tells the encoder which keypad is connected
b) Connect the encoder cable to the pc
c)
RELEASE KEY IF
you want function key ( 4 way) / telephone layout (12/16 way) code table
or
d)
KEEP THE KEY PRESSED FOR 10 SEC IF
you want cursor ( 4 way) / calculator ( 12/16 way) code table
Now check that you are getting the correct characters on screen. If you need to reconfigure the encoder you can
change the code table ( or reset to a pre-loaded code table ) with the USB Configuration Utility from
www.storm-
interface.com


