3
After setting the temperatures and times for the first step, you have to set the link-step. This is the step where the
program jumps to, after the current step has elapsed. Setting range is 0 to 8, where “0” means no jump to another step.
After setting the first step, increase the step number and repeat setting the values for that step. Due to that procedure,
you can create a program of max. 8 ramps and 8 soaks that ends at the last step (number 8), or that keeps on repeating
by setting the link-step at 1 in the last step.
Of course, it is also possible to repeat a part of the program by setting the link step at x (for example 4) in step 8. Step 4
till 8 will then be repeated till the operator pushes the stop button.
After you have set your program, push the “NEXT CHANNEL” text to swap to the next channel selection page.
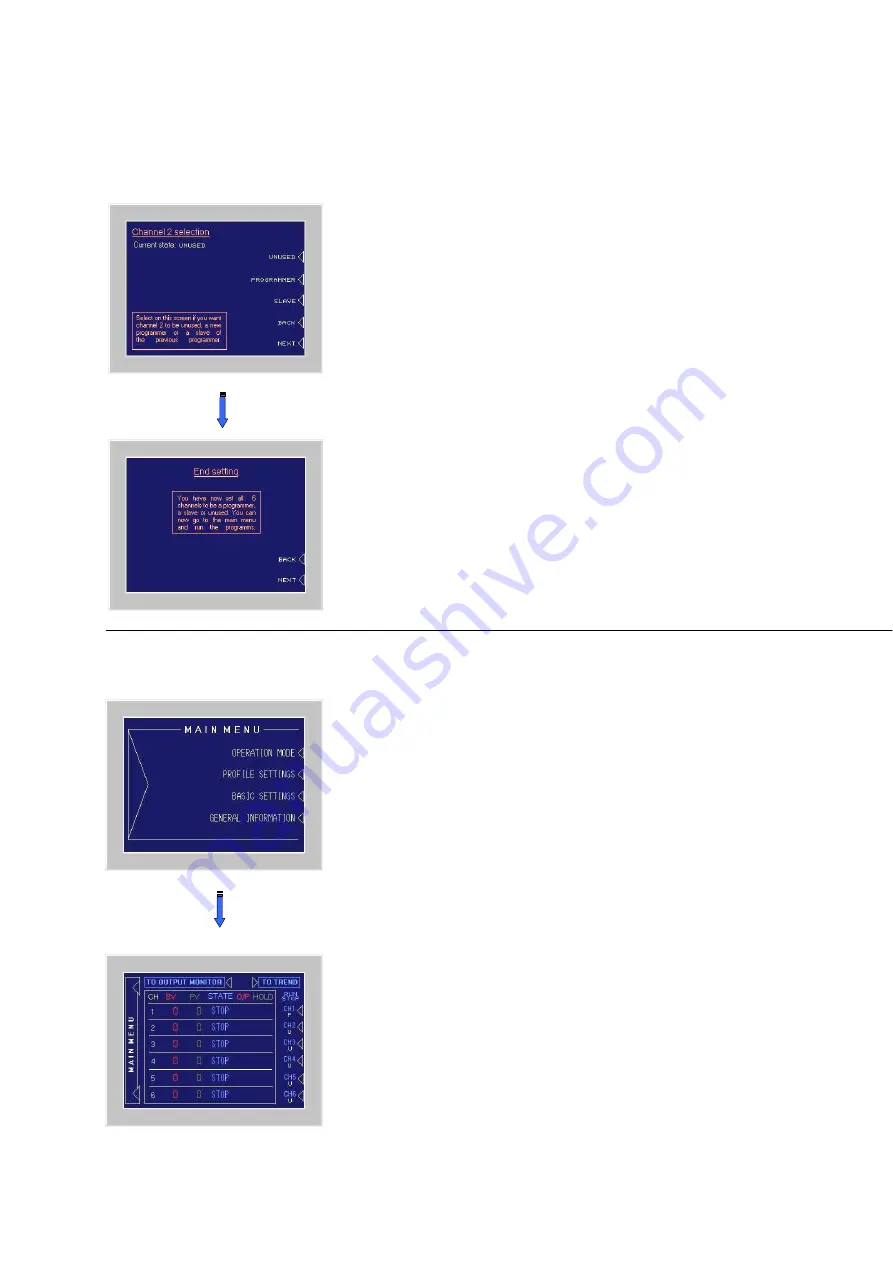
b) On the “Channel selection screen” you can select each channel to be unused,
programmer or slave of the previous programmer by pushing the corresponding
text. You can go back to the previous channel at any time, by pushing “BACK”.
After setting the channel function, push “NEXT”. If you choose “programmer”, you
will automatically swap to the channel 2 profile setting screen. If you have selected
“unused” or “slave”, you will swap to the next channel selection screen.
From here, you repeat the same procedure to set all channels.
After you have set all six channels to be a programmer, slave or unused you will
enter the “end setting” page that confirms that all channel have been set.
Also from the “End setting screen” you can go back to previous channel by
pushing the “BACK” text.
Push “NEXT” to swap to the main menu.
4) Operation Mode
Push the “OPERATION MODE” text to swap to the Operation Mode, where you
can RUN and STOP your programmers by pushing the corresponding channel
number text (CH1 ~ CH6). For each channel, the “P”, the “S” or the “U” indicates
whether that channel is a Programmer, a Slave or Unused. Programmers can
easily be recognized by the blue rectangle surrounding the channel number.
a) To RUN or STOP a program, toggle the corresponding programmer channel
button (CH1 ~ CH6) for one second. The one second delay on these buttons is to
prevent the operator for running and stopping channels by incident. The slaves
belonging to that programmer will automatically follow. In the “STATE” table, you
can see for each channel if it is in RUN or STOP mode. In the “O/P” (Output) table
you can see which outputs are active. In the “HOLD” table you can see on the
displayed “H” if that programmer is in Hold. The “H” will only be displayed on the
programmers. On the yellow spots in the HOLD table, you can see which
channel(s) are responsible for the programmer’s hold. This can be the
programmer itself, any of its slaves, or any combination.


