


65
SANDING OPERATIONS
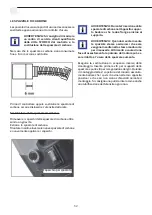
1. Once the sander, the vacuum cleaner, and all sa-
fety equipment have been set up, switch on the
vacuum cleaner first and then the sander. (When
using a vacuum cleaner with integrated switch,
such as STORCH VacTec 25 or VarioVac 50, set
the switch to the "Automatic" position first and
then switch on the tool.)
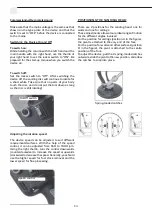
2. For sanding, press the sanding head as lightly as
possible against the surface to be processed, just
enough to keep the sanding head flat against the
surface.
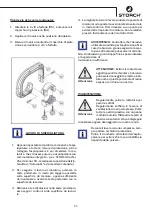
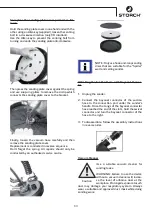
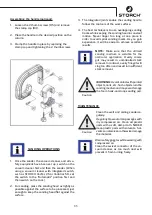
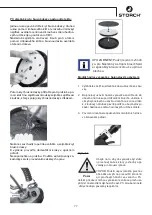
Assembling the handle (optional):
1. Loosen the 2 thumb screws (05) and remove
the clamp cap (04).
2. Place the handle in the desired position on the
column.
3. Clamp the handle in place by replacing the
clamp cap and tightening the 2 thumb screws.
MAINTENANCE
Clean the wall and ceiling sander re-
gularly.
Regularly blow out all air passages with
dry compressed air. Clean all plastic
parts with a soft, damp cloth. NEVER
clean plastic parts with solvents. Sol-
vents can dissolve or otherwise damage
the material.
Wear safety goggles while working with
compressed air.
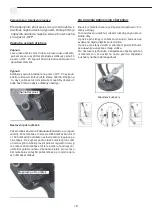
Clean the swivel connector of the va-
cuum cleaner, as too much dust will
prevent it from turning freely.
3. The integrated joints enable the sanding head to
follow the contours of the work surface.
4. The best technique is to use overlapping sanding
tracks while keeping the sanding head in constant
motion. Never linger too long at one place in
order to avoid spiral sanding marks. As you gain
experience, it will be easier to achieve excellent
results.
NOTE:
Make sure that the utilised
sanding medium is suitable for the
particular application. Overly coarse
grit may result in uncontrolled stock
removal. In contrast, overly fine grit will
clog too often and result in insufficient
stock removal.
WARNING:
Avoid contact with pointed
objects, nails, etc. Such objects ruin the
sanding medium and may even damage
the foam hook-and-loop sanding pad.
Caution
Caution
Summary of Contents for Spider
Page 2: ...2 ...
Page 12: ...12 Explosionszeichnung ...
Page 26: ...26 DETAILTEKENING optioneel ...
Page 40: ...40 SCHEMA ECLATE en option ...
Page 54: ...54 DISEGNO ESPLOSO opzionale ...
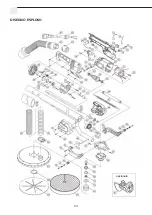
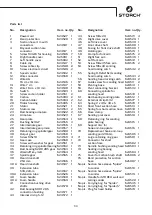
Page 68: ...68 Exploded view ...
Page 75: ...75 Pozor Pozor 1 ...
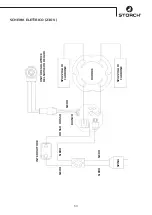
Page 78: ...78 Spínač vypínač Regulace počtu otáček ...
Page 81: ...81 MOTOR ...
Page 82: ...82 EXPLOZIVNÍ VÝKRES Volitelně ...
Page 86: ...86 ...
Page 87: ...87 ...


