Instruction Manual
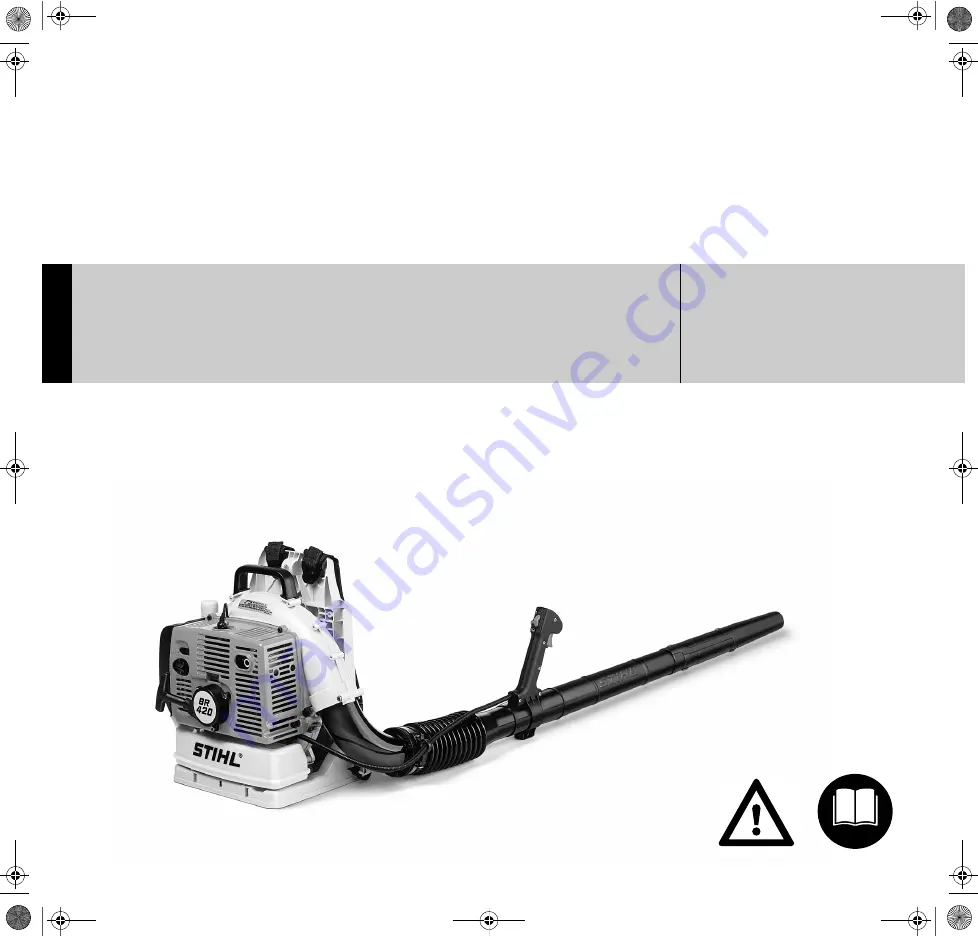
STIHL BR 420
BA_BR340_01_U_F3.book Seite 0 Dienstag, 24. Juni 2003 9:58 09
STIH)
Page 1: ...Instruction Manual STIHL BR 420 BA_BR340_01_U_F3 book Seite 0 Dienstag 24 Juni 2003 9 58 09 STIH ...
Page 2: ... Spark Plug 19 Engine Running Behavior 20 Spark Arresting Screen in Muffler 20 Replacing Starter Rope and Rewind Spring 21 Storing the Machine 24 Maintenance Chart 25 Minimize Wear and Avoid Damage 26 Parts and Controls 27 Specifications 28 Special Accessories 29 Maintenance and Repairs 29 Certificate of Conformity 30 Quality Certification 30 Dear Customer Thank you for choosing a quality engineer...
Page 3: ...re is a risk of damaging the machine or its individual components Note or hint which is not essential for using the machine but may improve the operator s under standing of the situation and result in better use of the machine Note or hint on correct procedure in order to avoid damage to the environment Equipment and features This instruction manual may refer to several models with different featu...
Page 4: ... a power tool Persons with pacemakers only The ignition system of your unit produces an electromagnetic field of a very low intensity This field may interfere with some pacemakers To reduce health risks STIHL recommends that persons with pacemaker consult their physician and the pacemaker manufacturer before operating this tool Do not operate this power tool while under the influence of any substa...
Page 5: ...nd damage Fueling Gasoline is an extremely flammable fuel Keep clear of naked flames and fire Do not spill any fuel do not smoke Always shut off the engine before refueling Do not fuel a hot engine fuel may spill and cause a fire Always remove the unit from your back and put it on the ground before fueling Fuel the unit only when it is standing securely on the ground Open the fuel cap carefully to...
Page 6: ... Engine Start the engine at least 3 meters from the fueling spot outdoors only not in confined spaces Your power tool is a one person unit Do not allow other persons to be near the running unit even when starting Do not drop start the engine The correct starting procedure is described in your instruction manual Place the unit on firm ground or other solid surface in an open area Make sure you have...
Page 7: ...ut it down near easily combustible materials e g wood chips bark dry grass fuel Mufflers with a catalytic converter can become particularly hot Your power tool produces toxic exhaust fumes as soon as the engine is running These fumes may be colorless and odorless Never run the engine indoors or in poorly ventilated locations even if your model is equipped with a catalytic converter To reduce the r...
Page 8: ...p hinders circulation Continual and regular users should monitor closely the condition of their hands and fingers If any of the above symptoms appear seek medical advice Maintenance and repairs The machine must be serviced regularly Do not attempt any maintenance or repair work not described in your Owner s Manual All other work should be carried out by a servicing dealer STIHL recommends that mai...
Page 9: ...fire due to ignition outside the cylinder move the slide control stop switch to STOP or 0 before turning the engine over on the starter with the spark plug boot removed or the spark plug unscrewed Check that the muffler is in perfect working condition Do not use the machine if the muffler is damaged or missing risk of fire Hearing damage Do not touch the hot muffler risk of burns The condition of ...
Page 10: ...he throttle cable 4 to the pleated hose with the retainer 5 Mounting Blower Tube with Straight Nozzle Operate the machine only with the blower tube and nozzle properly mounted Push the blower tube 6 into the pleated hose 7 Push the nozzle 8 onto the blower tube 6 to position a long or b short as far as lug 9 and rotate it in the direction of the arrow clockwise to lock see Guide to Using this Manu...
Page 11: ...onet coupling see Guide to Using this Manual Rotate the pleated hose 7 counterclockwise as far as stop and leave it in that position Turn the control handle 10 counterclockwise to the horizontal position Rotate the complete blower tube assembly until the nozzle discharge opening points in the same direction as the control handle Tighten down the clamp screw 11 Adjusting the Control Handle Put the ...
Page 12: ... than those specified may result in serious damage to the engine Poor quality gasoline or engine oil may damage the engine sealing rings hoses and the fuel tank Gasoline Use only high quality brand name gasoline with a minimum octane rating of 90 leaded or unleaded If your machine is equipped with a catalytic converter you must use unleaded gasoline A few tankfuls of leaded gasoline will greatly r...
Page 13: ...ake the mixture in the canister before fueling your machine Pressure may build up in the canister open it carefully Clean the fuel tank and canister from time to time Dispose of remaining fuel and cleaning fluid properly in accordance with local regulations and environment requirements Before fueling clean the filler cap and the area around it to ensure that no dirt falls into the tank Position th...
Page 14: ...c converter must always be switched off with the setting lever in the idle position because the throttle cable will otherwise disconnect itself from the throttle trigger The throttle cable reconnects itself automatically when the setting lever is moved to the idle position Observe safety precautions see chapter Safety Precautions and Working Techniques Slide the stop switch 1 to Move the setting l...
Page 15: ...zle Make sure you have a firm footing Hold the unit with your left hand on the housing and put one foot against the base plate to prevent it slipping Pull the starter grip slowly with your right hand until you feel it engage and give it a brisk strong pull Do not pull the starter rope out all the way as it might otherwise break Do not let the starter grip snap back Guide it slowly back into the ho...
Page 16: ...tures Allow engine to warm up As soon as engine runs Move the setting lever to the lower stop the engine settles down to idle speed Open throttle slightly warm up engine for a short period If the engine does not start If you did not turn the choke knob to e quickly enough after the engine began to fire the combustion chamber is flooded Pull off the spark plug boot Unscrew and dry off the spark plu...
Page 17: ...um power after about 5 to 15 tank fillings During operation After a long period of full throttle operation allow engine to run for a while at idle speed so that the heat in the engine can be dissipated by flow of cooling air This protects engine mounted components ignition carburetor from thermal overload After finishing work Storing for short period Wait for engine to cool down Drain the fuel tan...
Page 18: ...ways replace a damaged prefilter Clean loose dirt from the filter cover and filter chamber Install the main filter and prefilter elements in the filter cover Fit the cover on the filter base 5 and tighten it down firmly The carburetor comes from the factory with a standard setting This setting provides an optimum fuel air mixture under most operating conditions With this carburetor it is only poss...
Page 19: ...le setting is too lean Turn low speed screw L counterclockwise no further than stop until the engine runs and accelerates smoothly Erratic idling behavior Idle setting is too rich Turn low speed screw L clockwise no further than stop until the engine runs and still accelerates smoothly It is usually necessary to change the setting of the idle speed screw LA after every correction to the low speed ...
Page 20: ...n on power difficult to start or runs poorly at idle speed first check the spark plug Remove the spark plug see Starting Stopping the Engine Clean dirty spark plug Check electrode gap A and readjust if necessary see Specifications Rectify the problems which have caused fouling of spark plug To much oil in fuel mix Dirty air filter Unfavorable running conditions Fit a new spark plug after about 100...
Page 21: ...y an authorized STIHL dealer If the engine is down on power or does not run smoothly at maximum RPM check the spark arresting screen if fitted in the muffler Wait until engine has cooled down completely before performing the following operations Use suitable tool to squeeze ends of clip 1 together and then lift the clip away Pull the spark arresting screen 2 out of the muffler Clean the spark arre...
Page 22: ...her 4 and pawl 5 Ease the cap 6 out of the starter grip Remove remaining rope from the rotor and grip Tie a simple overhand knot in the end of the new starter rope and then thread the rope through the top of the grip and the rope bushing 7 Refit the cap in the grip Replacing Starter Rope and Rewind Spring 1 1 1 373BA025 KN 2 1 353BA034 KN 3 5 4 353BA041 KN 7 6 ...
Page 23: ...r or suitable pliers to install the spring clip 3 on starter post and over the peg on the pawl the spring clip must point clockwise see illustration Go to Tensioning rewind spring Replacing a broken rewind spring Lubricate the new spring with a few drops of non resinous oil Remove the rope rotor as described in Replacing the starter rope Remove parts of old spring 373BA026 KN 353BA034 KN 3 5 4 ...
Page 24: ...volutions in the direction of the arrow see illustration Hold the rotor steady straighten the twisted rope Release the rotor and let go of rope slowly so that it winds onto the rotor The starter grip must sit firmly in the rope guide bushing If the grip droops to one side Increase spring tension by one additional turn When the starter rope is fully extended it must be possible to rotate the rotor ...
Page 25: ...erly in accordance with local environmental requirements Run engine until carburetor is dry this helps prevent carburetor diaphragms sticking together Thoroughly clean the machine pay special attention to the cylinder fins and air filter Store the machine in a dry high or locked location out of the reach of children and other unauthorized persons Storing the Machine ...
Page 26: ...onths if problem if damaged if required Complete machine Visual inspection conditon leaks x x Clean x Control handle Check operation x x Air filter Clean x Replace x Pick up body in fuel tank Check x Replace x x Fuel tank Clean x Carburetor Check idle setting x x Readjust idle x Spark plug Readjust electrode gap x Replace after about 100 operating hours Cooling air intakes Clean x Spark arresting ...
Page 27: ...by a servicing dealer STIHL recommends that you have maintenance and repair work carried out only by an authorized STIHL servicing dealer STIHL servicing dealers are able to attend regular training courses and receive technical information bulletins on the latest engineering changes If these operations are not carried out as specified the user assumes responsibility for any damage that may occur A...
Page 28: ... Back plate 12 Back padding 13 Air filter 14 Antivibration elements 15 Spark plug boot 16 Muffler with spark arresting screen 17 Carburetor adjusting screws 18 Choke knob 19 Starter grip 20 Fuel filler cap 21 Fuel tank Serial number see Guide to Using this Manual Parts and Controls 11 12 10 5 6 7 1 4 9 8 13 373BA040 KN 2 3 14 14 373BA041 KN 20 19 18 17 16 15 373BA042 KN 21 ...
Page 29: ...el pump Fuel tank capacity 1 5 l 1 500 cm3 Fuel mix see chapter Fuel Specifications Air velocity BR 420 78 m s BR 420 catalytic converter 77 m s Max air flow rate without blower tube BR 420 1260 m3 h BR 420 catalytic converter 1230 m3 h Air flow rate with nozzle BR 420 890 m3 h BR 420 catalytic converter 880 m3 h BR 420 9 1 kg BR 420 catalytic converter 9 3 kg Noise and vibration data are measured...
Page 30: ...ommends that all maintenance and repair work be carried out by an authorized STIHL dealer STIHL dealers regularly attend training courses and are supplied with the necessary technical information When repairing the machine only use replacement parts which have been approved by STIHL for this power tool or are technically equivalent Only use high quality replacement parts in order to avoid the risk...
Page 31: ...teed sound power level BR 420 108 dB A BR 420 catalytic converter 107 dB A Technical documents deposited at ANDREAS STIHL AG Co KG Produktzulassung Product Licensing Done at Waiblingen 10 04 2006 ANDREAS STIHL AG Co KG Elsner Director Group Product Management All STIHL products comply with the highest quality standards An independent organization has certified that all products manufactured by STI...
Page 32: ...31 BR 420 English ...
Page 33: ...32 English BR 420 ...
Page 34: ...0458 373 0121 B englisch English BA_BR340_01_U_F3 book Seite 1 Dienstag 24 Juni 2003 9 58 09 ...