293
FR
ES
PT
IT
EL
PL
RU
KZ
UA
RO
BR
EN
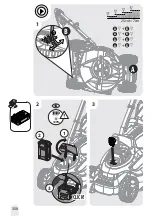
The battery is not fully charged at the time of purchase.
Before using the product for the fi rst time, place the battery
in the charger and charge it fully.
Pay particular attention using the machine for the fi rst time : focus and dedicate all your attention to this
fi rst use. Make the fi rst trial on a free space with no obstacle and no surrounding element
4.4 OPERATION
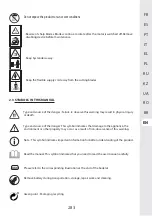
WARNING ! The mower can only be used outdoors, and in no
case in a building.
Start the product
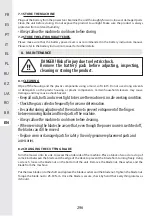
WARNING ! Sharp moving blade. Never attempt to override
the operation of this switch and safety key system as a serious
injury could result.
WARNING ! When the motor has been switched off , the cutter
continues to run for several seconds. Therefore, do not touch
the underside of the mower until the cutter has come to a
standstill.
Connect the battery fully charged. Press and hold the switch button. Pull the switch bar toward the
handle and release the switch button to start the mower. To stop the mower,release the switch bar. Let
the blade come to a complete stop before making any adjustments to the mower.
About safety key:
The safety key is a disabling device to prevent unintentional activation of the lawnmower.
Do not pull out the key in normal operation, the safety key is not control device that govern the operation
of the cutting means. Always remove the safety key if the lawnmower is going to be left unattended.
Operate the product
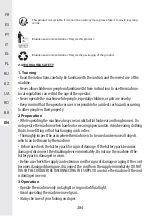
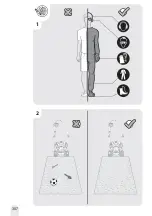
CAUTION ! Always wear safety glasses, substantial
footwear and long trousers. Wear a fi lter mask if the operation
is dusty. Use of proper gloves is also recommended.
Firmly hold the handle with both hands when mowing. Do not try to cut long grass all at once. Instead,
mow the lawn in steps. Leave a day or two between mowings until the lawn becomes evenly short. When
mowing at the edge, be sure to face the left side of the machine toward the edge, and then move the
machine along the edge.
WARNING :
if you strike a foreign object, stop the motor. Remove the safety key, thoroughly inspect the
mower for any damage and repair the damage before restarting and operating the mower. Extensive
Summary of Contents for 20VLM2-33P.1
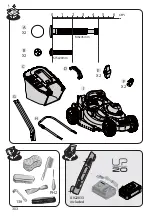
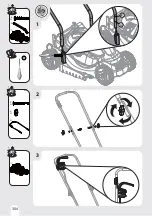
Page 302: ...PH2 0 1 2 3 4 5 6 cm M6x45mm ST5x20mm A X2 B C I X2 D H G E X2 F X2 13 A022033 included 303 ...
Page 303: ...2 3 A X2 E X2 G I B X2 1 I H A B 304 ...
Page 304: ...5 F X2 4 100 cm 92 cm 305 ...
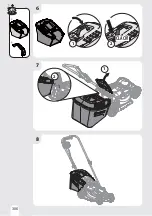
Page 305: ...6 7 8 C D 1 CLACK 2 1 2 306 ...
Page 306: ...1 2 307 ...
Page 307: ...2 3 1 4 3 2 1 2 5cm 7cm A 1 B 1 A 2 B 2 A 3 B 3 A 4 B 4 1 2 3 4 B A 100 1 2 CLICK 3 308 ...
Page 308: ...4 5 1 2 3 6 309 ...
Page 310: ...8 15 311 ...
Page 311: ...12 13 11 9 10 312 ...
Page 312: ...3 2 4 1 90 3 4 2 1 5 313 ...
Page 313: ...2 3 1 90 3 4 2 1 314 ...
Page 314: ...5 4 7 6 9 8 A022033 included 25 30N m 315 ...
Page 315: ...1 2 4 5 3 4 2 1 3 316 ...
Page 316: ...1 2 4 с 24 с 317 ...

