Steren WR-057, Instruction Manual
The Steren WR-057 is a high-quality electronic product that comes with a detailed Instruction Manual for easy setup and operation. The manual can be downloaded for free from manualshive.com, ensuring that users have all the necessary information to maximize the functionality of their device.
Share
Download


Reviews:
No comments
Related manuals for WR-057

5002
Brand: Karma Pages: 12

AMD-805
Brand: Aiwa Pages: 20

BETA 52
Brand: Shure Pages: 12

980186-0403 - USB Desktop Microphone
Brand: Logitech Pages: 11

611L
Brand: Astatic Pages: 2

SC-506
Brand: Supersonic Pages: 6
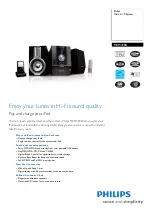
MCM398D Series
Brand: Philips Pages: 2

CR-ST700SCD
Brand: Kenwood Pages: 160

E205
Brand: Superlux Pages: 2

AEA N22
Brand: AEA Pages: 2

MAX-DL44
Brand: Samsung Pages: 20

MAX-DN64
Brand: Samsung Pages: 24

MAX-DS9550
Brand: Samsung Pages: 32

MAX-DJ650
Brand: Samsung Pages: 33

MAX-DJ550
Brand: Samsung Pages: 32

MAX-DG53
Brand: Samsung Pages: 32

MAX-DS18500
Brand: Samsung Pages: 39

MAX-DC950
Brand: Samsung Pages: 35


