10
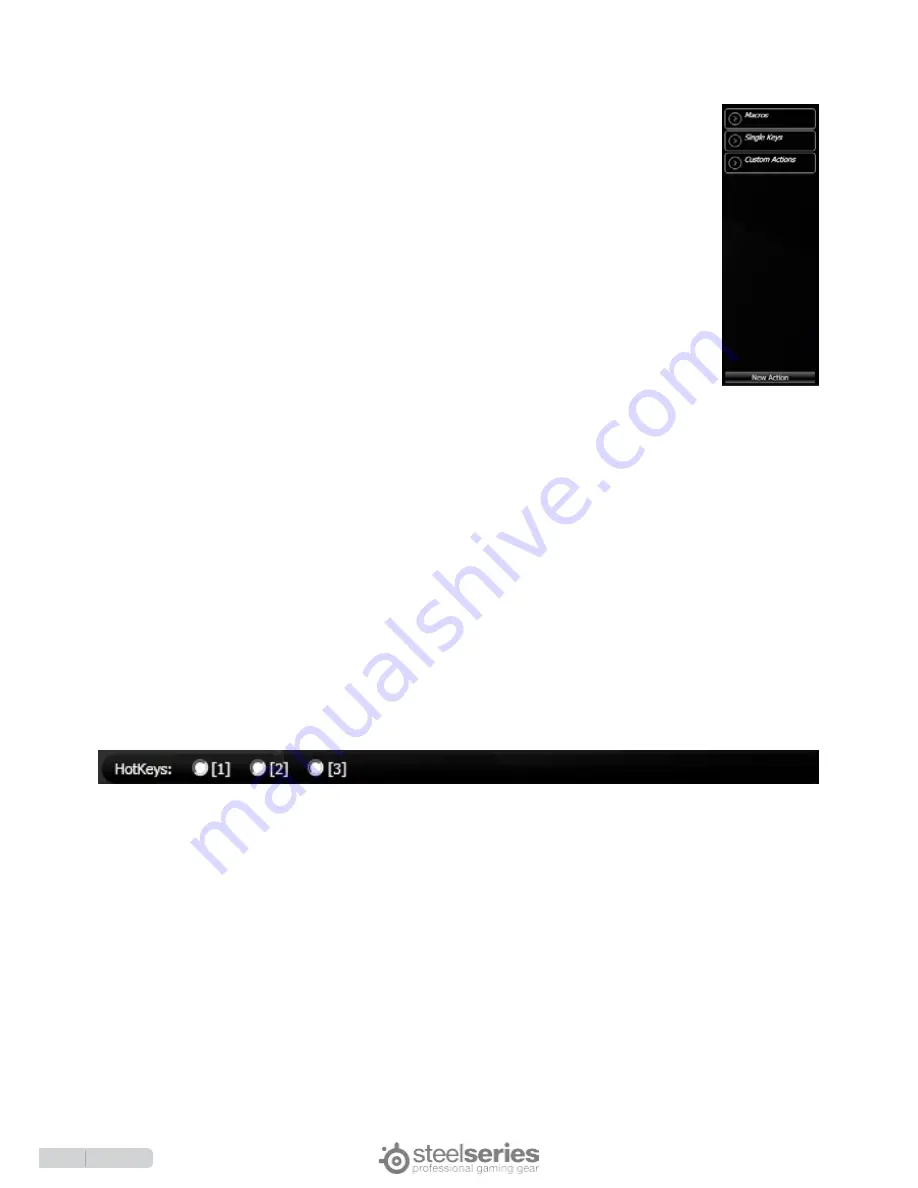
On the right side of the window is a menu for macros and are grouped into three categories. The
contents of each category can be explored by clicking on the arrow button next to their names.
When the arrow is pointing down, the list is expanded (shown). When it is facing right, it is collapsed
(hidden).
The actions under the Macros and Single Keys categories are read-only and can not be edited or
deleted, they will always be available for you to use or copy as a basis for custom macros. Please
refer to the Single Keys list whenever you need to use a button that is missing on the current keyset.
Custom actions are all the macros you have recorded manually when assigning them to certain
keys (see Profile Customization, page 9). They are saved in this list so they can be quickly applied
to other keys, or for when a macro should temporarily be disabled.
You can create a new macro and not have it mapped to any key by clicking on the button labeled
New Action. Then, you may later apply the macro by selecting its name on the menu, then dragging
it to the desired key.
As a final note, you can create, copy, and delete custom actions just like profiles by right clicking on
the name and selecting the desired action.
The hotkeys have 3 layers and will work both with the SteelSeries Engine and in a standalone mode on any other
computer. There are four buttons next to Hotkey 8 – the ones labeled 1, 2, and 3 toggle which hotkey layer you are
using. The fourth button, which shows a red circle, is used for the on-the-fly macro recording. There are two ways to
record a hotkey macro:
1. On-the-fly: press Record button, press layer button and then the hotkey to be remapped, type in the macro and
press Record button again to finish the recording. Note that throughout the process the extended LEDs marked with
1, 2 and 3 will be flashing indicating the current selected layer. If the SteelSeries Engine is installed, the newly recorded
Hotkey macro will appear in the Custom Actions.
2. Using SteelSeries Engine: select which hotkey layer you wish to work with using the buttons shown above the
keyboard layout:
Then select the key and edit it (see Profile Customization, page 8-9).
Layers
Even though you are able to customize as many profiles as you want within the SteelSeries Engine, each profile can
be further specialized under a number of layers. The Standard keyset that comes with your Shift features four different
layers, while other keysets can have a different amount and structure of layers.
On the upper right hand corner of keyboard, next to the button with the SteelSeries logo, there are two buttons labeled
Bar Lock and Pad Lock. To the right of the buttons should be two green lights that indicate which layer is turned on.
The four profiles that are supported are Primary (the default, “Main” layer), Bar Lock, Pad Lock, and Bar Lock + Pad
Lock [took this out].
The Primary Layer is indicated when both the Bar and Pad lights are turned off. The actions assigned in the Primary
layer will be present throughout all layers, unless a key is overwritten with another action in a different layer.
When the Bar Lock layer is enabled, the Bar light will be turned on, and the Function keys (F1-F12) will be replaced by
a new set of keys B1-B12, which are disabled by default.
When the Pad Lock layer is enabled, the Pad light will be turned on, and the Number Pad on the far right side of the
Macros/custoM actIons
hotKeYs
Summary of Contents for Shift
Page 1: ...USER GUIDE STEELSERIES SHIFT ...
Page 14: ...www steelseries com ...


