7
Operators with “back mounted” vests should also orient the connection to
send the arm to the inside.
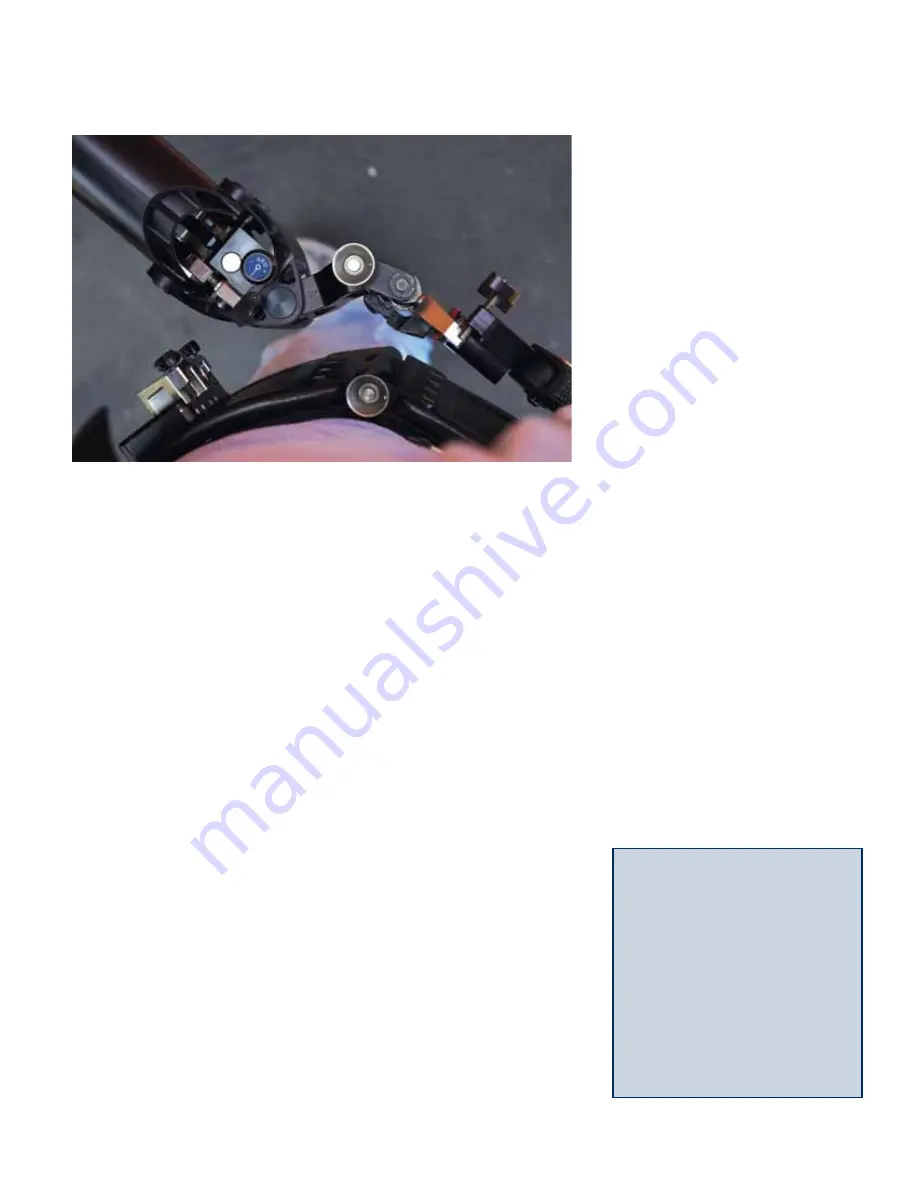
With a back mounted vest
When using a back mounted vest, set the
kickback link inwards as shown in the
photo. This is the opposite direction from
the kickback link’s use in a front mounted
vest. The idea is to get the socket block
both closer to the body and to the sled.
Why? See the next tip.
When using any back mounted vest, all
arms are more extended from the load
(the sled) to the attachment point (the
socket block). Additionally, the “end
block” nearest the body is pointing fore-
aft. With a normal, front-mounted vest,
the arm extension is less and the end
block is oriented sideways to the load.
Extending any arm makes it more likely
to go over centers and lock up.
When you lean back with a back mounted
vest, the upper arm section’s end block
leans back in line with the upper arm
section. (With a front mount vest, the end
block rotates perpendicular to the upper
arm section as you lean back). With a
back mounted vest, this leaning back
puts the end block in a more iso-elastic
If you leave the forearm fully iso, it
has the “helper torque” throughout its
range, low to high, and when the arm is
extended, it tends to force the upper arm
over centers. Consequently, you should
not only reduce the iso for the upper arm
link with a back mounted vest, but also
reduce the iso for the forearm. That way
when raised, the operator is lifting a little,
the torque is reduced correspondingly and
the transferred torque is likewise reduced
– hence a smaller tendency for the upper
arm section to go over centers. Even with
the iso dialed down, the G-70x
™
arm’s
response in the +/- 50 degree range is
more iso-elastic than other arms.
position, making the upper arm section
more likely to go over centers and lock
up.
All arms behave this way, but the
consequences become evident with an
extended range (+/- 70 degree) and very
iso-elastic arm like the G-70x
™
arm or
G-50x
™
arm. The travel in most other
arms is restricted to +/-50 degrees, and
this effect occurs above that angle.
The solution is to have about one-half the
“iso” help (1/2 the threads) in the upper
arm section that one has in the forearm
section. You fine tune the adjustment
the same way as described on page 5,
increasing the iso-elastic response until
the arm starts to lock up, then dialing it
back in a few turns.
Walking with a back mounted vest also
“activates” the socket block more than
with a front mounted vest; it rocks back
and forth in line with the upper arm
section, again with consequences for the
arm’s response. It may require an even
smaller “less iso” link.
Tip: Many operators with
front mount vests have
removed the stopper for
the socket block spring. If
you do this, also change
the kickback link to the
forward position (like the
back mount photo). It’s
a bit harder to insert the
arm into the socket block,
but the range of motion is
increased.


