11
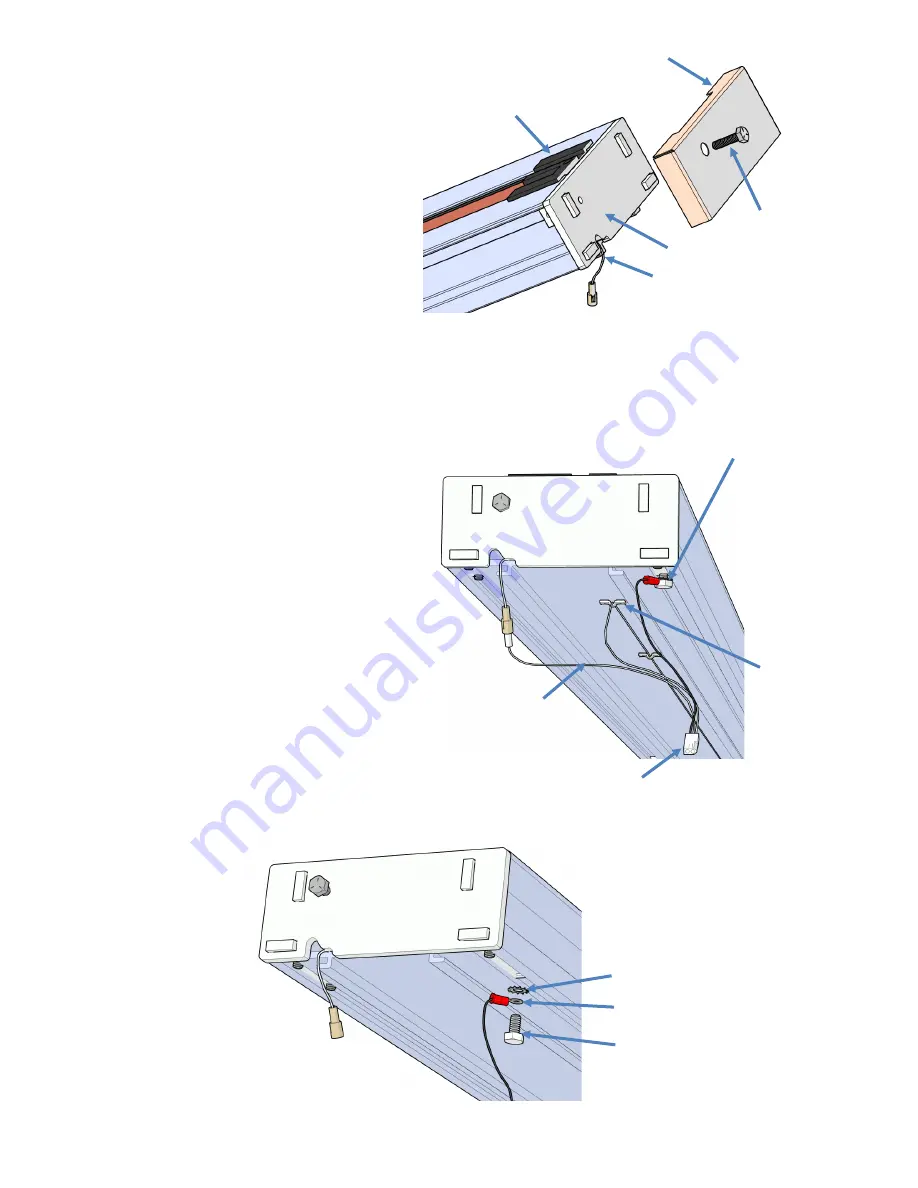
Star Lock Washer
Retaining Ring
Hex Head Screw
Limit
Cam
End Cap
End Plate
Gear Rack
Compression
Screw
Route the
Charge Wire
through the slot
in the End Plate
Place the upper limit cam inside the track
and secure by tightening the phillips head
screw.
Place the end plate onto the end of the track
while routing the charge wire through the
slot in the bottom of the end plate. Tighten
the set screws in the end plate.
Place the end cap onto the end plate and
secure with adhesive back tape.
Insert the gear rack compression screw and
tighten to compress the gear rack pieces
together. The screw must make contact with
the gear rack. If the screw is too short, there
is a longer one with the small parts.
The battery charger can be placed at the top or
bottom of the track.
The illustration shows the
charger being at the top end of the track.
Connect the short white wire to the mating
connector from the top charge strip.
Route the long white wire to the bottom of the
track and connect it to the mating connector
from the bottom charge strip.
Adhesive back U
-
clips are provided to be applied to the bottom
of the track for wire routing.
Remove the hex head screw and star lock
washer from the bottom of the end plate and
connect the black wire to the end plate. Con-
nect the harness to the charger.
Hex head screw
with Ring Terminal
(Black Wire)
White Wires
U
-
Clip
To Charger
Plug the charger into 110V outlet.


