


1
2
3
4
5
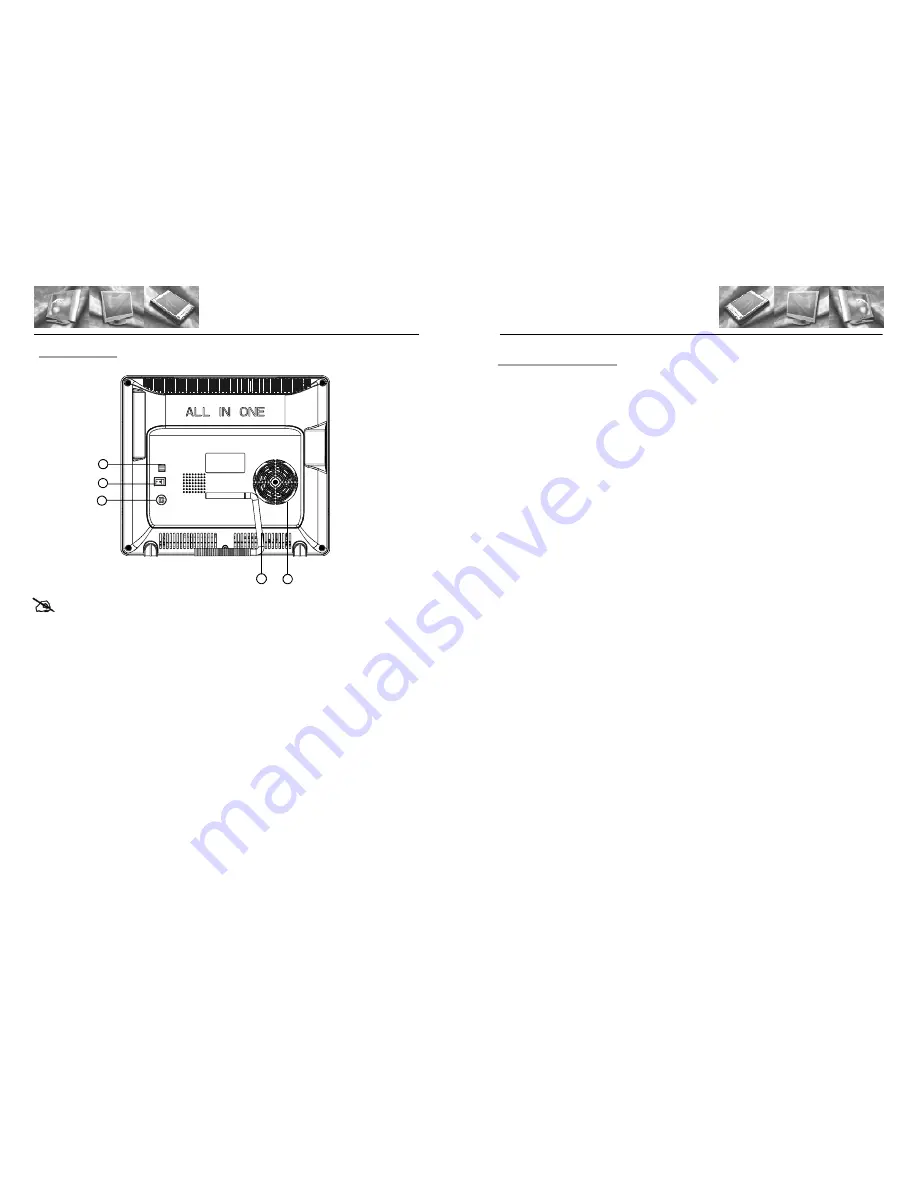
Rear view (with external power supply)
Rear view
1. USB 5/6
2. POWER SWITCH (ON/OFF): th e Ge nera l Power s witc h button
3. DC j ack for DC terminal of the A dapter
4. Compute r stand
5. Ventilation ho le fo r FAN
6. Optical d isc d rive(ODD dri ve)
Not e:
1.The pictur e illu strated above is fo r ref eren ce on ly. T he a ctua l spe cific ation or
app earance m ay b e di fferent su bjec t to requireme nts of the cus tomer.
2.There are two k inds of Optica l disc drives for th is co mpu ter, it de pend s on your
specification , one is slim t ray ODD, and the othe r is slim s lot-i n ODD, F or tray ODD,
Plea se p ress EXIT but ton t o po p-up the tray, and then put the disc with non-d ata s ide
faci ng y ou, and th en p ush the tray. F or s lim s lot-i n OD D, p leas e ins ert th e di sc directly
with non-data sid e fac ing y ou, to ex it th e disc, pr ess th e EX IT b utto n.
Quickstart Guide
Step 1. Unpac k the gift box conte nts to gat her your c omputer and relev ant a cces sorie s,
then pos ition the comp uter in a s uitable pl ace, insert DC term inal of th e ada pter to D C
jack of th e co mput er, a nd fi nally finis h the con necti on b etwe en adapter and wall outlet.
Step 2. Insert the USB terminals of ke ybo ard a nd mouse to th e US B po rt in the b ack o f the
compute r.
Step 3. S witc h on the P OWE R SWITCH a t the back of th e co mput er. P ress POWER
butt on on the fron t key pad o f the com pute r to turn o n the com pute r, an d ins ert th e
OS( operating syst em) insta llatio n dis c to the ODD drive , the com pute r will boo t from the
disc , ple ase fi nish the i nstal latio n of OS b y fol lowing th e ins tallation g uide of th e OS
inst allati on C D.
Step 4. After insta llatio n of the OS, p lease inse rt the driv er CD into the ODD dri ve and
cho ose the su itabl e drivers for y our OS to install, pl ease follow th e ste ps sh own belo w for
driv ers' i nstal latio n, an d res tart your com puter afte r installation.
1. M /B dr iver(driver for motherb oard chip set)
2. VGA d river(driv er fo r bui lt-in Video pro cessing c ard)
3. So und drive r(driver f or so und chipset)
4. L AN d river (driv er fo r loc al networ k card)
5. WIFI d river(driv er fo r wir eless network card )
Not e: Please mak e sure th e comput er is at POWER OFF status whe n yo u co nnec t the
cab le or term inal to the co mpu ter each time by switching off the P OWER SWITCH
at the ba ck o f the com pute r.
Not e: Th e co mpu ter BIOS defa ult b oot sequ ence is from ODD driv e, if you failed to
boo t the compute r fro m th e no rmal boo t disc or OS in stallatio n dis c wh ich i s ins erted
to the ODD d rive , firs t ple ase check if th ere are a ny p roblems with your disc, or else,
pres s CTRL+ALT+DELE TE to restart the comp uter, and hold DE LETE ke y for a
few seco nds to en ter the BIOS setting in terfa ce d urin g BI OS P OST(power-on-self-
test ) pro cedu re, a nd then press F9 a nd ENTER to loa d the optimal defaults, pres s
F10 and ENTER to sa ve co nfig urat ion c hanges and exit se tup , the computer will
restart o nce again and try to se arch boo t discs from the ODD d rive and boot the
compute r.
NO TE: Please ins tall the p rope r dr ivers for your compute r ba sing on the
spec ifica tion of y our comp uter.
5
6
Summary of Contents for X9GPP17X
Page 1: ...PC ALL IN ONE User Manual...


