background image

Instruction Manual

5

Disk Installation

Connect the Dock to an available power outlet, using the provided    

1. 
  power adapter.

Connect the Dock to the (powered) Host Computer, using the provided  

2. 
  USB/eSATA cables.

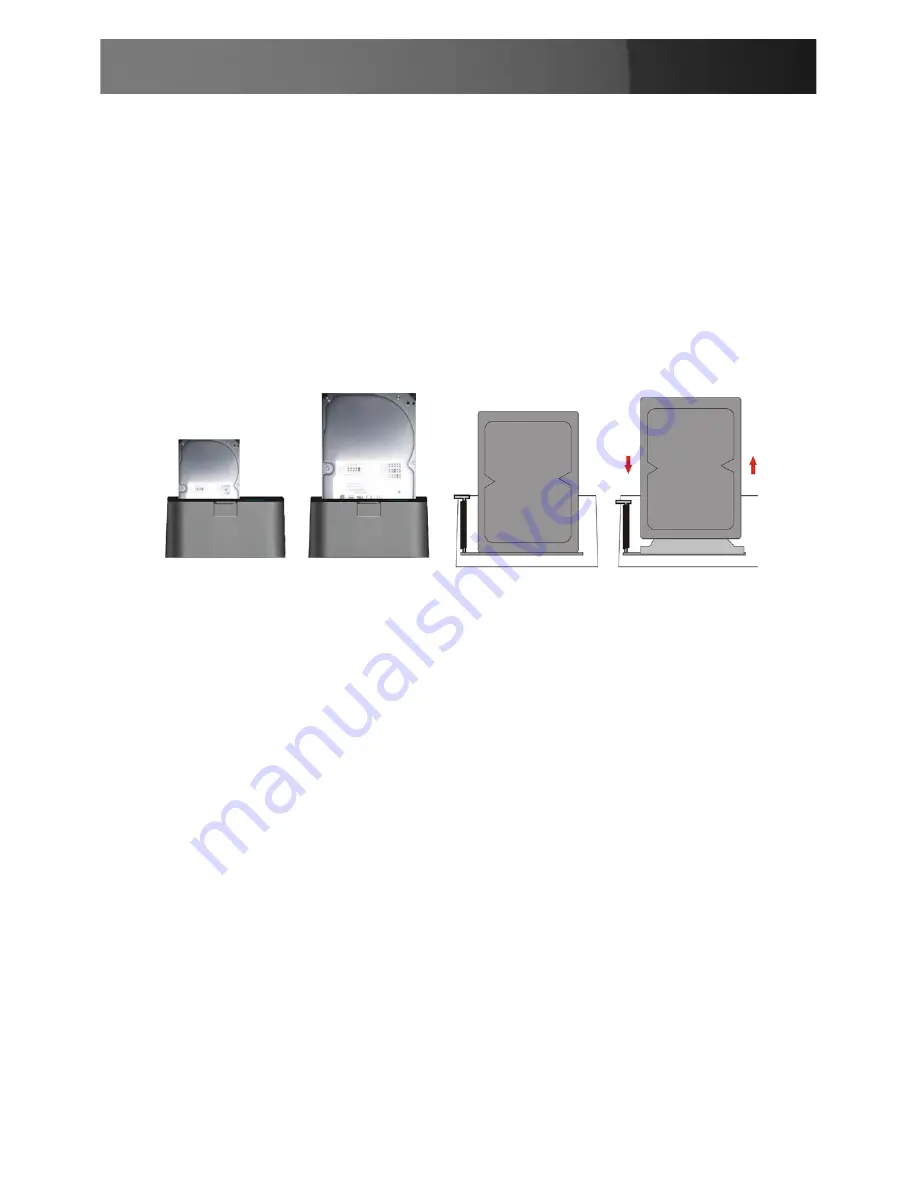
Insert the 2.5” or 3.5” SATA/SATA II drive(s) you wish to install, such   

3. 
  that the SATA power and data connectors at the back of the drive are  
  properly aligned with the corresponding connectors inside the Dock.

Press the Power Button on the rear panel of the Dock

4. 
Once the drive has been inserted, the operating system will detect that 
it has been connected and automatically update the drivers for proper 
operation.

SATA Drive Removal

If you are using the SATADOCKU2 or SATADOCKU2E, you can remove 
SATA drives from the docking station by gently pulling them out from the 
top of the dock. 
If you are using the SATADOCK22UE, the drives can be removed using 
the eject button that corresponds with the drive you wish to remove. 
When removing the installed drive from the Dock, please ensure that you 
have followed the appropriate steps (dependant on the operating system) 
to disconnect removable storage. In Windows for example, click on the 
Safe Remove icon located in the taskbar. Select the drive from the menu 
provided, then click 

Stop. Select the device to disconnect, and click OK.

Summary of Contents for SATADOCK22UE

Page 1: ...SATADOCKU2 SATADOCKU2E SATADOCK22UE 2 5 3 5 SATAHD Docking Station Instruction Manual...

Page 2: ...antenna Increase the separation between the equipment and receiver Connect the equipment into an outlet on a circuit different from that to which the receiver is connected Consult the dealer or an exp...

Page 3: ...Features 1 Package Contents 1 SATADOCKU2 1 SATADOCKU2E 2 SATADOCK22UE 2 Hardware Guide 3 SATADOCKU2 3 SATADOCKU2E 3 SATADOCK22UE 4 Disk Installation 5 SATA Drive Removal 5 Preparing the Hard Drives f...

Page 4: ...book The StarTech com SATA HD Docking Station is a perfect solution for data recovery drive imaging and testing centers or any environment requiring fast access to uninstalled archived drives Features...

Page 5: ...2 SATADOCKU2E 1 x eSATA Cable 1 x Manual 1 x Power Adapter 1 x SATA hard drive docking station 1 x USB Cable SATADOCK22UE 2 x eSATA Cable 1 x Manual 1 x Power Adapter 1 x SATA hard drive docking stat...

Page 6: ...Instruction Manual 3 Hardware Guide SATADOCKU2 SATADOCKU2E DC Power Adapter USB Port On Off Switch On Off Switch DC Power Adapter eSATA Port USB Port...

Page 7: ...Instruction Manual 4 SATADOCK22UE eSATA Ports USB Port DC Power Adapter Eject Buttons Drive LEDs...

Page 8: ...t it has been connected and automatically update the drivers for proper operation SATADrive Removal If you are using the SATADOCKU2 or SATADOCKU2E you can remove SATA drives from the docking station b...

Page 9: ...select Manage In the left pane of the Computer Management window click Disk Management In the bottom right pane of the Computer Management window you 2 should see your drives listed as unallocated Cl...

Page 10: ...you wish to create You must select a 5 partition size that is between the maximum and minimum sizes typically the maximum disk space available Once you have done so click Next to continue Select 6 For...

Page 11: ...Wizard Click Finish to commence the formatting of the drive The status of the drive as shown in the Computer Management 8 window will be updated to reflect the selections you have made Please wait whi...

Page 12: ...Instruction Manual 9 To access your newly partitioned drive s open My Computer Your 10 drive s should be displayed below the heading Hard Disk Drives...

Page 13: ...in Female External Connectors 1 x USB B Female 1 x DC Power Adapter 1 x USB B Female 1 x eSATA Plug Female 1 x DC Power Adapter 1 x USB B Female 2 x eSATA Plug Female 1 x DC Power Adapter Drive Compat...

Page 14: ...with equivalent products at our discretion The warranty covers parts and labor costs only StarTech com does not warrant its products from defects or damages arising from misuse abuse alteration or no...

Page 15: ...name just a few We offer an unmatched selection of computer parts cables A V products KVM and Serv er Management solutions serving a worldwide market through our locations in the United States Canada...

Reviews: