background image

IIn

ns

stta

alllla

attiio

on

n

Installing a Hard Drive in the Enclosure

Use caution when installing a hard drive in the enclosure. Excessive shock or force
could damage the drive and/or the enclosure, resulting in data loss.

CAUTION:

Always ensure that you are properly grounded when handling a hard drive or

the enclosure tray, since electronic components can be damaged by static electricity. If
an anti-static mat or similar product is not available, ground yourself by touching a
computer case or other metal surface for several seconds before handling any
components.

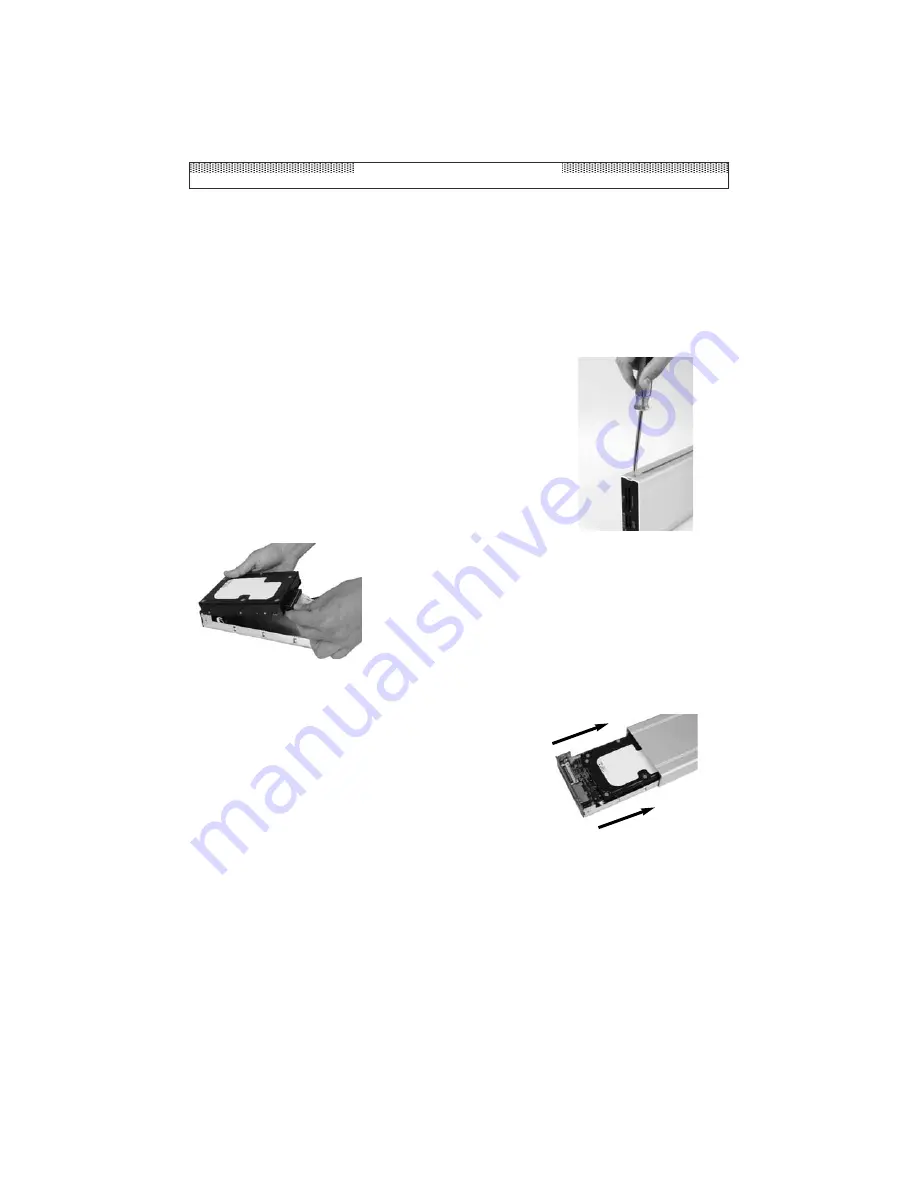
1. Using a Phillips-head screwdriver, remove the two screws 

located on the top of the case.

2. Gently slide the inner tray out of the enclosure.

3. Attach the IDE connector to the hard drive. To 

avoid damaging the drive and the enclosure, 
please refrain from using excessive force.

4. Attach the power connector to the hard drive.

5. Attach the hard drive to the tray, using the screws 

provided with the hard drive.

6. Gently re-insert the tray back into the enclosure

7. Re-fasten the Phillips-head screws that were removed 

in 

Step 1

.

Connecting and powering the Enclosure

1. Attach the provided USB cable to the Mini B port, located on the enclosure.

2. Connect the opposite end of the USB cable into an available USB port on the host 

computer.

3. Connect the 5V/12V DC 1.5 Amp switching power supply to the power port located 

next to the On/Off switch. Connect the opposite end to an available power source.

PostScript 

Picture

Instruction Manual

2

Summary of Contents for InfoSafe

Page 1: ...InfoSafe Drive Enclosure with Card Reader and USB Hub IDECASEU2CRH Instruction Manual Actual product may vary from photo InfoSafe 3 5 USB 2 0 Drive Enclosure with Card Reader and USB Hub...

Page 2: ...uipment and receiver Connect the equipment into an outlet on a circuit different from that to which the receiver is connected Consult the dealer or an experienced radio TV technician for help U Us se...

Page 3: ...Installation 2 Installing a Hard Drive in the Enclosure 2 Connecting and powering the Enclosure 2 Driver Installation Windows 98SE ME 2000 3 Hard Drive Enclosure 3 Card Reader and USB Hub 3 Verifying...

Page 4: ...Sturdy aluminum casing Compliant with USB 2 0 USB 1 1 and Parallel ATA ATAPI Rev 6 B Be ef fo or re e Y Yo ou u B Be eg gi in n System Requirements A computer with an available USB 2 0 port An operat...

Page 5: ...of the case 2 Gently slide the inner tray out of the enclosure 3 Attach the IDE connector to the hard drive To avoid damaging the drive and the enclosure please refrain from using excessive force 4 At...

Page 6: ...lick next once this has been selected 4 At the next screen Windows will indicate that it is ready to install the best driver for the device specifying the location of the chosen driver Please click Ne...

Page 7: ...l Serial Bus Controllers If installation has been successful USB Storage Adapter AT2 TPP or USB Mass Storage Device will be listed indicating that the hard drive is ready to use Similarly Generic USB...

Page 8: ...ed Chipset Cypress CY7C63000 Operating System Support Windows 98SE and Higher Dimensions 237 x 40 x 130mm Weight 884 5g 1 95lb Flash Media Supported CF Type I II CF Ultra II CF Extreme I MD SMC SM MS...

Page 9: ...ent with equivalent products at our discretion The warranty covers parts and labor costs only StarTech com does not warrant its products from defects or damages arising from misuse abuse alteration or...

Page 10: ...s cables server management solutions and A V products and serve a worldwide market through our locations in the United States Canada the United Kingdom and Taiwan Visit www startech com for complete i...

Reviews: