3
Contents
This package should contain:
• 1 x drive caddy
• 1 x drive bay
• 2 x keys to lock/unlock the drive
• Assorted screws
Installation
NOTE:
Before installing the drawer, you will have to determine if the drive you are
installing is a master or a slave. You should set the jumpers before installing the drive
into the drive drawer. Contact the hard drive manufacturer for more details.
If you are using two drives on the same IDE channel, make sure that one is set to Master
and the other is set to Slave. If you are only installing one drive on the channel, you
should configure it as a Master. Also make note of the configuration of all of your drives
so that you will not accidently assign two Masters or two Slaves to the same channel
when you are adding or removing hard drives later on.
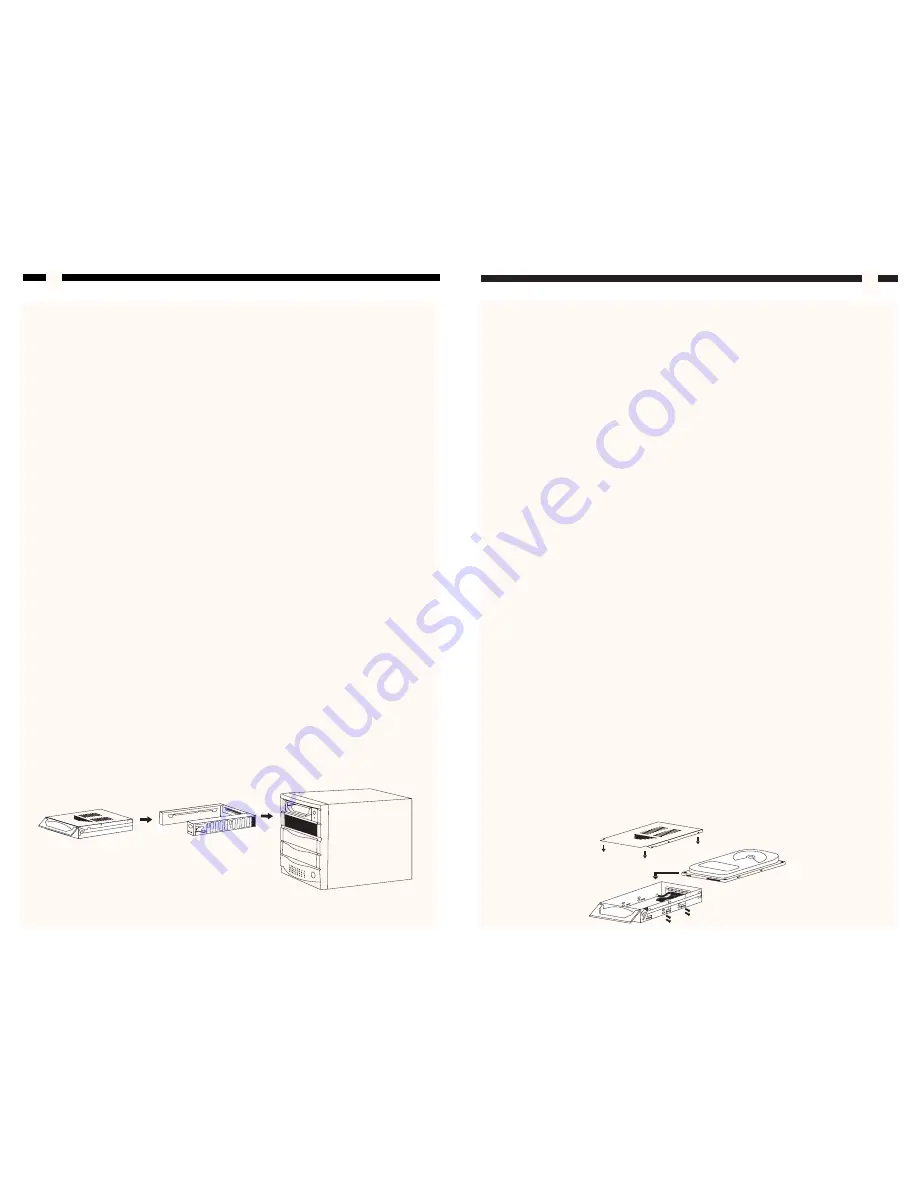
Installing the Hard Drive in the Caddy
1. Remove the caddy from the bay by lifting the handle and sliding the caddy out of the
bay.
2. Remove the top panel from the caddy by sliding the lid towards the back of the
caddy. (It may help to press down on the lid near the front of the drawer and then
sliding the lid free.)
3. Gently place the hard drive in the caddy and position the drive so that it is firmly
connected to the IDE and power connectors at the back of the drawer. If necessary,
loosen the screw holding the power connector in place and adjust the connector left
or right to fit your hard drive.
4. Using the 6-32 x 1/4” (coarse thread) screws, secure your hard drive into the drawer.
5. Replace the top panel of the caddy.
Installing the Bay in the PC
1. Make sure your system is unplugged and you are grounded.
2. Remove the side covers from your system and remove the front cover from an
available 5 1/4” drive bay (see your computer’s user manual for details, if
necessary).
3. Insert the bay into the 5 1/4” bay slot, making sure that the screw-holes on the side
of the bay line up with the holes in the bay slot.
4. Connect your computer’s cable ribbon to the connector on the back of the bay.
5. Plug a connector from your computer’s power supply into the power port on the
back of the bay.
6. Using the M3 x 1/4” long (fine thread) screws, mount the bay into the PC.
Installing the Caddy in the Bay
1. With the handle lifted, slide the caddy into the bay until it is firmly seated. Lower the
handle to click the caddy into its proper position.
2. Insert the key and turn clockwise to lock the drive into place and supply the drive
with power. The drive will not function if the drawer has not been locked.
Removing the Drive Drawer
1. Insert the key and turn counter-clockwise to unlock the drive drawer.
2. Lift the handle and gently pull the caddy out of the bay.
NOTE:
Do not unlock the drawer when the hard drive is in use (See “Monitoring Your
Hard Disk Drive and Drawer” on page 5). Only power down the drive when the hard
drive is idle. Once you have powered down the hard drive, wait about 15 seconds to let
the hard drive “spin down” before removing the caddy from the bay.
4
Caddy
Bay
5 1/4” Bay
Hard drive
Caddy


