background image

Instruction Manual

4

Installation

WARNING!

 It is advisable to remove all possible static discharge potential from any 

objects that the ExpressCard may come in contact with before installation. This can be 

accomplished by touching a grounded metal object, prior to insertion
1.  With the notebook PC powered on and fully booted, insert the PCMCIA Card into an 

available CardBus slot on the host computer.

2.  Connect the 15-pin connector of the cable to your PC card, then connect the DB9 

connector to your serial device.

3.  The Add New Hardware Wizard will launch and will guide you through the driver 

installation process.

Driver Installation

Windows 98, ME, 2000, XP, 2003

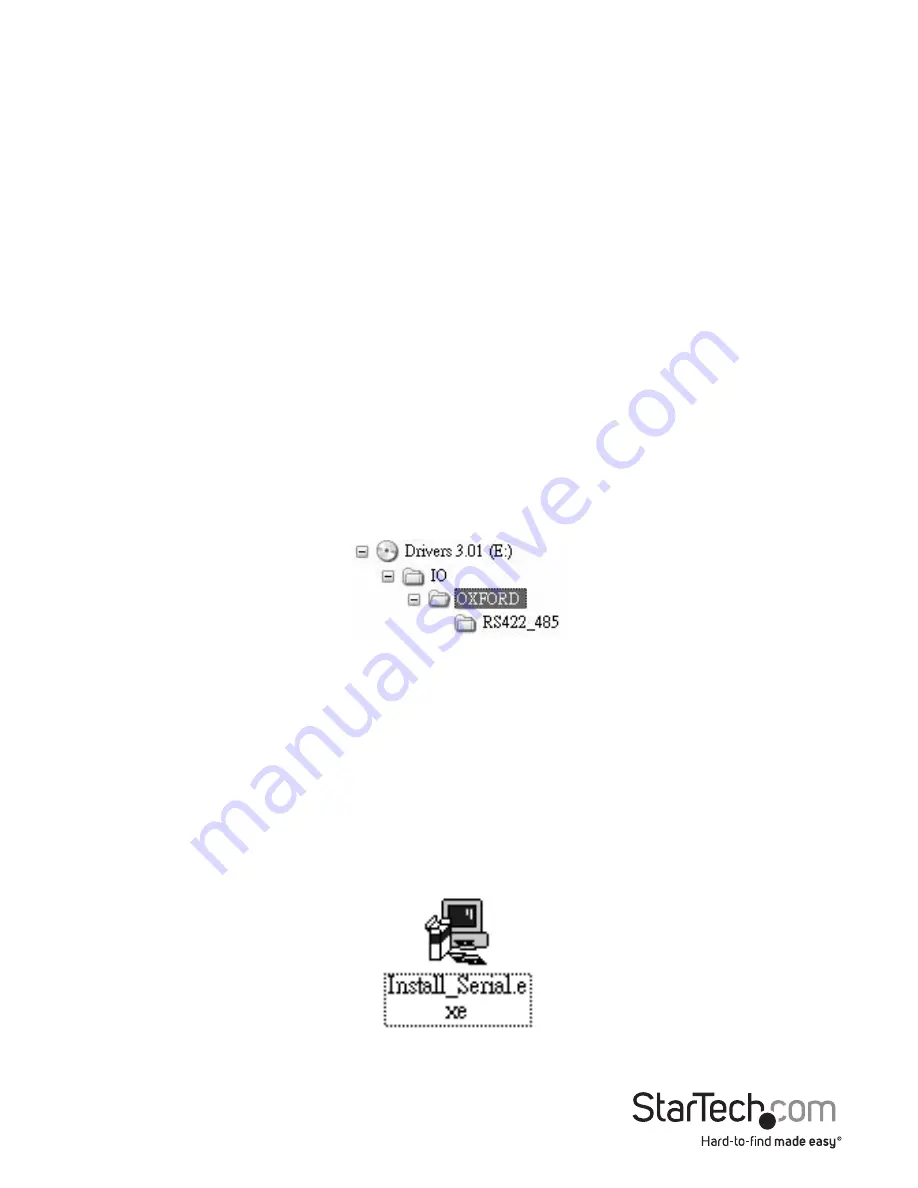
The necessary driver files are in ZIP format (e.g. V6515_RS422_485.ZIP) and are located 

in E:\IO\OXFORD\RS422_485 (where E: denotes the CD/DVD-ROM drive. Please copy 

the file to your local hard drive (presumably C:) and unzip it before proceeding with 

installation.
1.  When the Found New Hardware Wizard appears, click Next to continue.

2.  Select Install from a list or specific location (advanced) and click Next.
3.  Select Include this location in the search and click Browse to specify the  

driver’s location.

4.  Click Next to continue, then click on Finish to complete installation.

Windows NT

Because Windows NT does not support plug and play, you will need to locate the 

Install_Serial.exe file (in the E:\IO\OXFORD\WinNT4 folder, where E designates the 

location of the CD/DVD-ROM drive), and double click on the executable file. Follow the 

prompts to complete installation.

Summary of Contents for CB1S485

Page 1: ...leitung de startech com FR Guide de l utilisateur fr startech com ES Gu a del usuario es startech com IT Guida per l uso it startech com NL Gebruiksaanwijzing nl startech com PT Guia do usu rio pt sta...

Page 2: ...eceiving antenna Increase the separation between the equipment and receiver Connect the equipment into an outlet on a circuit different from that to which the receiver is connected Consult the dealer...

Page 3: ...ackaging Contents 1 System Requirements 1 Hardware Guide 2 Installation 4 Driver Installation 4 RS 485 2 wire mode 5 Baud Rate 5 Application Wiring 6 RS 422 Transmitter buffer is always enabled 7 Spec...

Page 4: ...D 1x Instruction Manual System Requirements A host computer with an available CardBus Slot Please note that CB1S485 can be used on a desktop computer using a PCMCIA to PCI Adapter Card Windows 7 32 64...

Page 5: ...ode and Termination Resistor Setting 422 Up default 2 wire RS 485 mode Note Down 4 wire RS 422 mode NECH Up Transmitting data will be echoed back Down default No echo data NLP Up RTS will be connected...

Page 6: ...TXD Up default 2 wire RS 485 mode Note Down 4 wire RS 422 mode RXD Up Transmitting data will be echoed back Down default No echo data RTS Up default RTS will be connected to CTS Down RTS and CTS opera...

Page 7: ...2003 The necessary driver files are in ZIP format e g V6515_RS422_485 ZIP and are located in E IO OXFORD RS422_485 where E denotes the CD DVD ROM drive Please copy the file to your local hard drive pr...

Page 8: ...000 XP 1 In the PCI Communications Port Properties window click on the Settings tab 2 Under Hardware config select RS422 485 and change the RS485 buffer enable value to Active Low using the dropdown b...

Page 9: ...operties 3 Choose Device Manager and double click on Ports 4 You will notice the added port listed as a PCI Communications Port Double click on the COM Port you wish to configure select Data rate and...

Page 10: ...CB1S485 supports 4 wire RS 422 mode which requires cross over twisted pair cable CB1S485 also provides two handshaking signals RTS RTS and CTS CTS to perform hardware flow control which requires the f...

Page 11: ...Bus Type 32 bit CardBus Type II Slot Connectors 1x DB9 Male Connector Maximum Data Transfer Rate 921 kbps OS Support Windows 7 32 64bit Vista 32 64 XP 32 64 2000 ME 98SE CE 5 0 Windows Server 2008 R2...

Page 12: ...returned for repair or replacement with equivalent products at our discretion The warranty covers parts and labor costs only StarTech com does not warrant its products from defects or damages arising...

Page 13: ...ts and we quickly deliver them wherever they need to go Just talk to one of our tech advisors or visit our website You ll be connected to the products you need in no time Visit www startech com for co...

Reviews: