Owner’s Manual
Another factor that one must consider is the evenness of sound coverage over the
listening area. As most surround processors have the ability to set the balance of all
channels, it is wise to adjust a circulating noise signal in each channel until the apparent
or measured sound level is even. Alternatively, the listener can move to another seat and
the resultant shift will be balance somewhat. Surround speakers placed properly will
minimize the level variation from seat to seat. Increasing the distance of the surround
speakers from the listening area is the best way to improve evenness. Mounting the
speakers high on the side walls or in the ceiling will improve the listening experience.
Surround speakers should be mounted at a minimum of one foot (305 mm) above the
height of a standing listener. Note: In the event of ceiling-mounted speakers, be sure to
place the speakers close to the side walls well away from an overhead position.
If you are planning a large theater room with three or more rows of seating, one needs to
consider that there should be more than one pair of surround speakers in order to give
more even coverage and a more diffuse sound field. STARKESOUND recommends that a
pair of surround speakers be used for every other seating row (first, third, fifth, etc.). This
method mimics the standard for most cinema applications.
Speaker Connection
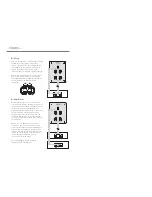
Prior to wiring STARKESOUND recommends that you plan
and layout the wiring paths from the speakers to the
amplifier. For runs up to 25 feet STARKESOUND
recommends a 16-gauge wire and for runs longer a
14-gauge wire is recommended. Take care to ensure that
the integrity of the speaker wire is not threatened or
compromised by resting/rubbing against any sharp or
pointed objects. Before setting the wire in position be sure
to allow approximately an extra foot (305 mm) of wire at
the speaker location to ensure an easy connection the
speaker.
For standard single wire connections, unscrew one set of
the terminal knobs (rotate counter-clockwise). Remove
approximately 1/2" (12mm) of the wire insulation from the
two wire conductors and twist the wire strands into a tight
bundle. Insert the wire into the terminal shaft hole and
rotate the terminal knob clockwise to secure the wire in
place. Take care that there are no stray or loose strands of
wire that could touch the other terminal shaft.
Confirm that both the positive and negative speaker terminals of the
amplifier are in connection with the corresp (red) and - (black) terminals at the
speakers. If you look closely you will see that all wire is marked in some way to trace their
respective connections. The two conductors will striped or ridged insulation in order to
identify them. Alternatively the conductors may be color coded to ensure their identity.
Wires with pin lugs or spade lugs are also accepted by the terminals. In addition, dual
banana plugs can be plugged into the rear of the terminals.
Series/parallel wiring should be used when connecting more than two speakers per
amplifier channel. Make certain in all cases that the total impedance does not fall below
the amplifier's rating. If there is any question be sure to contact your STARKESOUND
dealer.


