


NetCam XL
Page 7
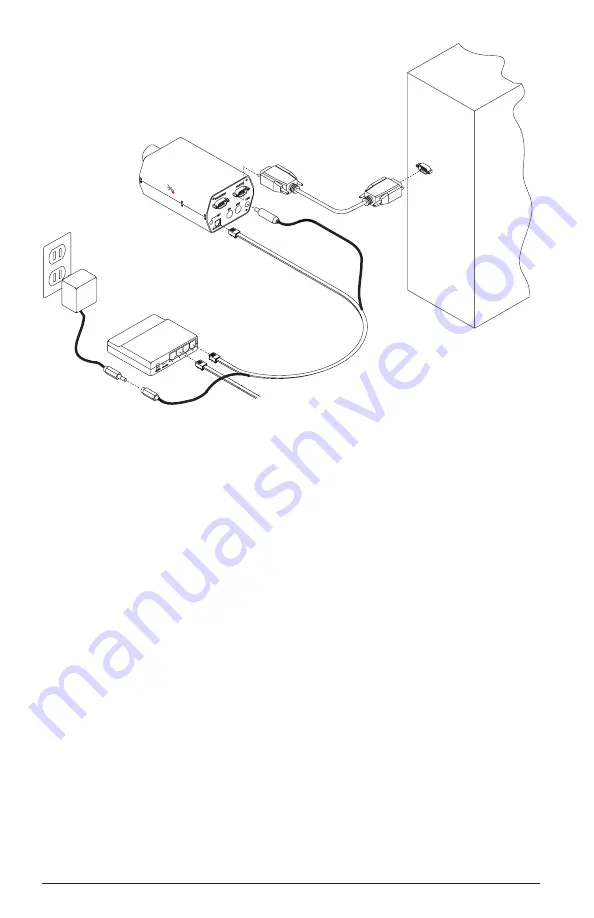
DB9-DB9 Null
Modem Cable (Included)
Used to connect NetCam
to a PC Serial Port for
Configuring Camera
Combo Ethernet/Power
Cable (50 ft., Included)
Used to connect NetCam
to Network and
Power Supply
12VDC Power Supply (Included)
Plugs Into Combo
Ethernet/Power Cabl
e
To Internet/LAN
netcam
ww
w.s
tard
ot-t
ech
.co
m
Router, Switch or Hub
(Not Included)
(normally not needed)
1.5 An Overview of Network Connectivity
A LAN or network connection is the simplest configuration for NetCam.
NetCam simply needs an IP address (and other networking parameters) to
make the live images and configuration menus accessible from any web
browser on the network. There are two ways NetCam can be assigned an
IP address: automatically or manually.
Automatic IP Assignment (DHCP)
NetCam is shipped in an automatic IP assignment mode called DHCP
(Dynamic Host Configuration Protocol). If your network has a DHCP server
(in most cases, a router), it will automatically assign the necessary network
parameters to NetCam. Before you can access the camera, you will need
to know which IP address was assigned to NetCam. Use the StarDot Tools
software to find NetCam’s IP address.
Manual IP Assignment
If you want to assign NetCam a permanent IP address, you will need
the following information:
• IP Address (example:
192.168.1.5
)
• Subnet Mask (example:
255.255.255.0
)
• Gateway (example:
192.168.1.1
)
• DNS Servers (obtain from ISP)
Summary of Contents for NetCam XL
Page 1: ...netcam XL User s Manual w w w s t a r d o t t e c h c o m...
Page 2: ......
Page 4: ...Page NetCam XL...
Page 12: ......
Page 20: ......