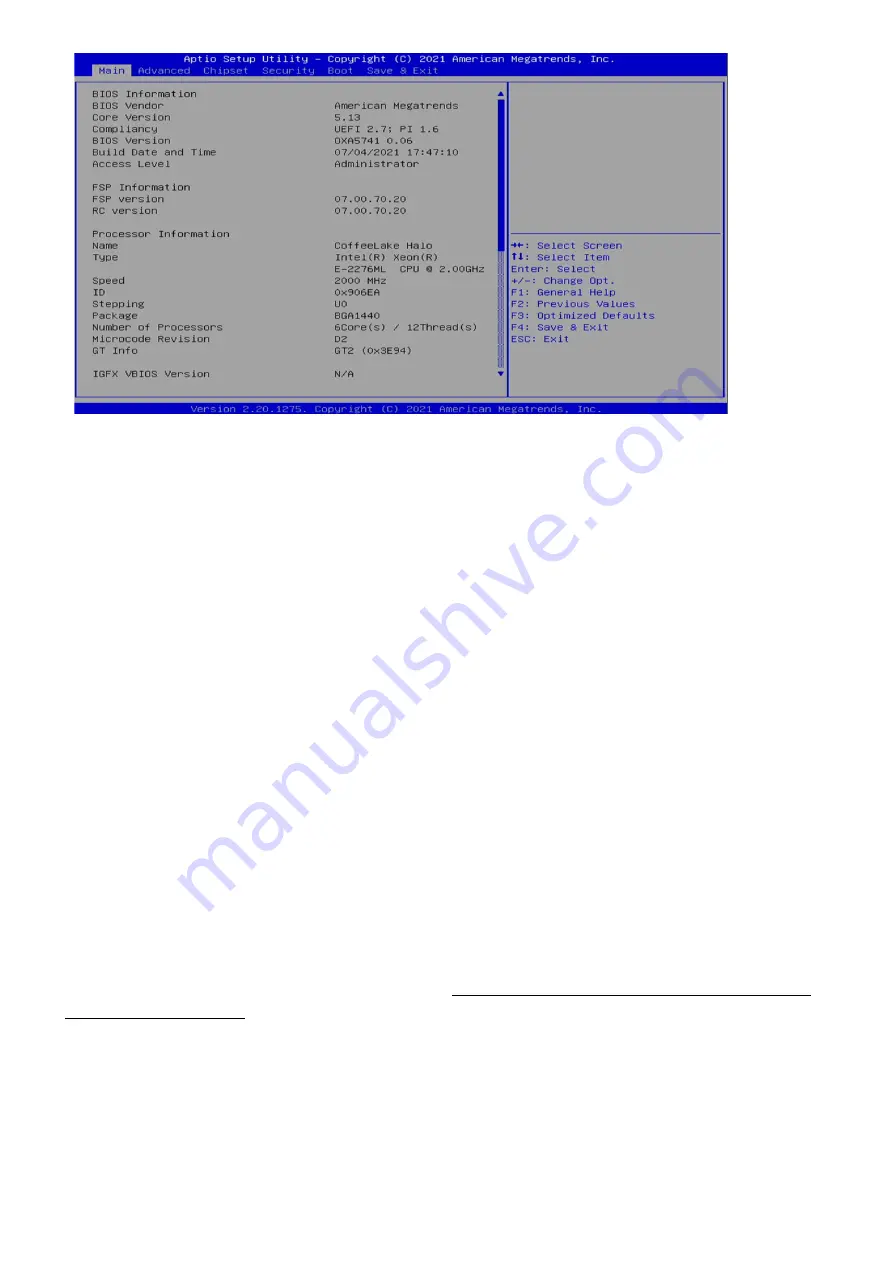
The Main BIOS setup screen has two main frames. The left frame displays all the options that can be
configured. Grayed-out options cannot be configured; options in blue can. The right frame displays the
key legend. Above the key legend is an area reserved for a text message. When an option is selected in
the left frame, it is highlighted in white. Often a text message will accompany it.
l
System Date
Use this function to change the system date.
Select System Date using the Up and Down <Arrow> keys. Enter the new values through the
keyboard. Press the Left and Right <Arrow> keys to move between fields.
The date setting must be entered in MM/DD/YY format.
l
System Time
Use this function to change the system time.
Select System Time using the Up and Down <Arrow> keys. Enter the new values through the
keyboard. Press the Left and Right <Arrow> keys to move between idles.
The time setting is entered in HH:MM:SS format.
Note:
The time is in 24-hour format. For example, 5:30 A.M. appears as 05:30:00, and 5:30 P.M. as
17:30:00.
l
Access Level
Display the access level of the current user in the BIOS.
3.4 Advanced Menu
The Advanced Menu allows you to configure your system for basic operation. Some entries are defaults
required by the system board, while others, if enabled, will improve the performance of your system or let
you set some features according to your preference.
Setting incorrect field values
may cause the
system to malfunction.
Summary of Contents for MIL-STD-810
Page 6: ... Dimensions ...
Page 8: ...Chapter 2 Jumpers and Connectors Locations l D38999 Connector PinDefinitions X1 DC In X2 DIO ...
Page 9: ...X3 X4 X5 LAN X6 X7 DVI ...
Page 10: ...X8 X9 X10 USB 3 0 ...
Page 36: ...3 6 Security 3 6 1 Administrator Password ...
Page 39: ...3 6 3 4 File System ...
Page 40: ...3 6 3 5 File System 3 6 3 6 Restore DB defaults 3 6 3 7 Platform Key PK ...
Page 41: ...3 6 3 8 Key Exchange Kesys ...
Page 42: ...3 6 3 9 Authorized Signatures 3 6 3 10 Forbidden Signatures ...
Page 43: ...3 6 3 11 Authorized TimeStamps 3 6 3 12 OsRecovery Signatures ...
Page 45: ...3 8 Save Exit 3 8 1 Save Changes and Exit 3 8 1 1 Save Exit Setup ...
Page 46: ...3 8 2 Exit Without Saving 3 8 3 Save reset ...
Page 47: ...3 8 4 Reset Without Saving 3 8 5 Save Setup Values ...
Page 48: ...3 8 6 Load Previous Values 3 8 7 Load Optimized Defaults ...
Page 50: ......


