Stanley STPP7502 Original Instructions Manual Download Page 27


(Переклад оригінальних інструкцій) 

УКРАЇНСЬКА

27


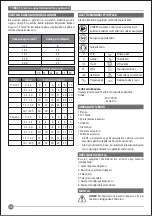
ВМІСТ КОМПЛЕКТУ ПОСТАЧАННЯ

1 Рубанок
2 ножі TCT
1 Напрямна лінійка
1 Гайковий ключ
1 Мішок для збирання пилу
1 Адаптер для пилососа    
1 Посібник з експлуатації

•  Перевірте,  чи  не  має  інструмент,  його  деталі  та 

приладдя  пошкоджень,  які  могли  з’явитися  під  час 

транспортування.

•  Перш  ніж  починати  роботу  з  інструментом,  уважно 

прочитайте  і  вивчіть  вказівки,  які  містяться  у  цій 

інструкції.

 ОПЦІЇ (рис. C)

В  цьому  інструменті  містяться  деякі  чи  всі  із  вказаних 

елементів.
1.  Кнопка вмикання/вимикання
2.  Кнопка відімкнення блокування
3.  Вихідний отвір для стружки
4.  Перемикач вихідного отвору для стружки
5.  Регулятор глибини стругання
6.  Градація глибини стругання
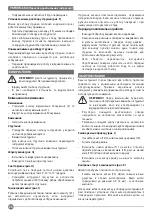
 ЗБИРАННЯ

ОБЕРЕЖНО!  Перед  виконанням  збирання 

переконайтесь  в  тому,  що  інструмент 

вимкнений  та  від'єднаний  від  розетки 

живлення.

Заміна ножів (рис. B)
Ножі, що встановлені на інструмент є двохсторонніми.
Ножі  для  заміни  можна  придбати  в  місцевій  роздрібній 

мережі.
ПРИМІТКА:


STPP7502 має два ножі, по одному з кожного 

боку ножового блока. Будь-яку дію або регулювання слід 

здійснювати з обома ножами.
Демонтаж

•  Послабте  болти  (7)  за  допомогою  гайкового  ключа, 

що поставляється з інструментом.

•  Витягніть лезо (8) із тримача.

•  Переверніть ніж так, щоб невикористаний бік став на 

місце  робочого.  Якщо  обидва  боки  ножа  вже 

спрацьовані, його необхідно замінити.    

Установка

•  Встановіть лезо в тримач до упору.

•  Затягніть  болти  за  допомогою  гайкового  ключа,  що 

поставляється разом з інструментом.

ОБЕРЕЖНО!  Завжди  проводьте  заміну  обох 

ножів.

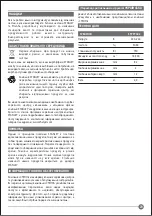
Регулювання глибини стругання (рис. C)
Глибина  стругання  відображається  за  допомогою 

відміток  (9).  Встановлене  значення  можна  визначити  по 

відмітках (6).

•  Поверніть  ручку  регулювання  глибини  стругання  (5) 

та встановіть необхідне значення глибини зрізу.

•  Коли  інструмент  не  використовується,  встановлюйте 

регулятор в положення ‘P'.

Установка та демонтаж направляючої лінійки (рис. D)
Направляюча  лінійка  використовується  для 

оптимального контролю на вузьких деталях.

•  Вставте ручку (11) в отвір на бічній поверхні рубанка 

та надійно затягніть.

•  Відпустіть  ручку  для  регулювання  направляючої 

лінійки (10).

•  Зсуньте направляючу лінійку в бажане положення.

•  Надійно  затягніть  ручку  регулювання  направляючої  

лінійки.

ПРИМІТКА:  Правильно  встановлена  направляюча 

лінійка має знаходитися нижче рубанка.

•  Для  того,  щоб  зняти  направляючу  лінійку  виконайте 

дії у зворотному порядку.

Під'єднання до інструмента пилососа (рис. E)
Для  під'єднання  до  інструмента  пилососа  чи 

пиловловлювача потрібен перехідник. Перехідник можна 

придбати в місцевій роздрібній мережі STANLEY.

•  Одягніть  перехідник  (12)  на  вихідний  отвір

  для 

стружки (3).


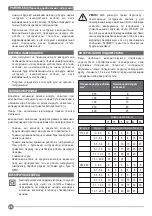
НАКЛЕЙКИ НА ІНСТРУМЕНТІ

Наклейка  на  вашому  інструменті  може  містити  наступні 

символи:

Розташування коду дати

Штрих-код  з  датою,  який  також  включає  рік 

виготовлення, надрукований на корпусі.

Приклад:

2017 XX JN

Рік виготовлення

УВАГА! Для зниження ризику травмування 

оператор повинен прочитати цю інструкцію 

з експлуатації перед початком роботи.

Застосовуйте засоби захисту органів слуху.

Використовуйте відкриті і закриті захисні окуляри.

В


Напруга

Постійний струм

A

Ампери

n0

Швидкість холостого ходу

Гц

Герци

Конструкція класу II

Вт

Вати

Клема заземлення

хв.

хвилини

Попереджувальний знак

Змінний0 

струм

/хв

Кількість обертів або 

зворотно-поступальних 

рухів за хвилину

Summary of Contents for STPP7502

Page 1: ...STPP7502 English Page 05 French Page 11 Russian Page 17 Ukrainian Page 24 Turkish Page 30 Page 21...

Page 2: ...2 1 3 4 5 6 ENGLISH Original instructions 2 A...

Page 3: ...9 5 6 10 11 4 3 14 3 12 13 7 8 Original instructions ENGLISH 3 B C D E F G...

Page 4: ...N P 19 17 21 20 16 18 15 22 ENGLISH Original instructions 4 H J I K...

Page 5: ...r battery pack picking up or carrying the tool Carrying power tools with your nger on the switch or energising power tools that have the switch on invites accidents d Remove any adjusting key or wrenc...

Page 6: ...l The use of any accessory or attachment or performance of any operation with this tool other than those recommended in this instruction manual may present a risk of personal injury and or damage to p...

Page 7: ...holder Reverse the blade so that the unused side comes in position If both sides are worn the blade must be replaced Fitting Slide the blade into the holder until it is against the end stop Tighten th...

Page 8: ...and adjust the parallel fence Proceed as for planing Chamfering edges Fig H The V groove in the nose piece of the shoe enables you to chamfer edges at 45 30 and 15 angles Hold the tool at an angle wi...

Page 9: ...ANLEY offers a full network of company owned and authorized service locations All STANLEY Service Centers are staffed with trained personnel to provide customers with ef cient and reliable power tool...

Page 10: ...uthorised STANLEY repair agent in the STANLEY catalogue or contact your local STANLEY of ce at the address indicated in this manual A list of authorised STANLEY repair agents and full details of our a...

Page 11: ...ectrique e Lorsqu un outil lectrique est utilis l ext rieur utilisez uniquement une rallonge sp cialement pr vue cet effet L usage d une rallonge adapt e l utilisation en ext rieur r duit le risque de...

Page 12: ...rte de contr le ventuelle et des blessures graves b Tenez l outil lectrique uniquement par les surfaces isol es car la lame de coupe peut entrer en contact avec son propre cordon d alimentation Si un...

Page 13: ...une personne tout aussi quali e a n d viter tout accident ou blessure En cas de remplacement du cordon d alimentation par une personne tout aussi quali e mais non agr e par STANLEY la garantie ne sera...

Page 14: ...e la cl fournie ATTENTION Remplacez toujours les deux lames en m me temps R glage de la profondeur de coupe Fig C La profondeur de coupe est indiqu e par le rep re 9 La gamme de r glages peut tre lue...

Page 15: ...ner sur une longue p riode de temps avec un minimum d entretien Un fonctionnement continu satisfaisant d pend d un nettoyage et d un entretien soigneux et r gulier ATTENTION Avant d effectuer tout ent...

Page 16: ...our en savoir plus sur nos centres de r paration agr s et en cas de besoin de conseils techniques de r paration ou de pi ces rechange d origine contactez le concessionnaire STANLEY le plus proche GARA...

Page 17: ...17 STANLEY STPP7502 1 a b c 2 a b c d e f 3 a b c d e...

Page 18: ...f g h 4 a b c d e f g h 5 a b d e f g 18...

Page 19: ...II W min min 110 127 0 2 0 6 6 6 6 6 10 2 1 3 4 6 6 6 6 15 15 3 5 5 0 6 6 10 15 20 20 5 1 7 0 10 10 15 20 20 25 7 1 12 0 15 15 20 25 25 12 1 20 0 20 20 25 220 240 0 2 0 6 6 6 6 6 6 2 1 3 4 6 6 6 6 6 6...

Page 20: ...2017 XX JN 1 2 1 1 1 1 1 A 1 on off 2 3 4 5 6 B STPP7502 7 8 C 9 6 5 P D 11 10 E STANLEY 12 3 13 F 14 3 4 20...

Page 21: ...21 2 1 on o G H V 45 30 15 20 I 21 J 15 16 17 18 19 K 22 0 3 8 STANLEY Piranha...

Page 22: ...STANLEY STANLEY STANLEY STANLEY STANLEY www 2helpU com STANLEY STANLEY STANLEY STANLEY STANLEY V 220 240 Hz 50 60 W 750 min 1 16 500 mm 82 mm 2 mm 12 kg 2 9 STPP7502 22...

Page 23: ...01 05 09 13 18 22 26 31 35 39 44 48 02 06 10 14 19 23 27 32 36 40 45 49 03 07 11 15 20 24 28 33 37 41 46 50 2017 04 08 12 16 21 25 29 34 38 42 47 51 05 09 13 17 22 26 30 35 39 43 48 52 31 44 01 05 09...

Page 24: ...STPP7502 STANLEY 1 a b c 2 a b c d e f 3 a b c d e f 24...

Page 25: ...25 g h 4 a b c d e f g h 5 a a b c d e f g h i...

Page 26: ...0 15 20 20 5 1 7 0 10 10 15 20 20 25 7 1 12 0 15 15 20 25 25 12 1 20 0 20 20 25 220 240 0 2 0 6 6 6 6 6 6 2 1 3 4 6 6 6 6 6 6 3 5 5 0 6 6 6 6 10 15 5 1 7 0 10 10 10 10 15 15 7 1 12 0 15 15 15 15 20 20...

Page 27: ...27 1 2 TCT 1 1 1 1 1 C 1 2 3 4 5 6 B STPP7502 7 8 C 9 6 5 P D 11 10 E STANLEY 12 3 2017 XX JN A n0 II 0...

Page 28: ...13 F 14 3 4 2 1 G H V 45 30 15 20 I 21 J 15 16 17 18 19 K 22 0 3 8 28...

Page 29: ...29 STANLEY Piranha STANLEY STANLEY STANLEY STANLEY www 2helpU com STANLEY STANLEY 220 240 50 60 750 1 16 500 mm 82 mm 2 mm 12 2 9 STPP7502...

Page 30: ...CB tan mlar ile de i tirilebilir 3 Ki isel g venlik a Elektriklibiraletikullan rkenherzamandikkatliolun yapt n z i e yo unla n ve sa duyulu davran n Elektrikli bir aleti yorgunken veya ila ya da alkol...

Page 31: ...ilirse garanti ge erli olmayacakt r e Elektrikli aletleri ve aksesuarlar iyi durumda muhafaza edin Hareketli par alardaki hizalama hatalar n ve tutukluklar par alardaki k r lmalar ve elektrikli aletin...

Page 32: ...2 50 20 4 00 25 Kablo uzunlu u m 7 5 15 25 30 45 60 Tarih kodu konumu malat y l n da i eren Tarih Kodu g vdeye bas l d r rnek 2017 XX JN malatY l AMBALAJIN ER 1 Planya 2 TCT b ak 1 Paralel kesme k la...

Page 33: ...e i tirilmesi ekil B Bu aletle verilen kesme b aklar ift tarafl d r Kesme b aklar n n yenileri b lgenizdeki sat c dan temin edilebilir NOT STPP7502 b ak tamburunun her bir taraf nda bulunan iki b ak k...

Page 34: ...ygun kullan m i in yararl tavsiyeler Aleti ah ab n dokusu ile uyumlu ekilde hareket ettirin Dokular apraz veya k vr ml ise veya i par as sert bir ah ap t r ise kesim derinli ini her ge i te yaln zca o...

Page 35: ...ir Titre im d zeyi belirlenen seviyenin zerinde art g sterebilir yerinde d zenli olarak elektrikli alet kullanan al anlar korumak amac yla 2002 44 EC taraf ndan getirilen elektrik g venli i nlemlerini...

Page 36: ...orijinal par alar ile birlikte iade edilmi tir r n kiralama amac yla kullan lmam t r Garanti talebinde bulunmak i in l tfen sat c yla irtibata ge in veya STANLEY katalogunda belirtilen size en yak n S...

Page 37: ...F dG dG H dG 37 K 22 8 3 www 2helpU com STANLEY STANLEY 24 www 2helpU com 220 240 50 60 750 16 500 1 82 2 12 2 9 STPP7502...

Page 38: ...H dG F dG dG 38 5 P D 11 10 E 3 12 13 F 14 3 2 1 G H V 15 30 45 20 I 21 J 16 15 17 19 18...

Page 39: ...1 3 4 3 5 5 0 5 1 7 0 7 1 12 0 12 1 20 0 6 6 6 10 15 20 6 6 6 10 15 20 6 6 6 10 15 20 6 6 6 10 15 20 6 6 10 15 20 25 6 6 6 10 15 20 6 6 15 20 25 6 6 6 10 15 20 6 15 20 20 25 6 6 10 15 20 25 10 15 20 2...

Page 40: ...H dG F dG dG 40 d e f g h i j STANLEY STANLEY 1 5 0 75 1 00 1 50 2 50 4 00 6 10 15 20 25 2...

Page 41: ...STANLEY STPP7502 dGh e dG G j c IAG b Y U MG I e a G UG Gh dG GP V dG S dGh 1 a b c 2 a b c d e f RCD 3 a b c d e f g h 4 a b c d e f g h 5 a F dG dG H dG 41...

Page 42: ......

Reviews: