GB
17
5.
When reference level is found, tighten knob again to secure
the Detector. Read the position shown at the Reference
Line (Figure
Ⓒ①
) edge of the clamp.
Operating the Detector
(See Keypad and LCD Descriptions for indications during
operation)
Powering on the Detector
•
Press the key to turn detector ON.
•
When powered ON, the entire LCD will momentarily display
all icons (use this to ensure the LCD is functioning correctly).
•
Press and hold the key for ≥ 2 seconds to turn the
detector OFF.
NOTE:
The detector will automatically power OFF after not
detecting a laser beam for 10 minutes. To power ON again,
press the key.
Illuminating the Detector LCD
•
When detector is ON, press the key to turn ON/OFF LCD
illumination.
NOTE:
The illumination will automatically turn OFF after 60
seconds of not detecting a laser beam or having a key pressed.
Adjusting the Detector Accuracy
•
When powered ON, press the key to toggle the accuracy
setting between HIGH and LOW.
•
The default accuracy setting is HIGH.
NOTE:
Use the LOW accuracy setting when:
•
The HIGH accuracy setting is not needed.
•
A stable reference level cannot be obtained due to vibrations.
•
Heat haze interferes with the laser beam.
Adjusting the Detector Speaker Volume
•
When powered ON, press the key to toggle through the
volume settings (LOUD/SOFT/MUTE).
•
When powered ON, the default volume setting is set to LOUD.
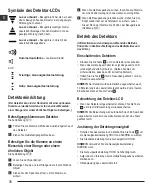
Detector LCD Icons
Laser Detected -
Reference Line Higher than
Laser Beam. Move the Detector the Direction Shown
(Down).
Laser Detected -
Reference Line Lower than
Laser Beam. Move the Detector the Direction
Shown (Up).
Laser Detected -
Reference Line in Line with
Laser Beam Reference Level.
OFF
Buzzer Volume -
Loud/Soft/Mute.
Low Accuracy Setting
High Accuracy Setting
Detector Setup
(The Detector can be used in hand or with optional clamp
to mount the detector to a measuring rod, pole, or similar
object)
Mounting Clamp onto Detector
See Figure
Ⓓ①
1.
Guide the clamp onto the detector using the alignment hole.
2.
Tighten the fixing screw.
Mounting Clamp onto Level Staff, Pole, or
Similar Object
See Figure
Ⓓ②
1.
Loosen tightening knob.
2.
Place onto level staff, pole, or similar object.
3.
Tighten tightening knob to secure the clamp.
4.
When locating reference level, loosen clamp to allow for up/
down positioning.
Summary of Contents for Fatmax FMHT77446
Page 2: ...2 RL700L RL750L G A B ...
Page 3: ...3 1 2 1 2 60 mm 2 36 in RL 600 RL 600L RL 700L RL 750L G E C D 1 2 ...
Page 4: ...4 1 2 AA AA OPEN 1 2 _ _ 1 2 F G ...
Page 5: ...5 5 8 11 5 8 11 H I ...
Page 6: ...6 J K L ...
Page 7: ...7 N M X Y ...
Page 8: ...8 X X Y 20 m 20 m 20 m 20 m D1 D2 D0 D2 D1 O ...
Page 317: ...317 ...


