Stanley CH2 Owner'S Manual Download Page 10


STANLEY is a registered trademark of The Stanley Works or its affiliates and are used under license by GXi Outdoor Power LLC. 

No part of this publication can be printed or copied without written permission. 

Rev2.5-15-12 

Preparation 

1.  Thoroughly inspect the area where the chipper/shredder is to be 

used. Remove all rocks, bottles, cans, or other foreign objects 
which could be picked up or thrown and cause personal injury or 
damage to the machine.  

2.  Avoid discharging chipped material out of the discharge chute 

against a wall or on asphalt, concrete, or other hard surfaces as 
material being ejected could ricochet, causing injury to you or 
bystanders. 

3.  Always wear safety glasses or safety goggles to protect eyes 

during operation or while performing an adjustment or repair.  

4.  Wear sturdy, rough-soled work shoes and closefitting pants and 

shirts. Loose fitting clothing or jewelry can be caught in movable 
parts. Wear leather work gloves when feeding material in the 
chipper chute.  

5.  Before starting the engine, check bolts and screws for proper 

tightness to be sure the machine is in safe working condition. Also, 
visually inspect the chipper shredder at frequent intervals for any 
damage.  

6.  Maintain or replace safety and instructions labels, as necessary. 

7.  To avoid personal injury or property damage use extreme care in 

handling gasoline.  

a.  Use only an approved gasoline container.  

b.  Extinguish all cigarettes, cigars, pipes, and other sources of 

ignition.  

c. 

Never fuel machine indoors.  

d.  Never remove gas cap or add fuel while the engine is hot or 

running.  

e.  Allow engine to cool at least two minutes before refueling.  

f. 

Never over fill fuel tank. Always leave about 1 inch open 
below bottom of filler neck to provide space for fuel 
expansion.  

g.  Tighten gasoline cap securely. 

h.  If gasoline is spilled, wipe it off the engine and equipment. 

Move machine to another area and wait 5 minutes before 
starting the engine. 
 

i. 

Never store machine or fuel container inside near an open 
flame, spark, or pilot light (e.g., furnace, water heater, space 

heater, clothes dryer, etc.). 

j. 

To reduce the fire hazard, keep machine free of grass, 
leaves, or other debris build-up. Clean up oil or fuel spills 
and remove any fuel soaked debris.  

k. 

Allow machine to cool at least 5 minutes before storing. 

8.  Never attempt to make any adjustments while the engine (motor) 

is running (except where specifically recommended by the 
manufacturer). 


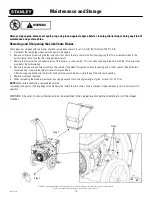
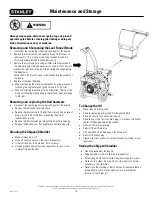
Safety Label Locations 

These labels warn you of potential hazards that can cause serious 
injury. Read them carefully. If a label comes off or becomes hard to 
read, contact your GXi Outdoor Power dealer for a replacement. 
 

Safety Information 

GXi Outdoor Power products are designed to give safe and 
dependable service if operated according to instructions. Read and 
understand this owner’s manual before operating your power 
equipment.  
 

Operator Responsibility


Never allow children under 18 years old to operate this machine. 
Children 18 years old and over should read and understand the 
operation instructions and safety rules in this manual and should be 
trained and supervised by a parent.  

Your Responsibility 


Restrict the use of this chipper/shredder to persons who read, understand and follow the warnings and instructions in 
this manual and on the machine.  


Note: Not all safety labels shown may apply to your chipper/shredder. 

Safety Information 

Summary of Contents for CH2

Page 1: ...__________ Location of Purchase _______________________ Model _______________________ Serial _______________________ Serial number is located next to the on off switch on the engine block See page 3 for more detail This manual contains important safety instructions for Chipper Shredder models CH2 CH7 READ SAFETY WARNINGS AND OPERATING INSTRUCTIONS CAREFULLY SAVE THESE INSTRUCTIONS Chipper Shredder...

Page 2: ...ithout incurring any obligation what so ever The information and specifications included in this publication were in effect at the time of approval for printing This manual contains important safety instructions for Chipper Shredders READ SAFETY WARNINGS AND OPERATING INSTRUCTIONS CAREFULLY SAVE THESE INSTRUCTIONS This owner s manual is considered a permanent part of the chipper shredder and should...

Page 3: ...or Power LLC No part of this publication can be printed or copied without written permission Contents Warnings 1 Product Specifications 2 Component Identification 3 Missing Parts Order Form 4 Identification Component 5 Safety Information 7 Operating Guidelines 8 Assembly 9 Important Engine Information 10 Operating Instructions 12 Maintenance Storage 13 Troubleshooting 16 Limited Warranty Service 17 ...

Page 4: ...nstructions could result in serious injury or death WARNING Do not operate this machine unless the chute deflector has been installed properly Keep bystanders helpers pets and children at least 75 feet from the machine while it is in operation Stop machine if anyone enters the area Wear hearing and eye protection while operating this machine or if you are within 75 feet of this machine Thrown objec...

Page 5: ...eet from the machine while it is in operation Stop machine if anyone enters the area 6 Never run an engine indoors or in a poorly ventilated area Engine exhaust contains carbon monoxide an odorless and deadly gas 7 Do not put hands or feet near rotating parts or in the feeding chambers and discharge opening Contact with the rotating impeller can amputate fingers hands and feet 8 Never attempt to un...

Page 6: ...diameter piece of wood Discharge Chute Chipped materials are discharged through this opening Fuel Tank Use regular unleaded fuel Always leave about 1 of air gap at the top of the tank for fuel expansion to prevent seepage or spills Hardware Bag Not shown This bag contains the owner s manual assembly hardware tools safety glasses and oil fill funnel On Off Switch Set this to On before using recoil s...

Page 7: ...e Email Address IMPORTANT Please include your receipt Without a receipt your order will be delayed You may also email us at customerservice gxioutdoorpower com If emailing please scan in your proof of purchase Comments Please indicate the part that you are missing Model CH7 CH2 Serial Date of purchase Refer to parts diagram and part list on page 5 and 6 for part numbers This will expedite the proc...

Page 8: ...tered trademark of The Stanley Works or its affiliates and are used under license by GXi Outdoor Power LLC No part of this publication can be printed or copied without written permission Rev2 5 15 12 Component Identification ...

Page 9: ... LCSSP11 020 Chipper wheels solid rubber plastic rim with retaining hardware to axle 23 LCSSP12 033 Funnel entry shield plastic white chipper with STANLEY label with spring STANLEY CH2 Chipper Shredder Spare Parts Diagram Item GXi Part Number Description 1 LCSSP11 001 Chipper plastic leaf funnel assembly kit with hardware and label for STANLEY 2 LCSSP11 002 Chipper discharge deflector with hardwar...

Page 10: ...e to cool at least two minutes before refueling f Never over fill fuel tank Always leave about 1 inch open below bottom of filler neck to provide space for fuel expansion g Tighten gasoline cap securely h If gasoline is spilled wipe it off the engine and equipment Move machine to another area and wait 5 minutes before starting the engine i Never store machine or fuel container inside near an open fla...

Page 11: ...feet near rotating parts or in the feeding chambers and discharge opening Contact with the rotating impeller can amputate fingers hands and feet 2 Before starting the machine make sure the chipper chute feed intake and cutting chamber are empty and free of all debris 3 Thoroughly inspect all material to be shredded and remove any metal rocks bottles cans or other foreign objects which could cause p...

Page 12: ... 3 Upper leaf funnel section with entry shield Item 4 Handle section and leaf funnel base Item 5 Discharge chute with deflector NOTE Fill out and submit missing parts request form on page 4 should any parts be missing 4 Verify all parts are in the hardware bag Figure 2 Goggles eye protection Wrenches for assembly and blade maintenance Allen wrench for blade maintenance Oil funnel with flexible neck ...

Page 13: ...ong bolts with lock washers and flat washers No nuts required for these connections Figure 3 7 Attaching the lower leaf funnel section Figure 4 The plastic part has a hook shape on the bottom side The hook shape slides into the steel track on the chipper body When the two parts have been connected fasten with three 20mm long bolts a flat washer on each side and nyloc nuts Figure 4 Figure 5 8 Attach ...

Page 14: ...ity that the part will not adversely affect emission control performance and must certify that use of the part will comply with emission regulations In the State of California a spark arrestor is required by law Other states may have similar laws Federal laws apply on all federal lands If you equip the muffler with a spark arrestor it must be maintained in effective working order Carbon Monoxide Ga...

Page 15: ...p the chipper blades sharp If the discharge area becomes clogged Stop the engine Disconnect spark plug wire from spark plug and ground against the engine Remove leaf funnel Reach in and clear the debris causing the blockage Reinstall the funnel and the clean out access hatch Connect the spark plug wire and restart NOTE If the blockage is severe the hammer screen within the discharge chute can be r...

Page 16: ...Disconnect the spark plug wire and ground it against the engine to prevent unintended starting 4 Do not change the engine governor settings or overspeed the engine The governor controls the maximum safe operating speed of the engine 5 Maintain or replace safety and instruction labels as necessary 6 Follow this manual for safe loading unloading transporting and storage of this machine WARNING 7 Nev...

Page 17: ...er section and upper section of the funnel as a subassembly This is done by removing three bolts with the 13mm wrenches provided in the hardware bag 4 Remove the blade using an Allen wrench on the outside of the blade through the limb chute opening and a 13mm wrench through the leaf funnel opening to remove the three fasteners from each blade After removing one blade turn the rotor by hand until t...

Page 18: ...park plug wire and ground against the engine Remove the leaf funnel and limb chute Remove the retainer clip for the flail hammer pin Use a piece of pipe or wood to block the flails preventing them from inadvertently turning Remove the flail hammer pin through the limb chute opening Replace the flail hammer flail hammer pin and retaining clip Cleaning the Chipper Shredder Make sure engine is off Wipe of...

Page 19: ...oline 4 Drain fuel tank Refill with fresh fuel 5 Clean or replace air cleaner 6 Call GXi Parts Service 919 550 3259 Too much vibration 1 Loose parts or damaged carousel 1 Call GXi Parts Service 919 550 3259 Engine overheats 1 Engine oil level low 2 Dirty air cleaner 3 Carburetor not adjusted properly 1 Fill crankcase with proper oil 2 Clean or replace air cleaner 3 Call GXi Parts Service 919 550 32...

Page 20: ...ct and any warranty on those parts will expire coincident with the original product warranty The customer is responsible for transportation to and from a service center Exclusions This warranty does not cover normal wear contaminants in the fuel or oil damage as a result of use in an application for which the product was not designed damage caused by incorporation or use of unsuitable attachments ...

Reviews: