background image

11UNO User

’s Manual 

Revision 6


Standa Ltd. All rights reserved 

THE 11UNO SINGLE CHANNEL LASER POWER METER 


1.1  Introduction 

To obtain full performance from the 11UNO, we recommend that you read this manual carefully. 

The  11UNO  is  a  large  display  laser  power  monitor  that  features  outstanding  efficiency,  ease  of use and 
battery life. 

Unpacking 

Each Standa 11UNO is thoroughly tested and calibrated prior to shipment. 

Visually inspect every 11UNO unit after removing it from the shipping containers. If you see any damage, 
retain  all  packaging materials and shipping receipts. Any damage claim should be made promptly to the 
shipping  company.  Notify  the  nearest  Standa  representative  concerning  the  claim,  so  that  any  repair  or 
replacement can be arranged as soon as possible.  


Summary of Contents for 11UNO

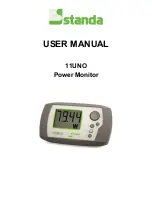
Page 1: ...USER MANUAL 11UNO Power Monitor ...

Page 2: ... the warranty card in order to activate the warranty In case of malfunction contact your local Standa distributor Standa office to obtain a return authorization number The material should be returned to Standa Ltd Svitrigailos 4 39 03222 Vilnius Lithuania Tel 370 5 2651474 Fax 370 5 2651483 e mail sales standa LT Website www standa LT CLAIMS To obtain warranty service contact Standa or send the pr...

Page 3: ...l interference in a residential installation This equipment generates uses and can radiate radio frequency energy and if not installed and used in accordance with the instructions may cause harmful interference to radio communications However there is no guarantee that interference will not occur in a particular installation If this equipment does cause harmful interference to radio or television ...

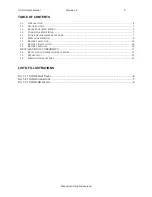
Page 4: ...SCRIPTION 7 2 1 POWER MEASUREMENT PROCEDURE 7 2 2 DISPLAY DESCRIPTION 9 3 1 BATTERY SELECTION 10 3 2 BATTERY INSTALLATION 10 3 3 BATTERY REMOVAL 10 DECLARATION OF CONFORMITY 11 3 4 RECYCLING AND SEPARATION PROCEDURE 12 3 5 SEPARATION 12 3 6 DISMANTLING PROCEDURE 12 LIST OF ILLUSTRATIONS FIG 1 1 11UNO FRONT PANEL 6 FIG 1 2 11UNO CONNECTORS 7 FIG 1 3 11UNO LCD DISPLAY 9 ...

Page 5: ...tstanding efficiency ease of use and battery life Unpacking Each Standa 11UNO is thoroughly tested and calibrated prior to shipment Visually inspect every 11UNO unit after removing it from the shipping containers If you see any damage retain all packaging materials and shipping receipts Any damage claim should be made promptly to the shipping company Notify the nearest Standa representative concer...

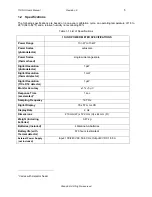
Page 6: ...Scales thermal head single wide range scale Digital Resolution photodetector 1 pW Digital Resolution thermal detector 1 mW Digital Resolution 11XLP 12 detector 1 µW Monitor Accuracy 1 5 µV Response Time accelerated 1 1 sec Sampling Frequency 16 7 Hz Digital Display 76 x 57 mm LCD Display Rate 2 Hz Dimensions 210 mm W x 122 mm H x 44 mm D Weight including batteries 0 47 kg Batteries included 4 Alka...

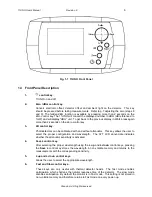
Page 7: ...be calibrated with and without attenuator This key allows the user to select the proper configuration and wavelength The ATT LCD annunciate indicates whether the attenuator sensitivity is activated 4 Save λ control key After selecting the proper wavelength using the λ up and λ down control keys pressing the Save λ control key stores the wavelength in non volatile memory and returns to the measurem...

Page 8: ...e with the detector heads probes The 11UNO works with all Standa power detectors currently sold It automatically recognizes every power detector head which ensures accurate auto calibration More importantly it can take advantage of our Personal wavelength correction It reads the memory in the Smart Interface connector to provide a wavelength correction that is based on spectral data measured from ...

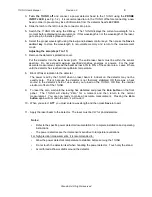
Page 9: ... until the detector has reached its equilibrium temperature 8 Block off laser radiation to the detector The power read by the 11UNO when no laser beam is incident on the detector may not be exactly zero This is because the detector is not thermally stabilized OR there was a heat source in the detector s field of view when you turned on the 11UNO OR from the internal electronic offset of the 11UNO ...

Page 10: ...the detector was calibrated with Error messages can also be displayed E 05 indicates that no detector is present on power up E 07 appears after pressing the ATT control key with a detector that does not have attenuator calibration The message disappears a few seconds after pressing the control key E 08 indicates that the detector is not supported or that the detector calibration EEPROM is corrupte...

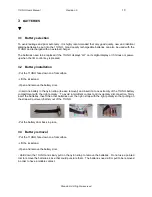
Page 11: ...d remove the battery door Insert one battery in the nylon strap to ease removal and insert it at one extremity of the 11UNO battery compartment with the right polarity To avoid intermittent contact and involuntary disconnection firmly insert the batteries Insert the other batteries over the nylon strap with the right polarity so that pulling on the strap will pull every battery out of the 11UNO Pu...

Page 12: ...1000 4 3 2006 A2 2010 Electromagnetic compatibility EMC Part 4 3 Testing and measurement techniques Radiated Radio Frequency electromagnetic field immunity test Class A EN61000 4 4 2004 A1 2010 Electromagnetic compatibility EMC Part 4 4 Testing and measurement techniques Electrical fast transient burst immunity test Class B EN 61000 4 5 2006 Electromagnetic compatibility EMC Part 4 5 Testing and m...

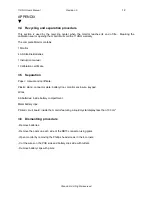
Page 13: ...Calibration certificate 3 5 Separation Paper manual and certificate Plastic stand connector plate battery door monitor enclosure keypad Wires AA batteries inside battery compartment Metal battery clips Printed circuit board inside the monitor featuring a liquid crystal display less than 100 cm 2 3 6 Dismantling procedure Remove batteries Remove the posts on each side of the DB15 connector using pl...

Reviews: